Quick Kit
Kits have power controllers and switches that are grouped and paired together at the factory for a fast installation in the field.
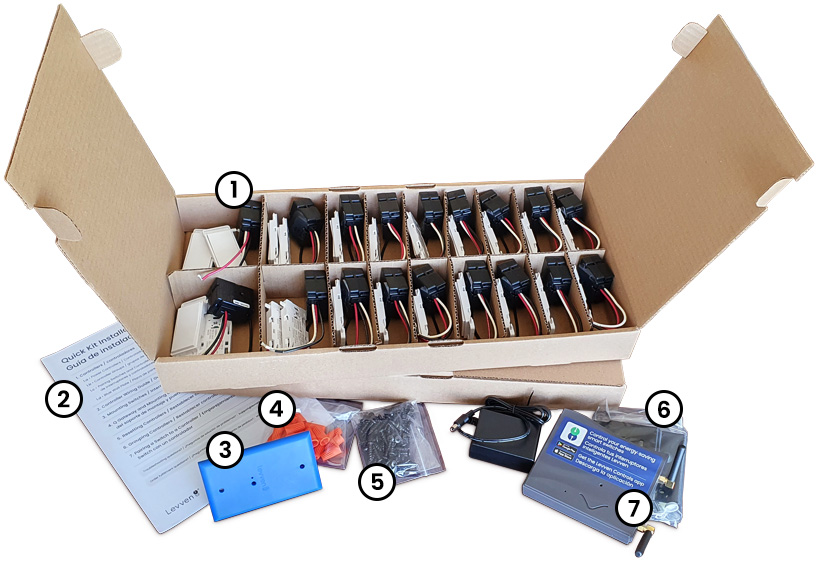
Levven Quick Kits include:
- Switches and Power Controllers paired together (single-pole, 3-way, 4-way, etc)
- Installation Reference Booklet
- Blue Pairing Plate
- Wire Nuts
- Drywall Screws for Switches
- Mounting Bracket for Levven Q Gateway and Security Screw, Post, and Screw Cap
- Levven Q Gateway, Power Supply, and Ethernet Cable
Installing Blue Pairing Plate
Install the Blue Pairing Plate in one of three locations:
- If the electrical panel is inside the house, install the Blue Pairing Plate beside the panel
- If the electrical panel is outside, install the Blue Pairing Plate in the garage
- If there is no garage, install the Blue Pairing Plate inside the main entry closet.
1. Connect the power controller to the power, load, and neutral wires in the device box.
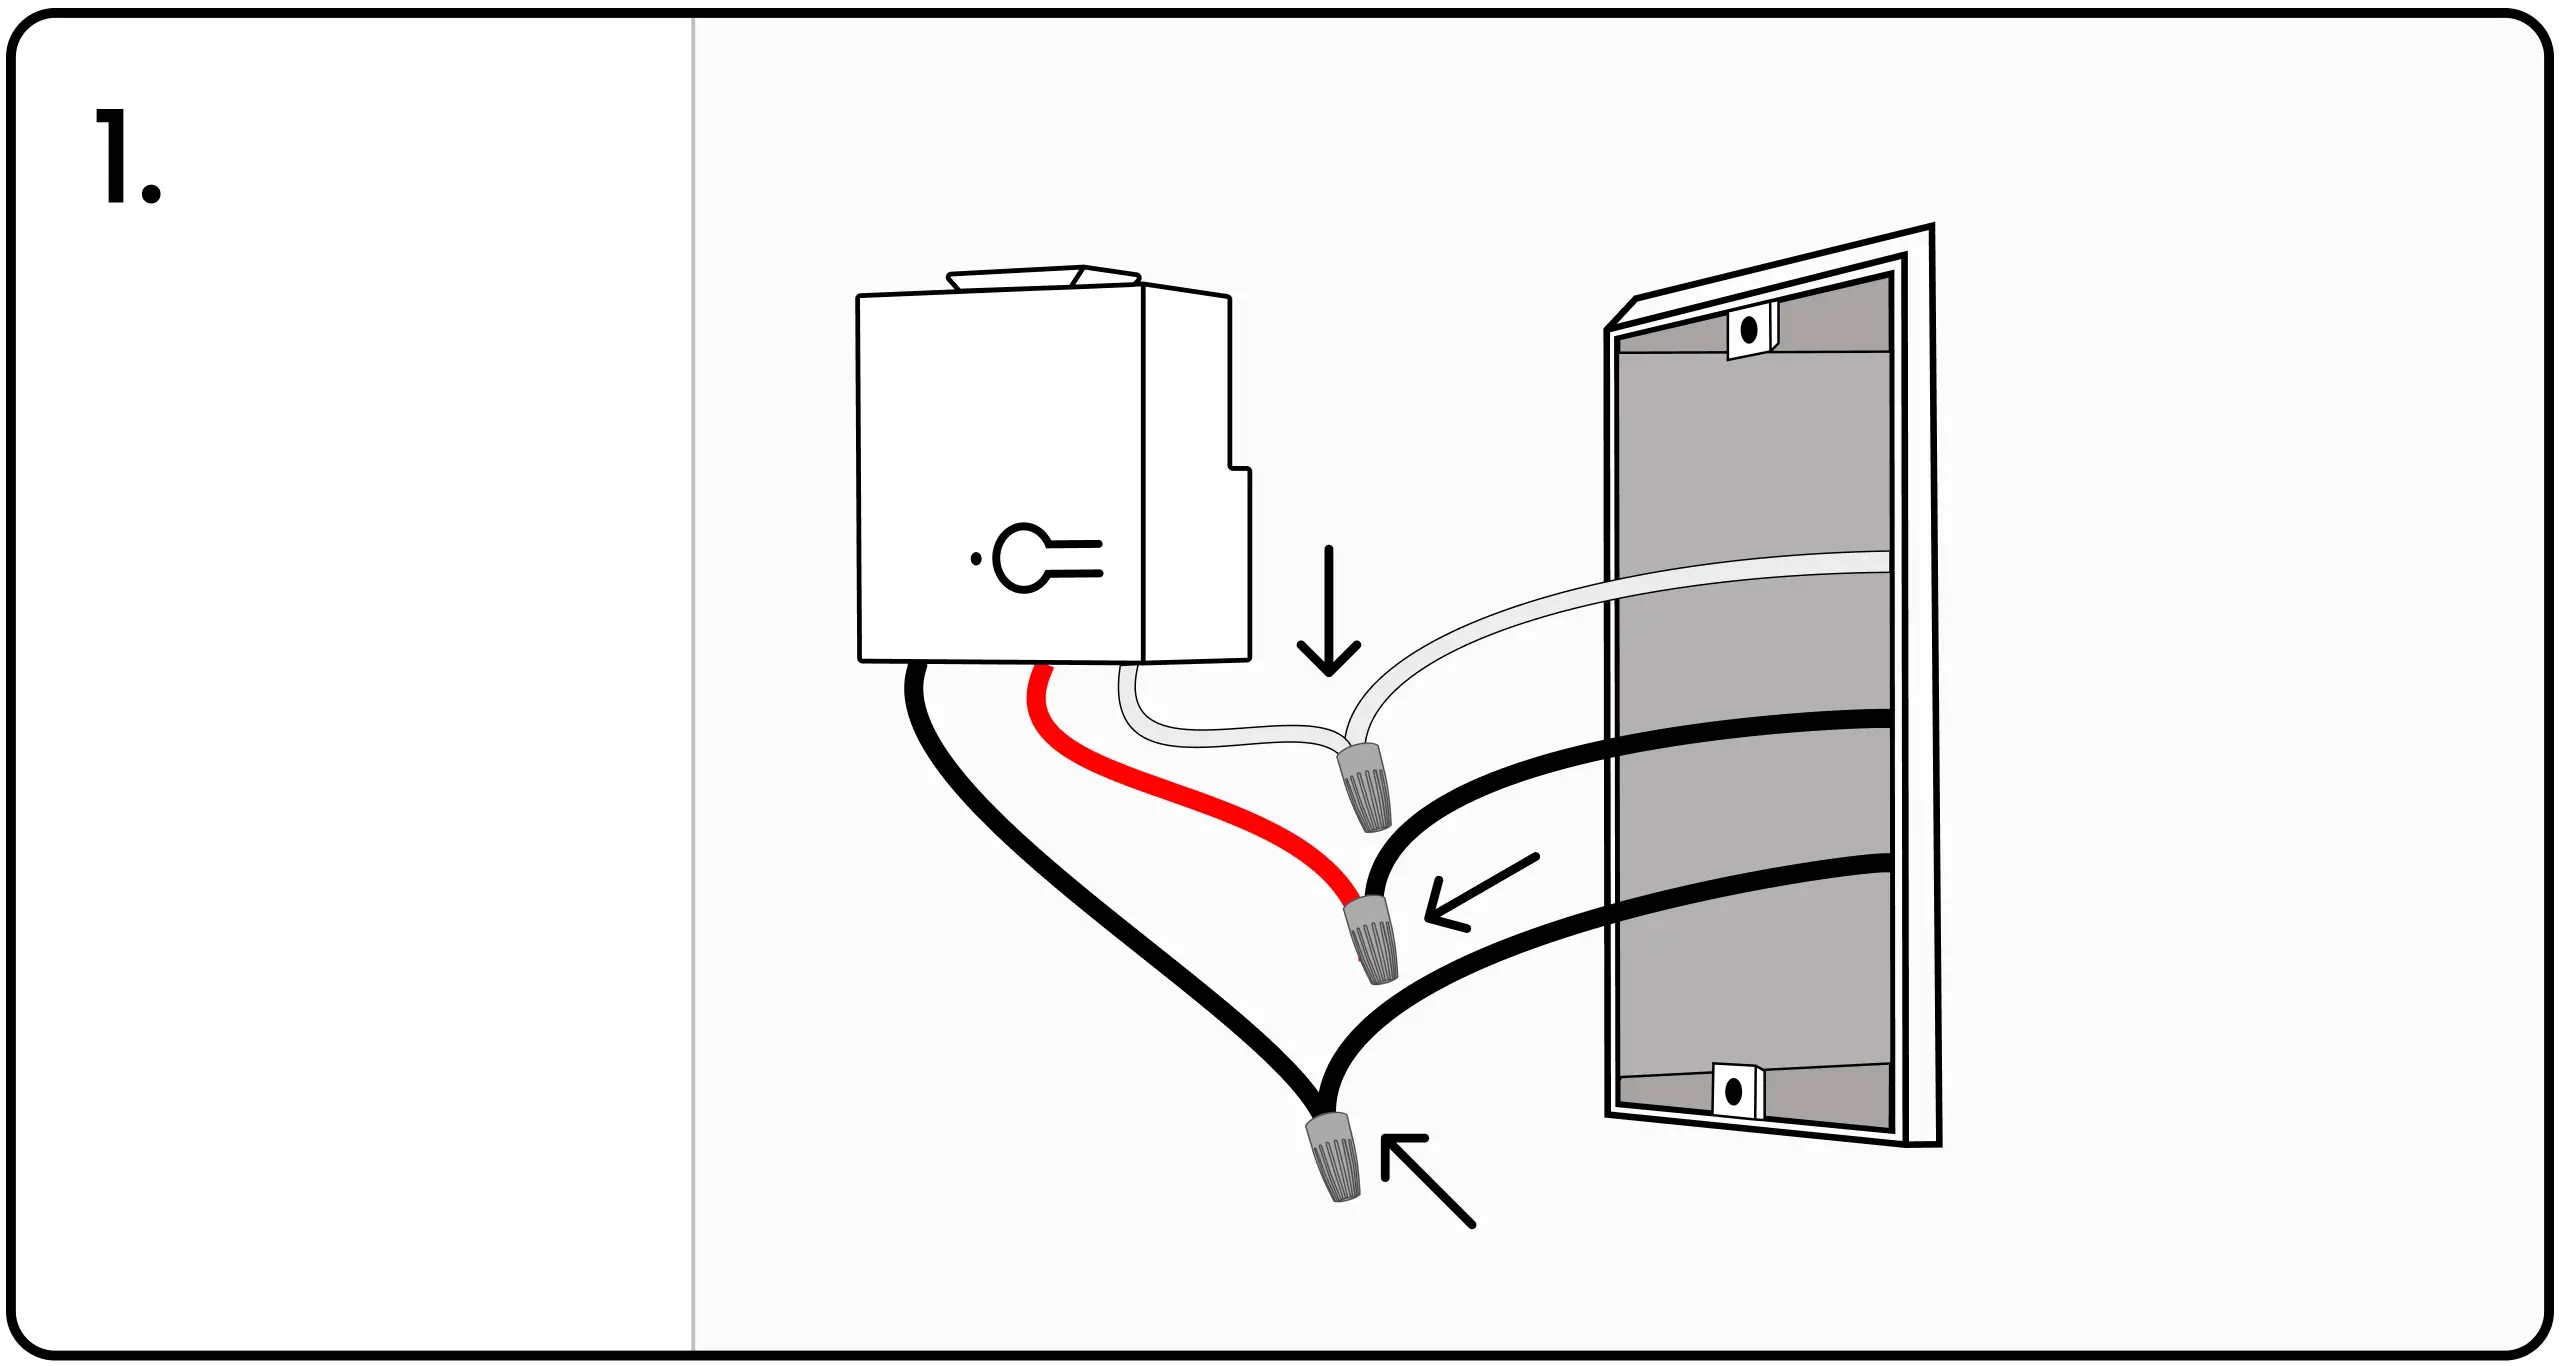
- Connect the black power wire to the power controller's black wire.
- Connect the black load wire to the power controller's red wire.
- Connect all three neutral white wires together.
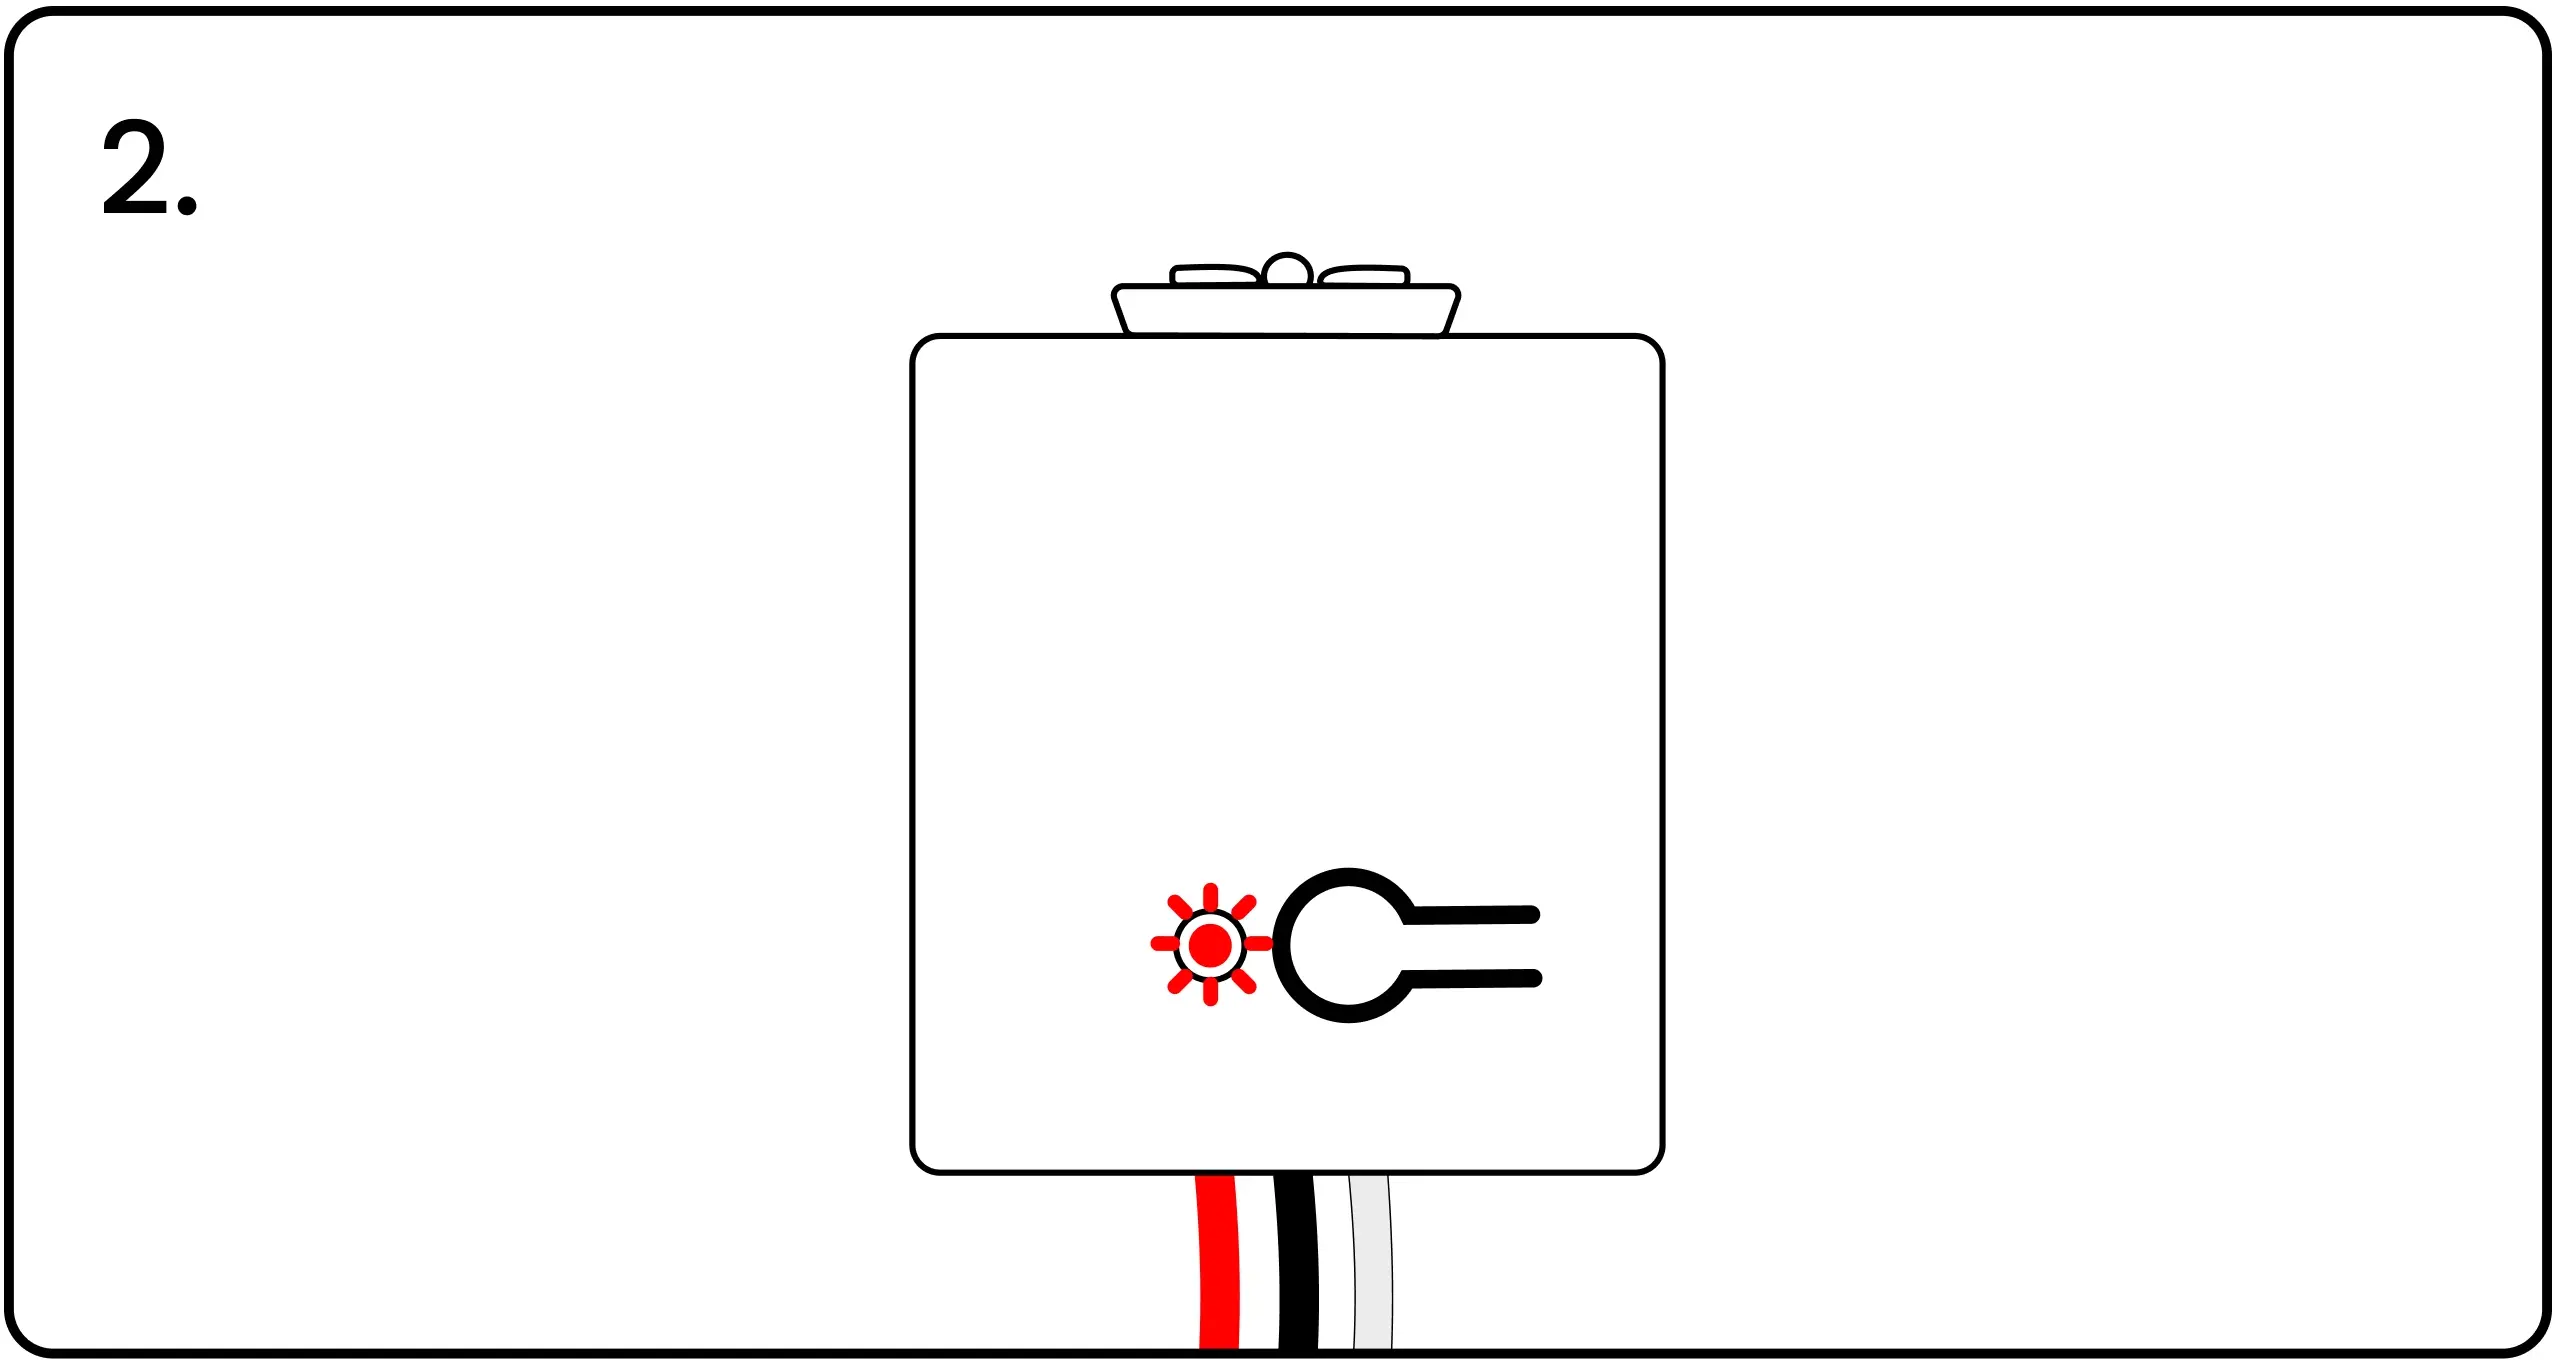
2. Align the power controller's pairing button and LED with the holes in the Blue Pairing Plate.
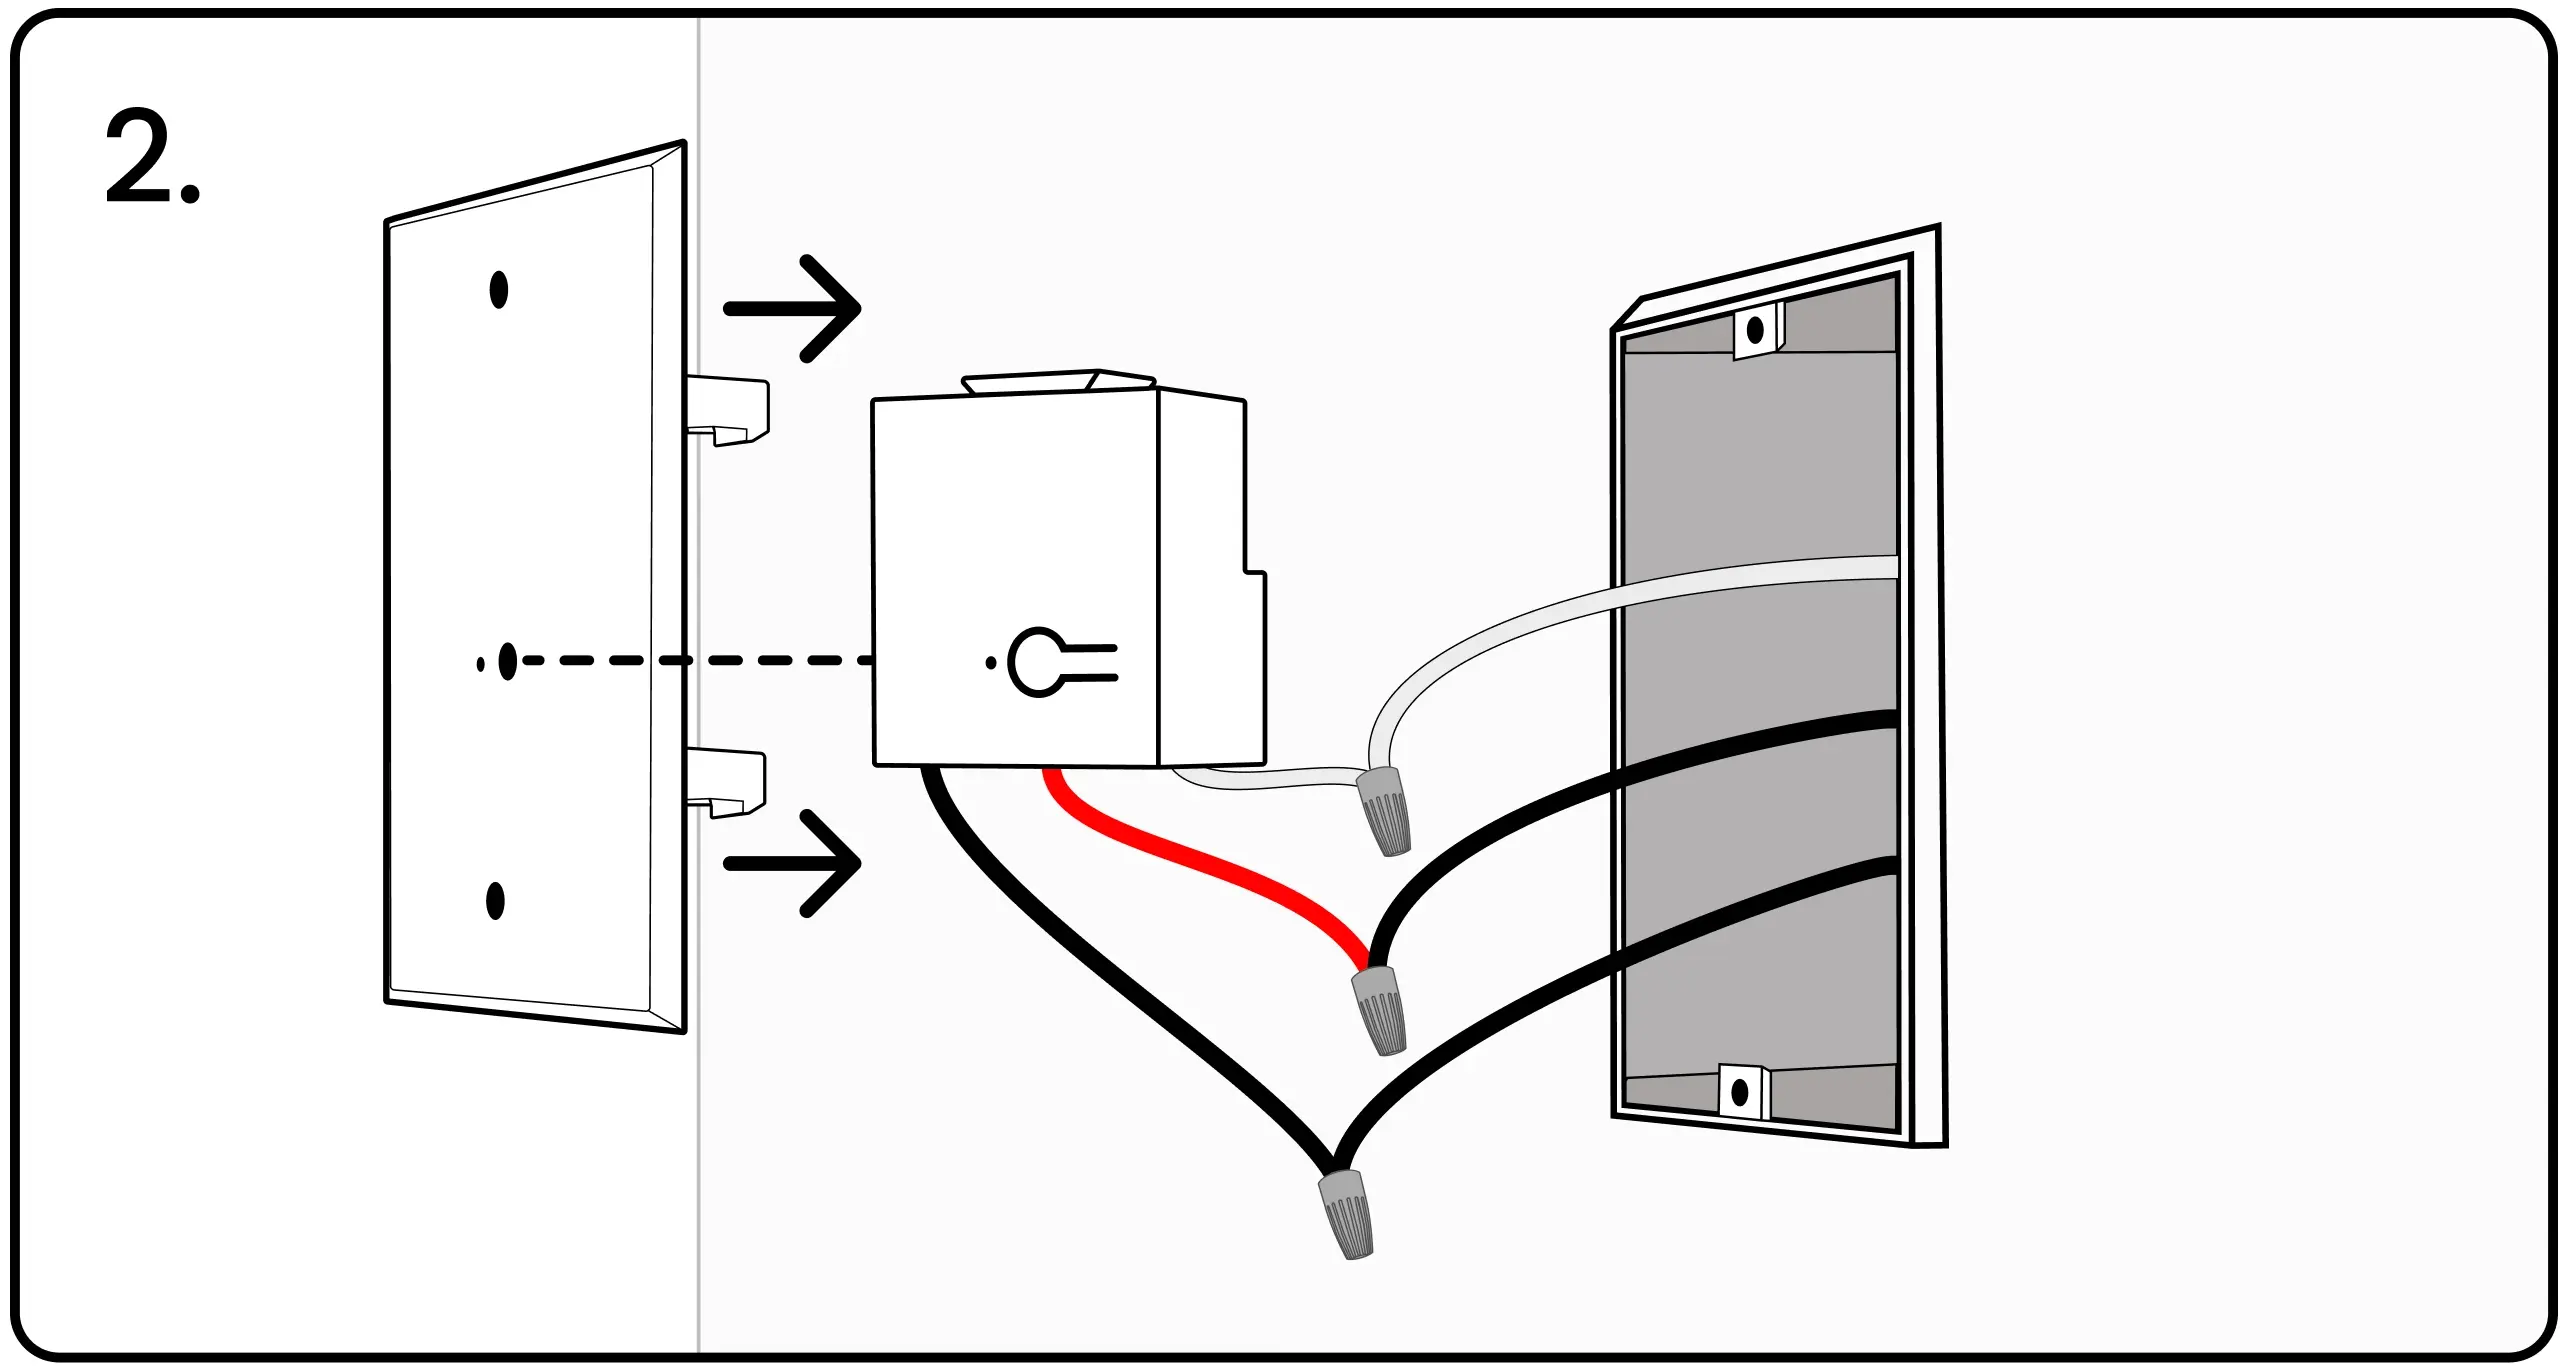
3. Snap the power controller into the Blue Pairing Plate's plastic clasps.
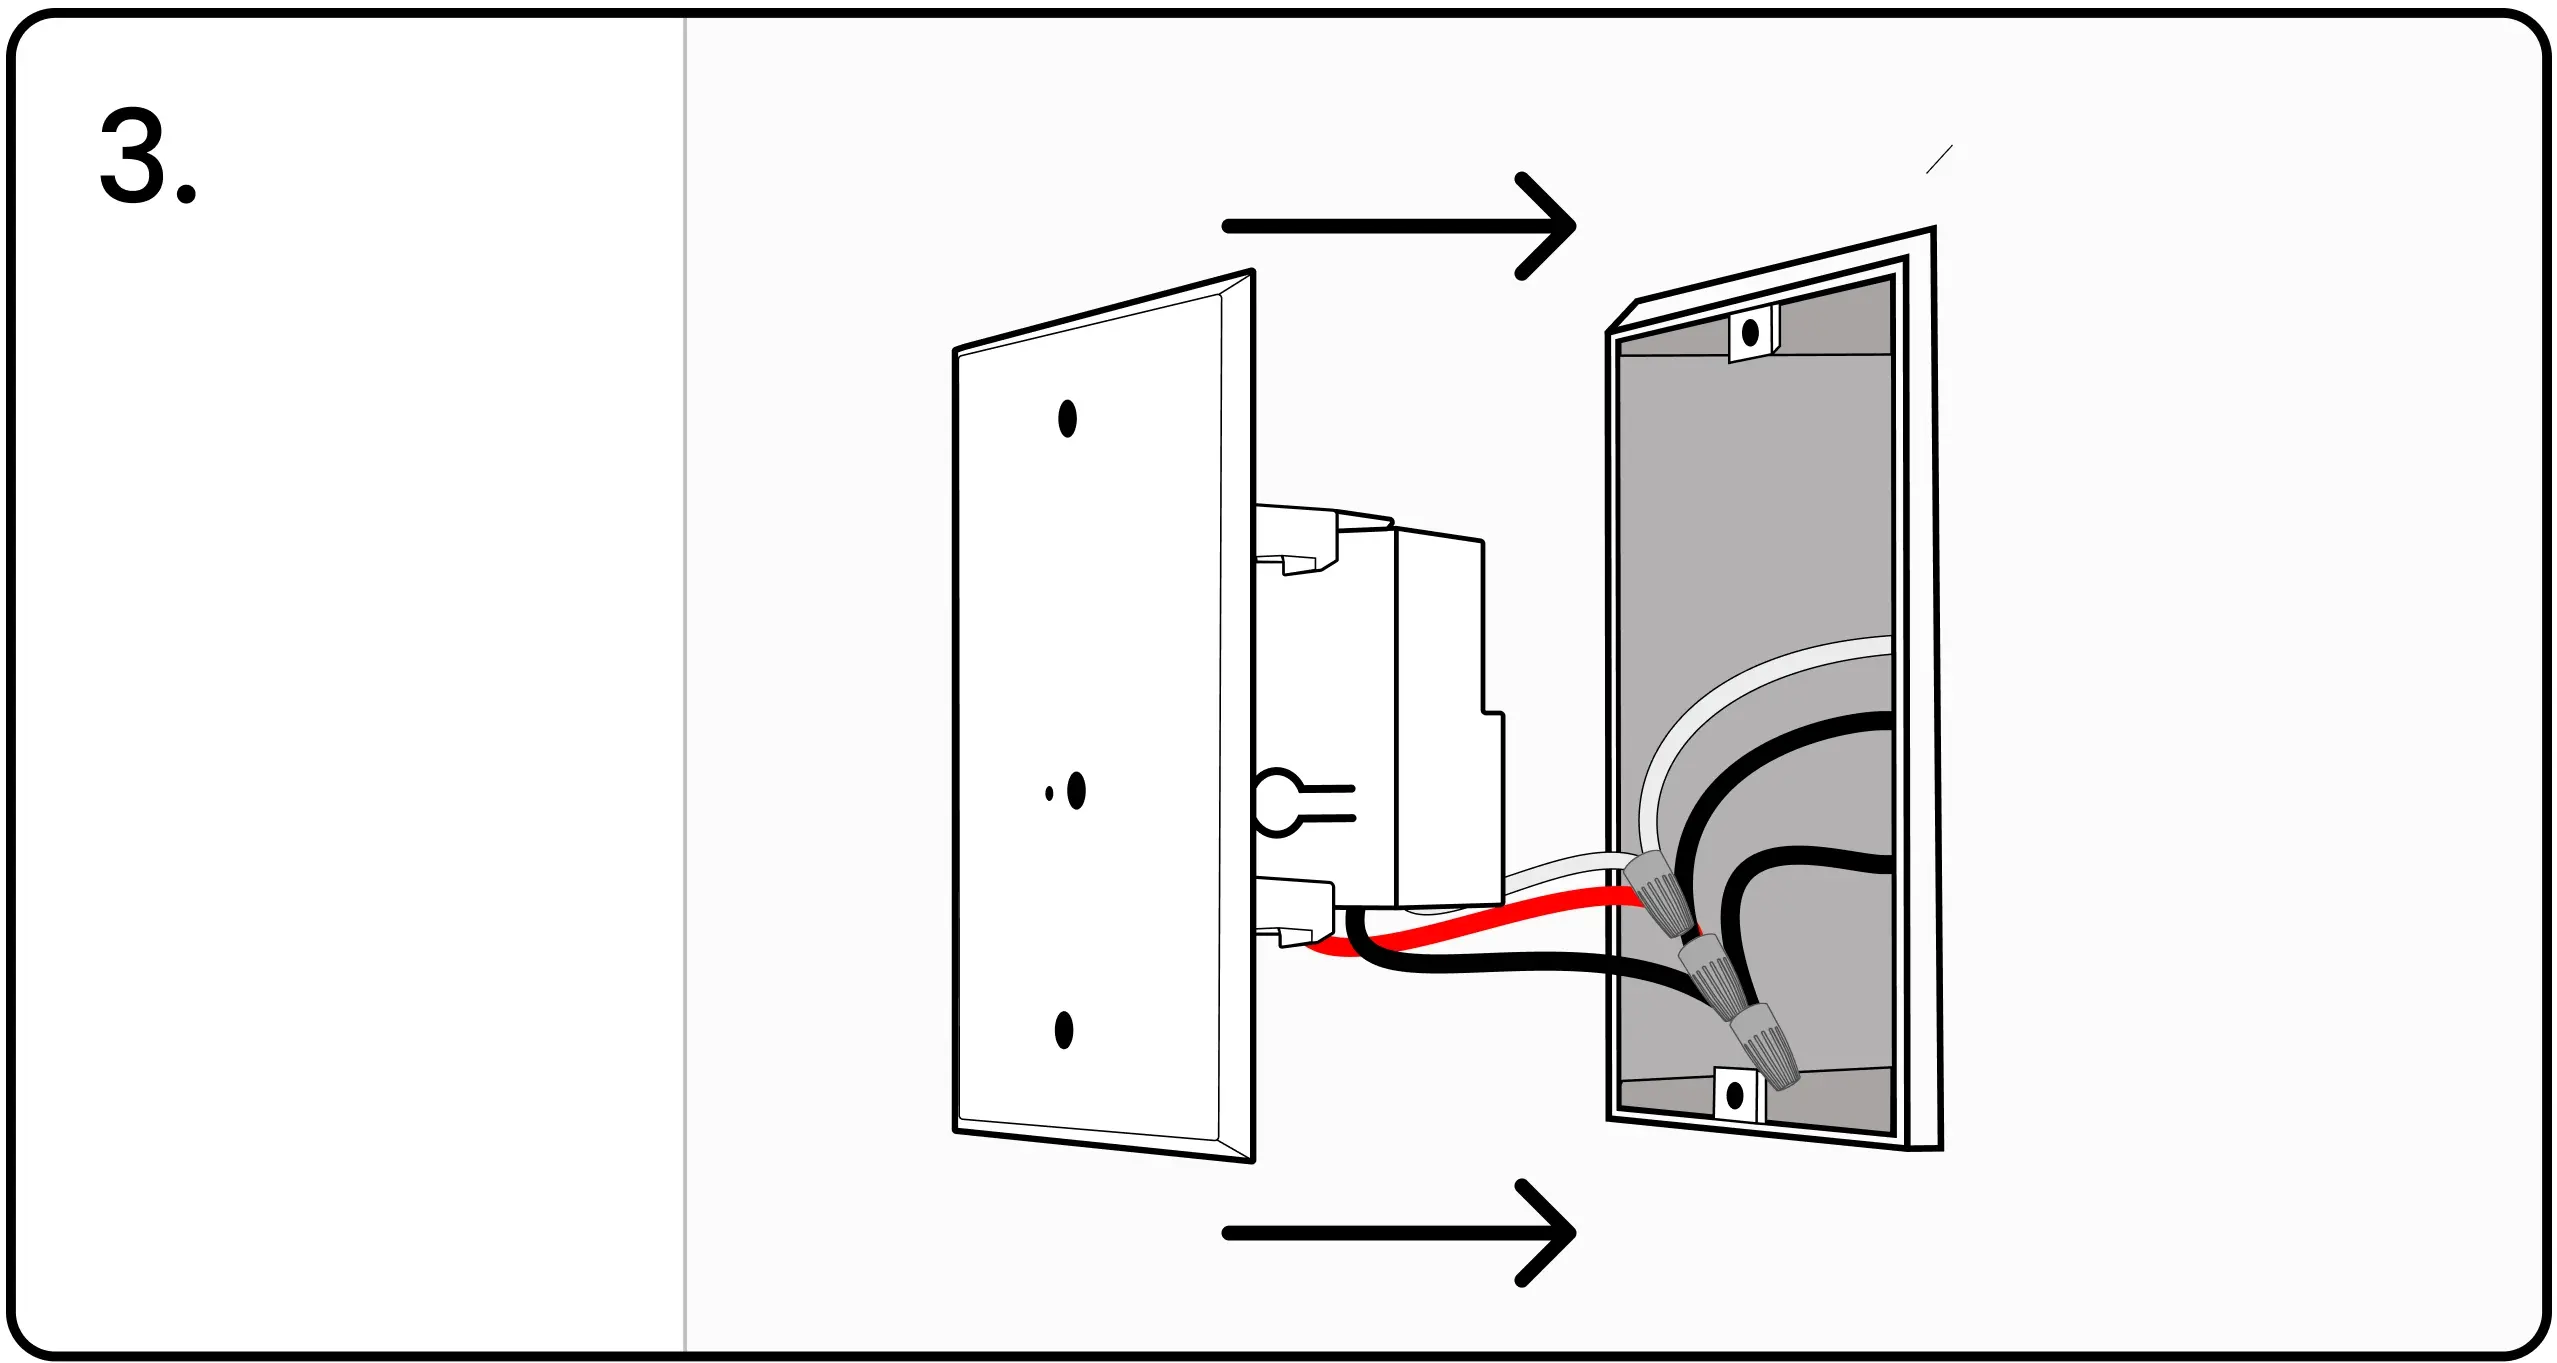
4. Screw the Blue Pairing Plate into the device box.
Power Controller Wiring Guides
2a - Power Controller and Switched Load in Same Junction Box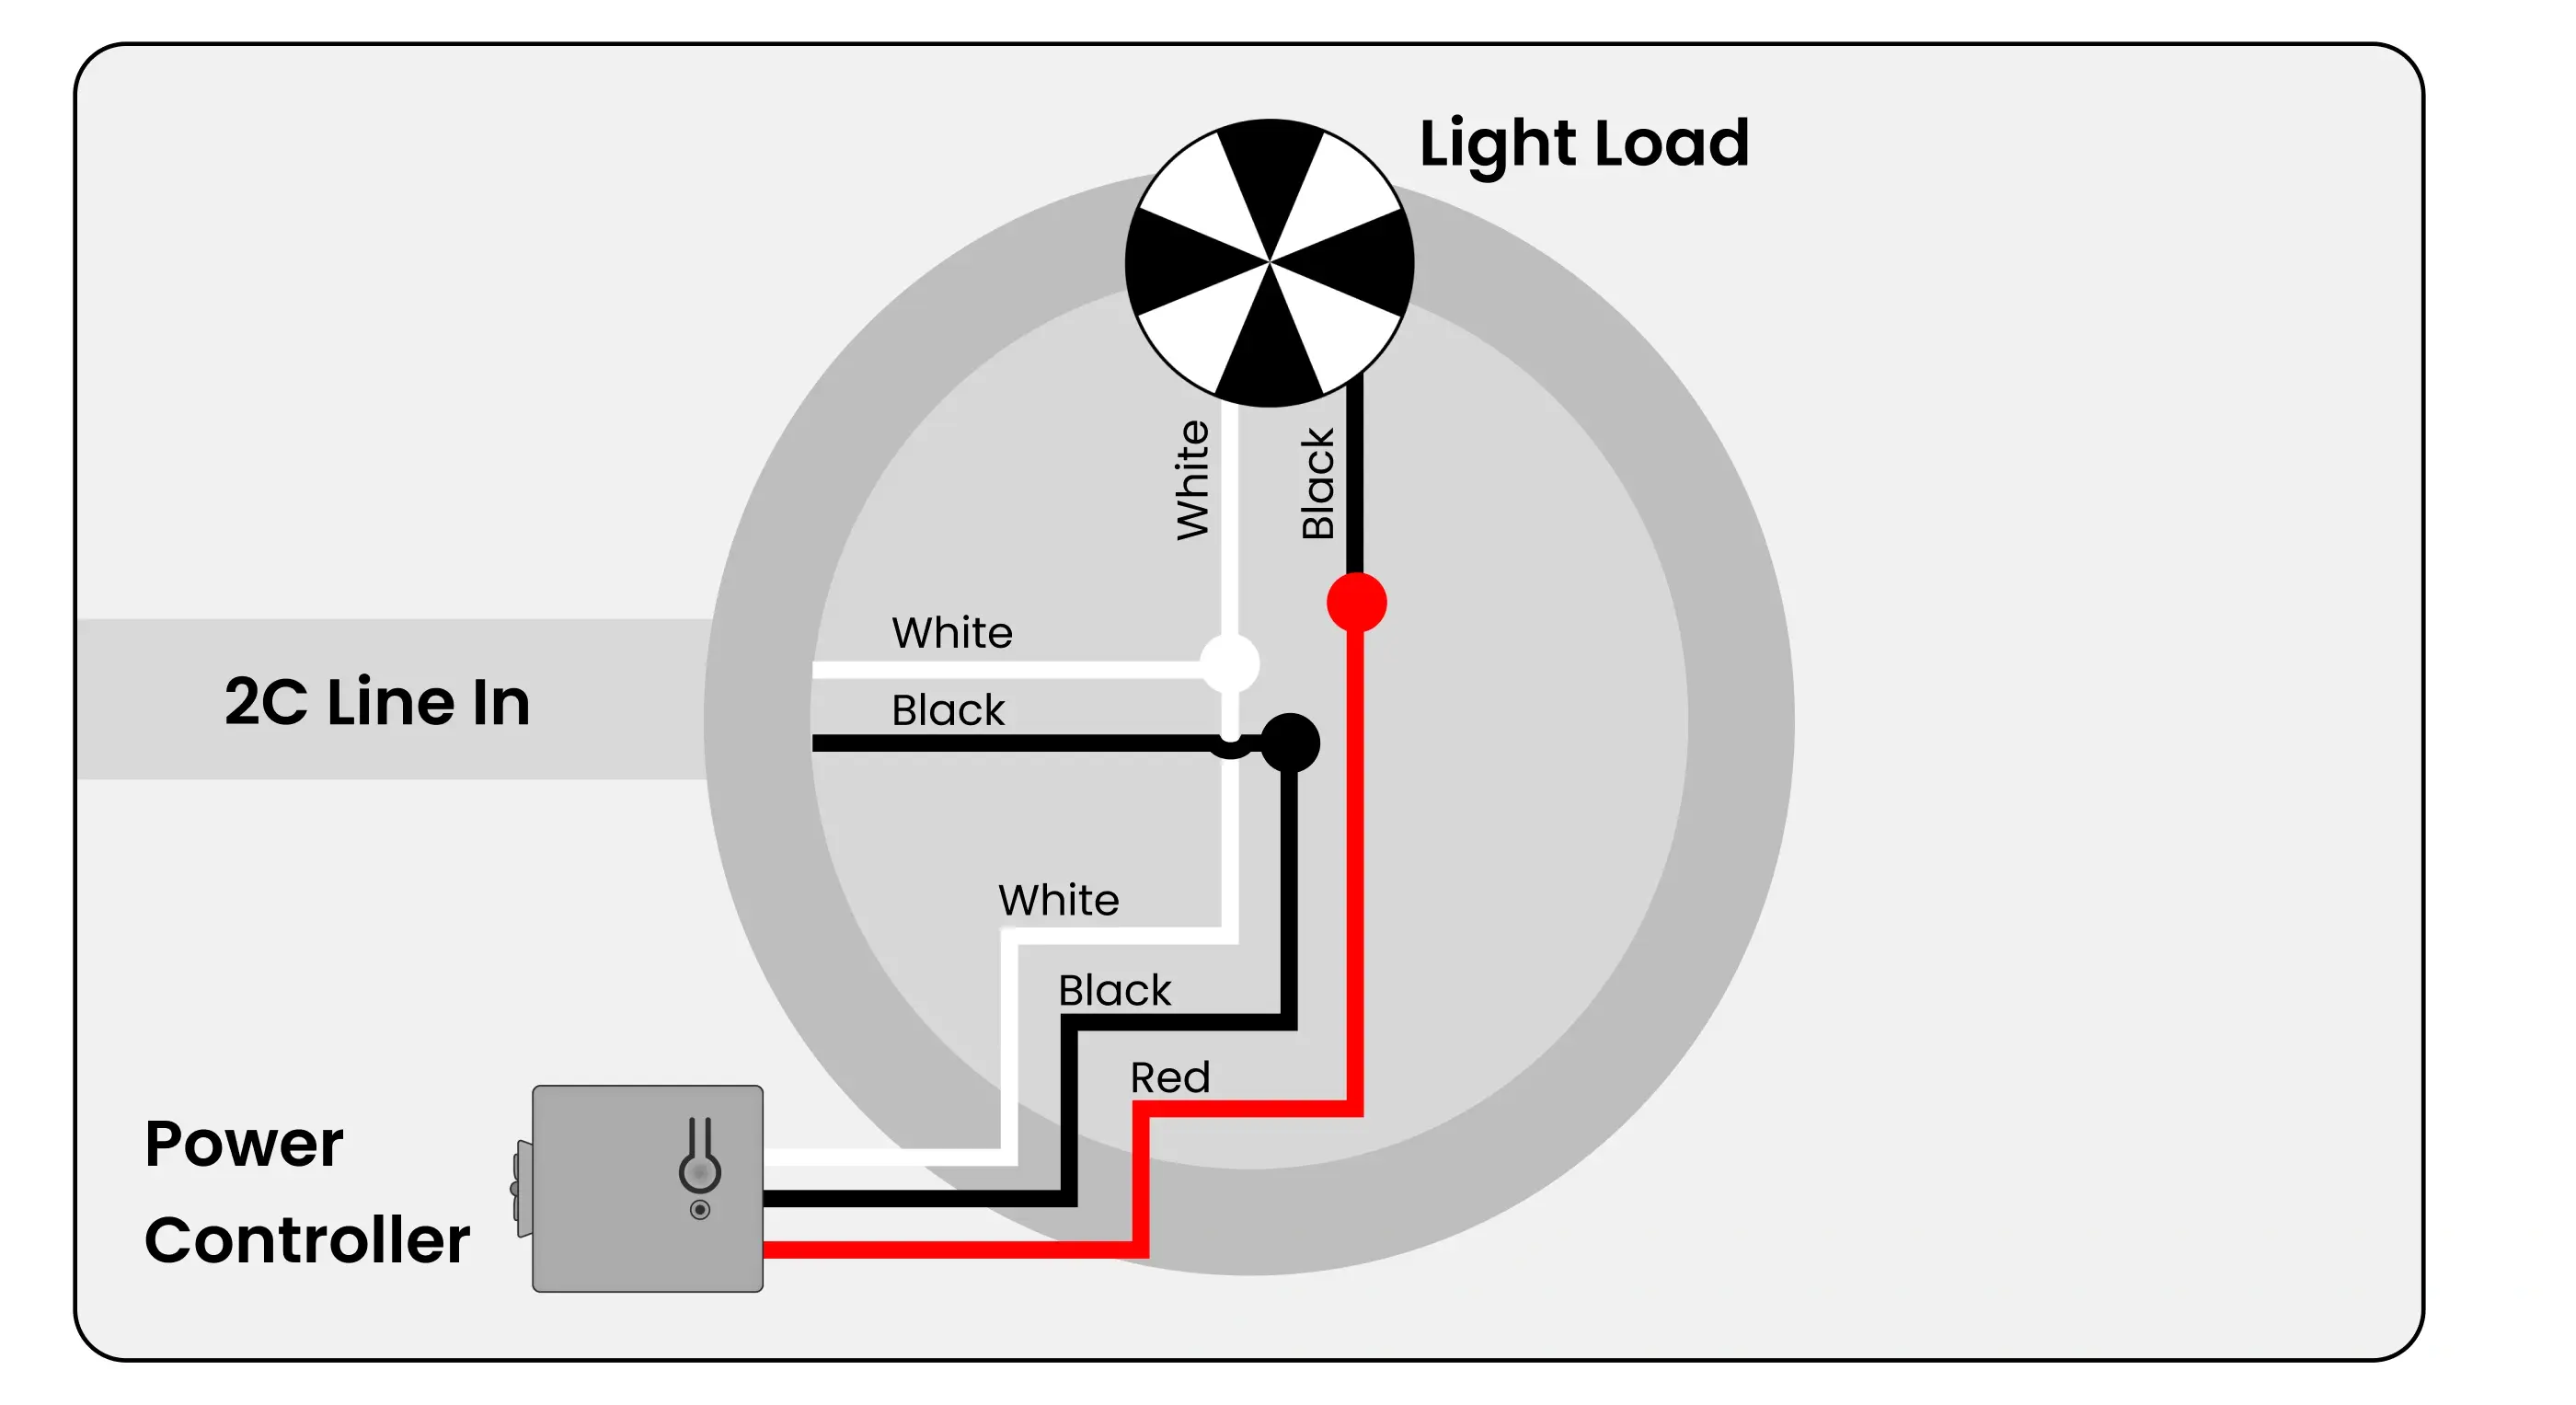
2b - Power Controller + Load In Box with Power for Next Box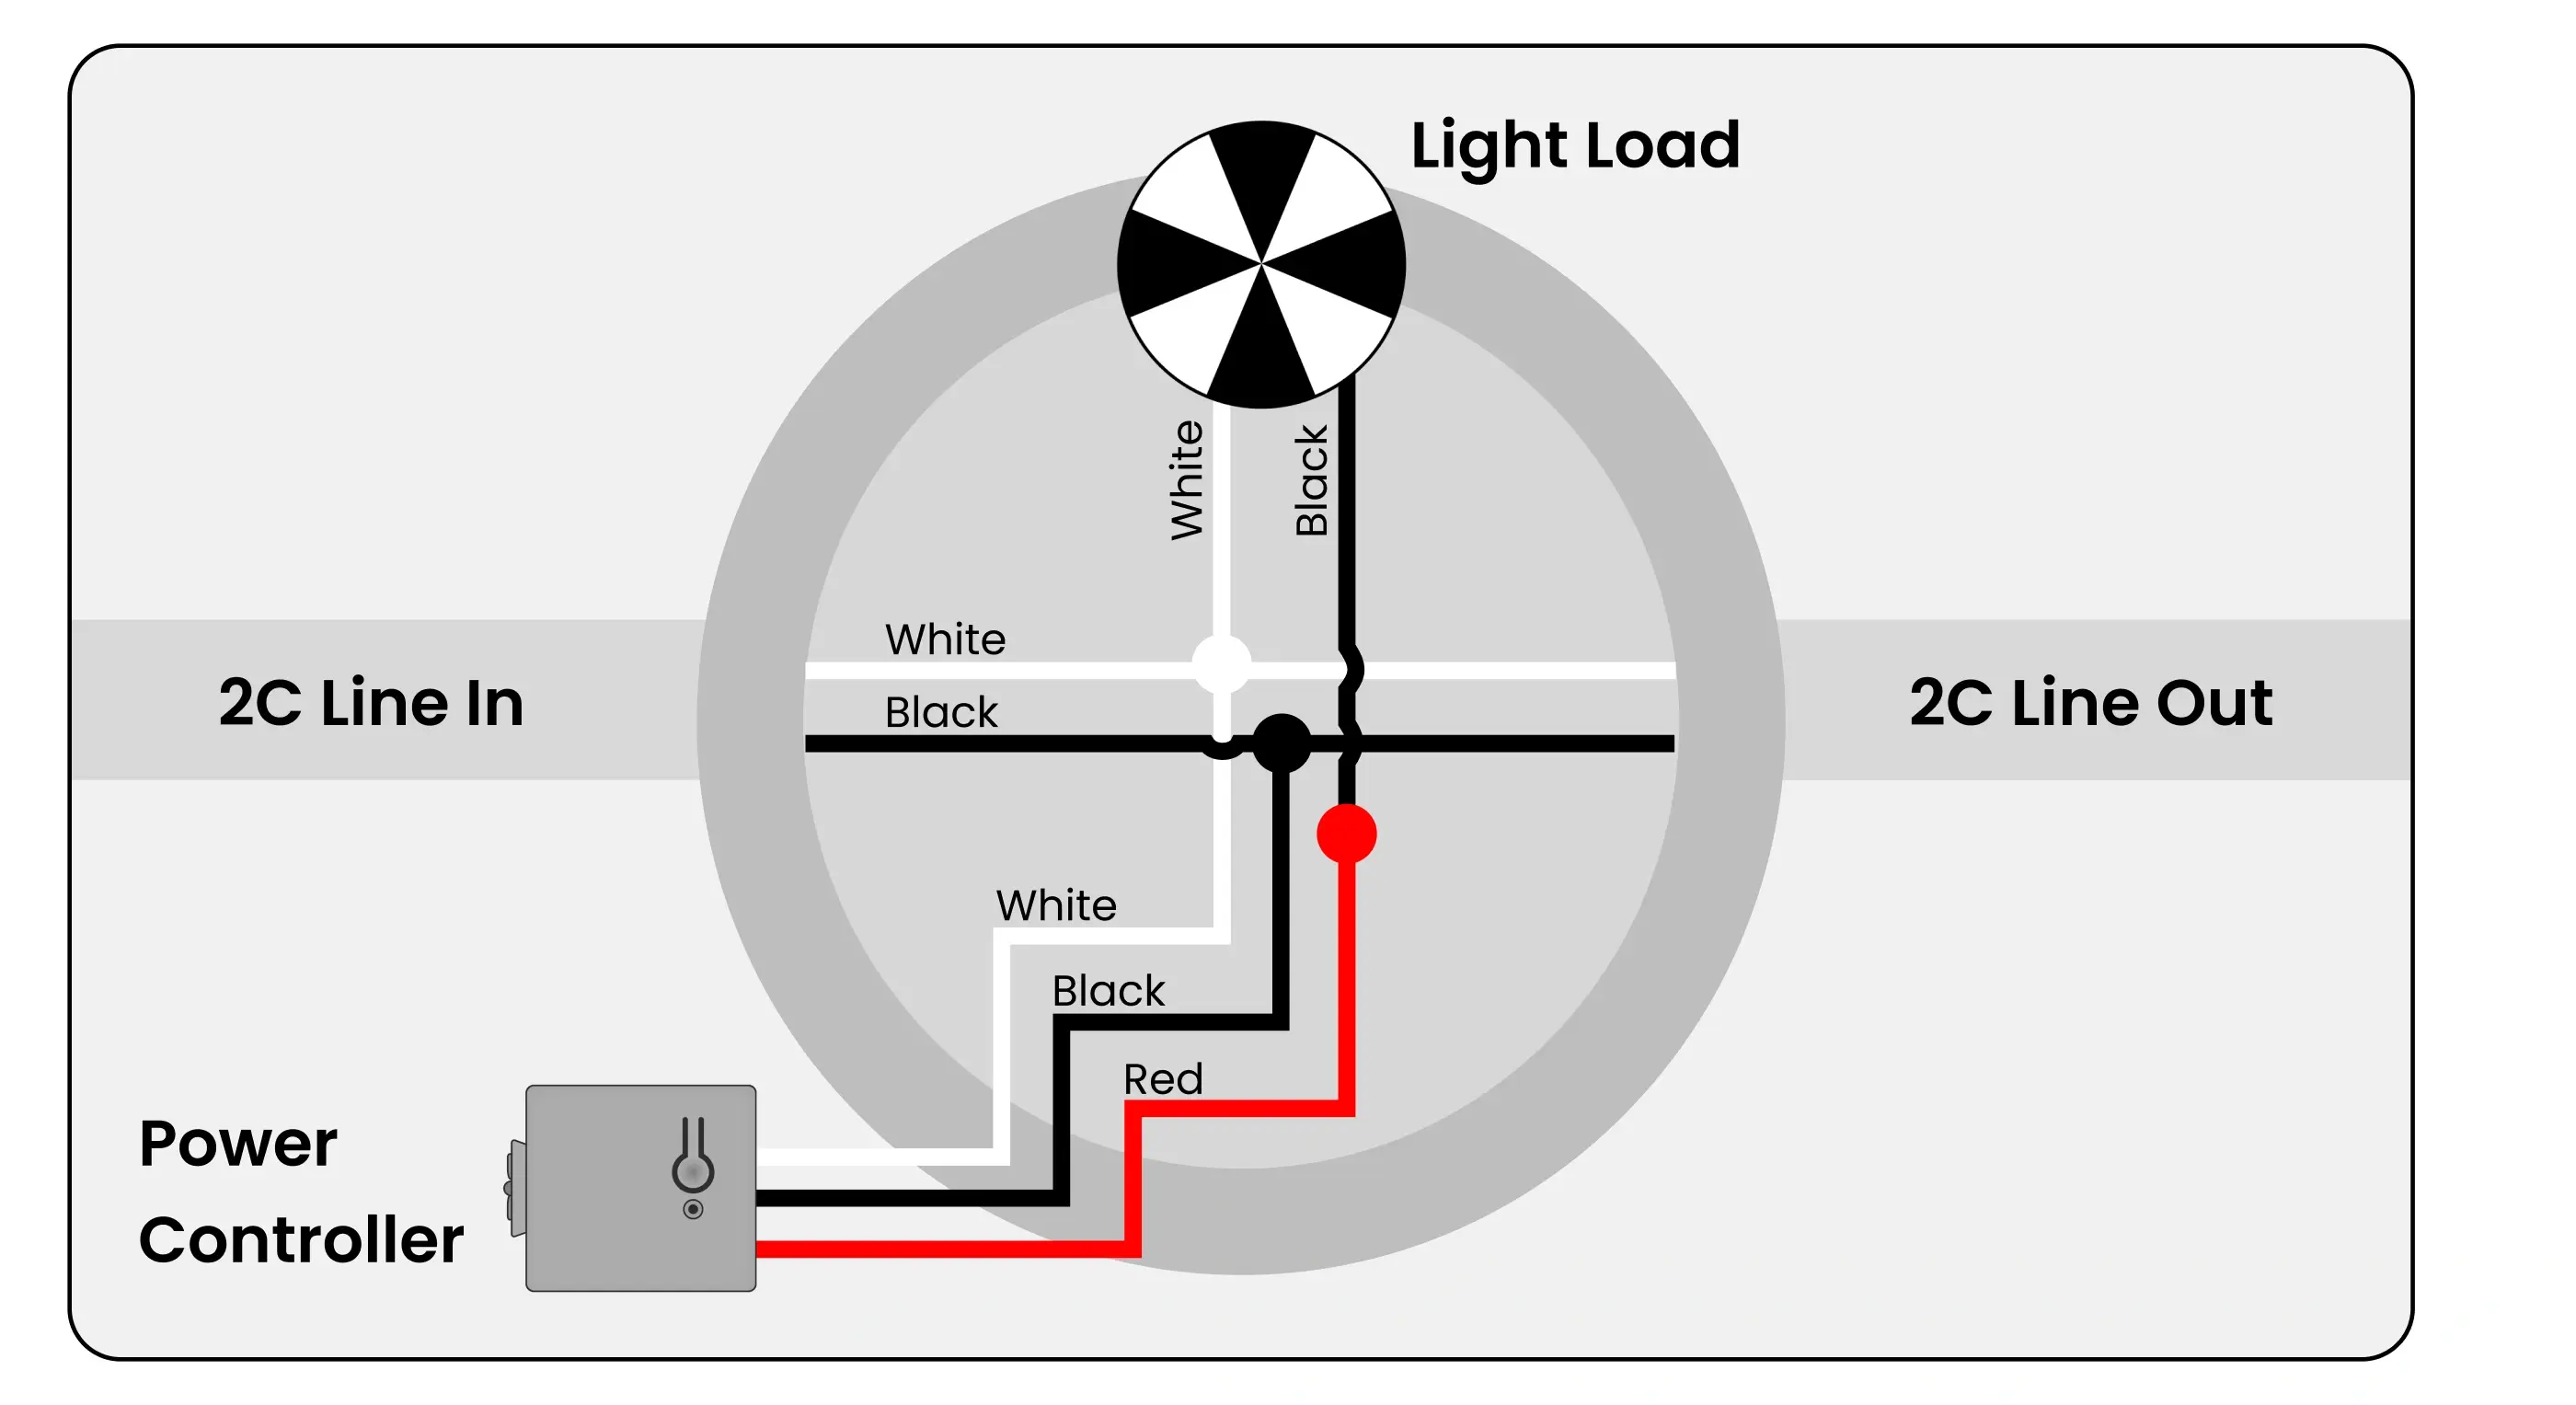
2c - Power Controller + Load with 3-Conductor Power for Next Box
2d - Power Controller is Switching a Load in Different Box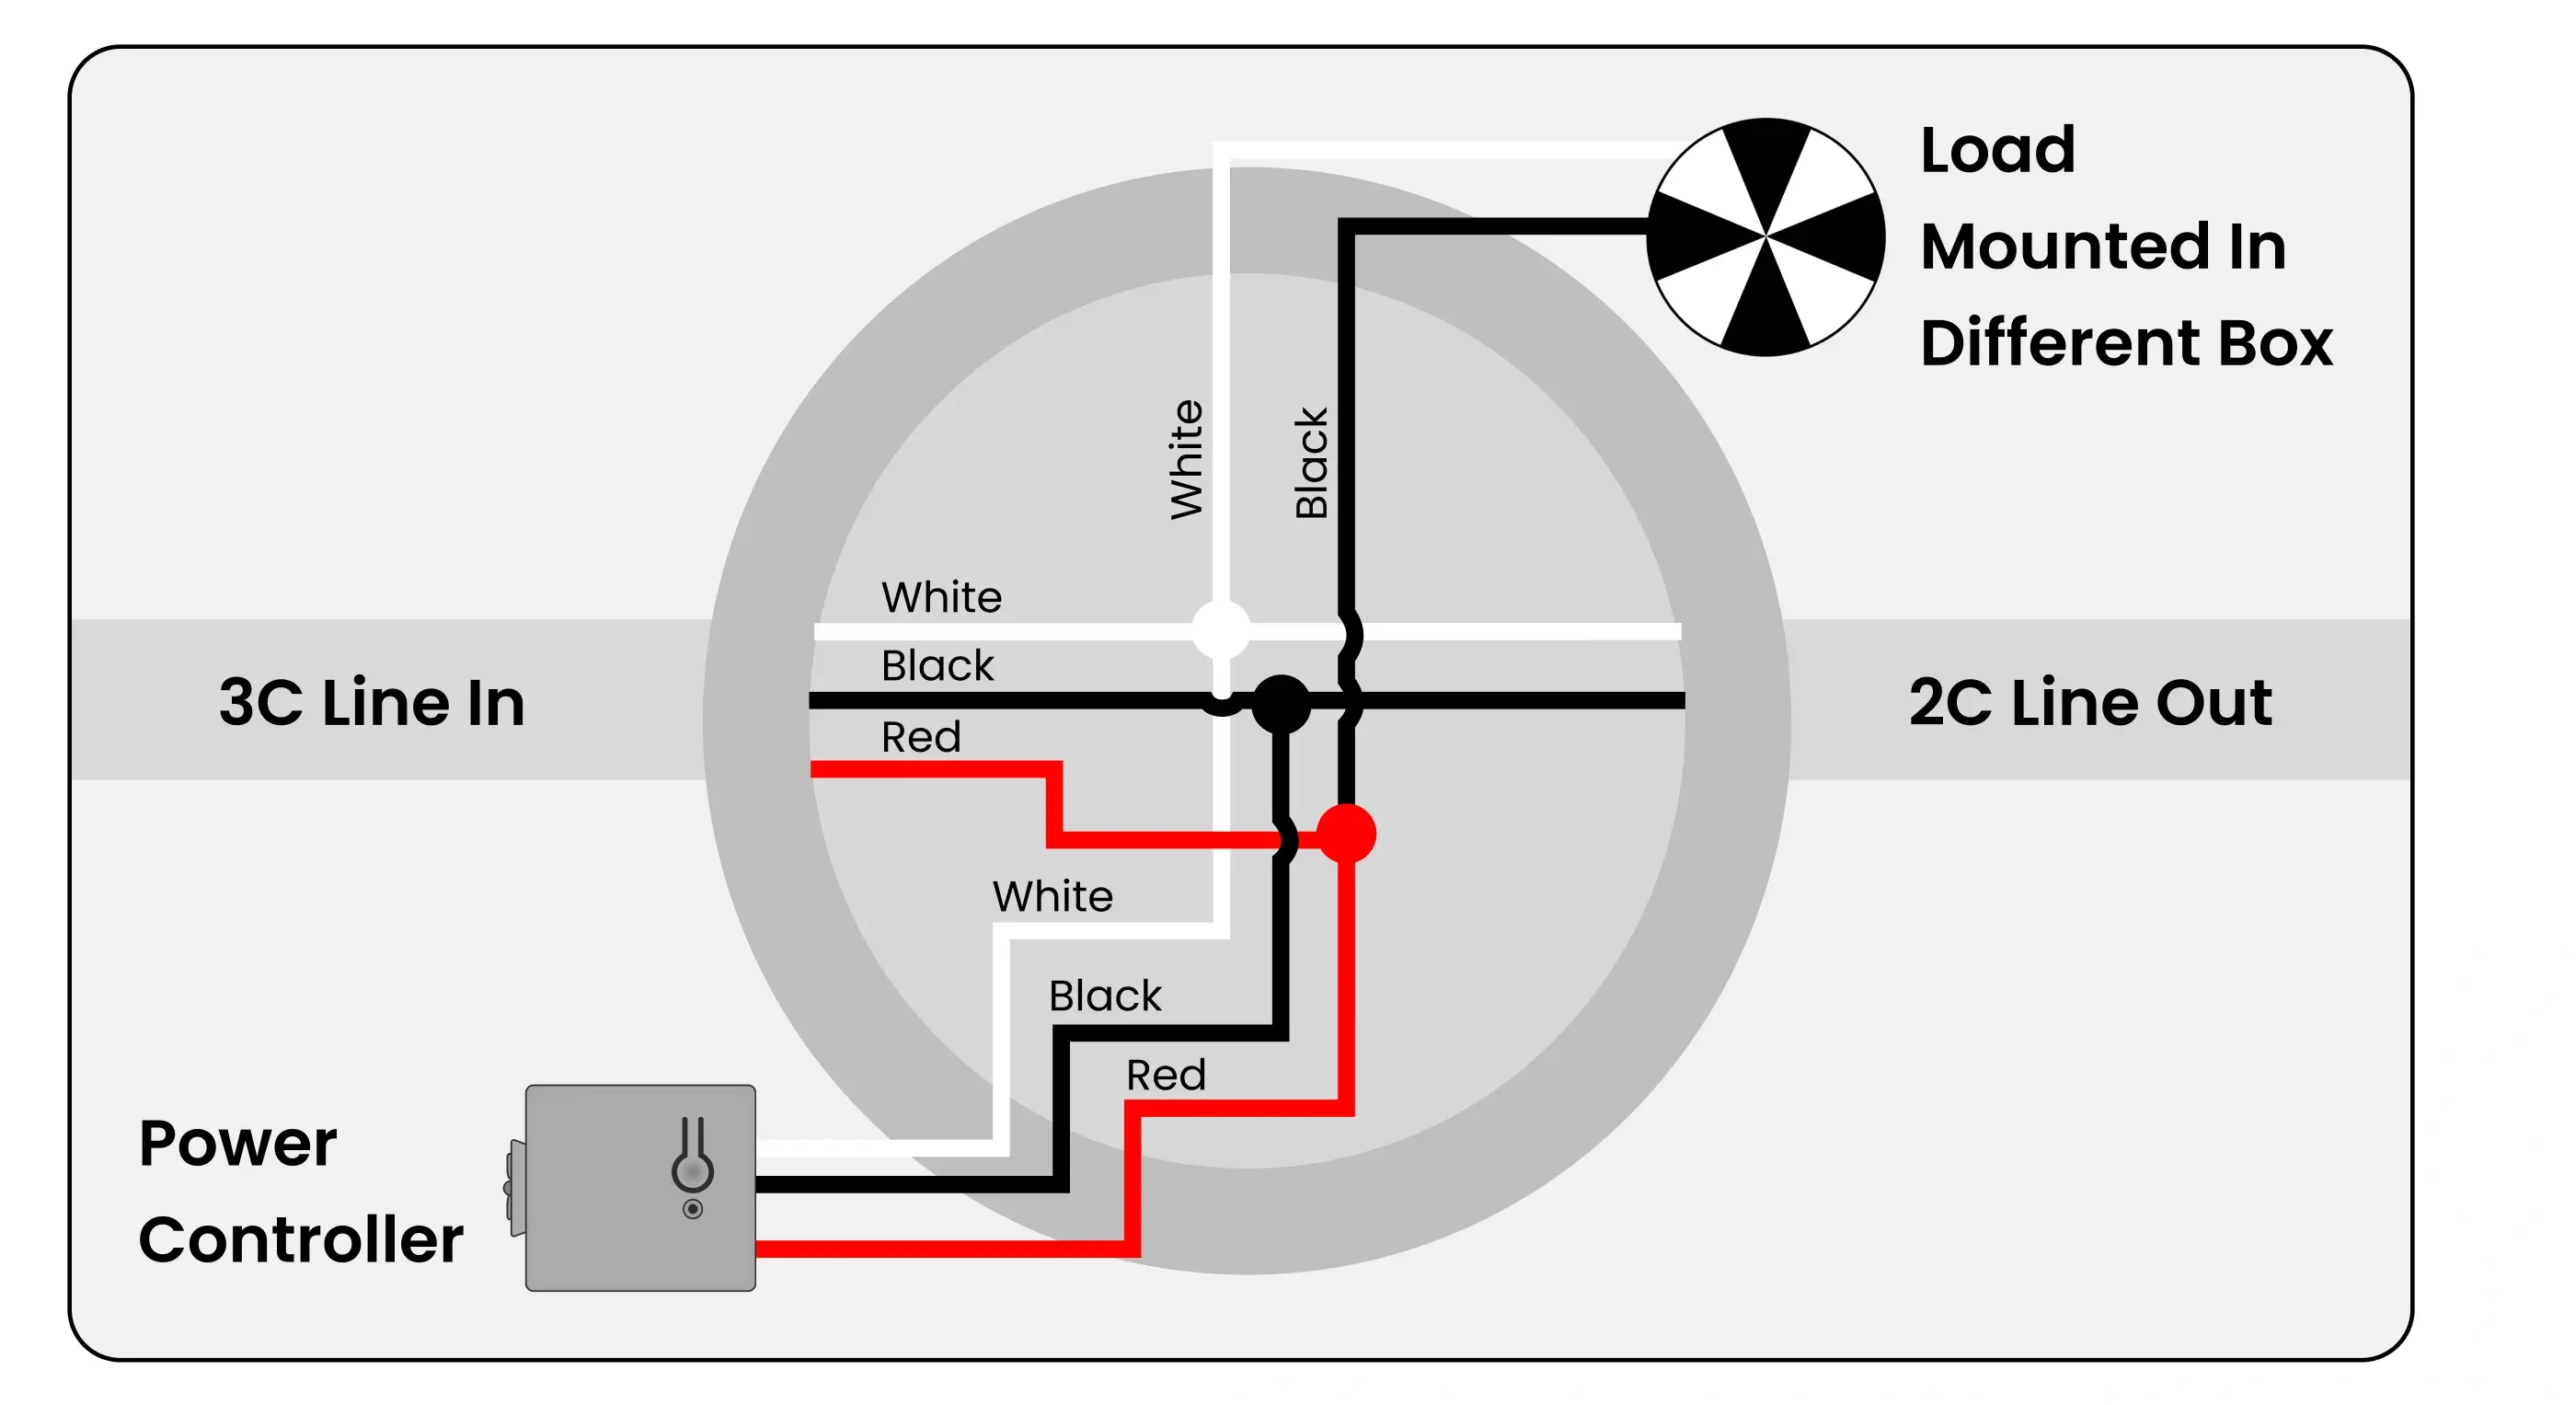
2e - Controlling Multiple Loads with One Power Controller, and Controlling an Exterior Load with a Second Power Controller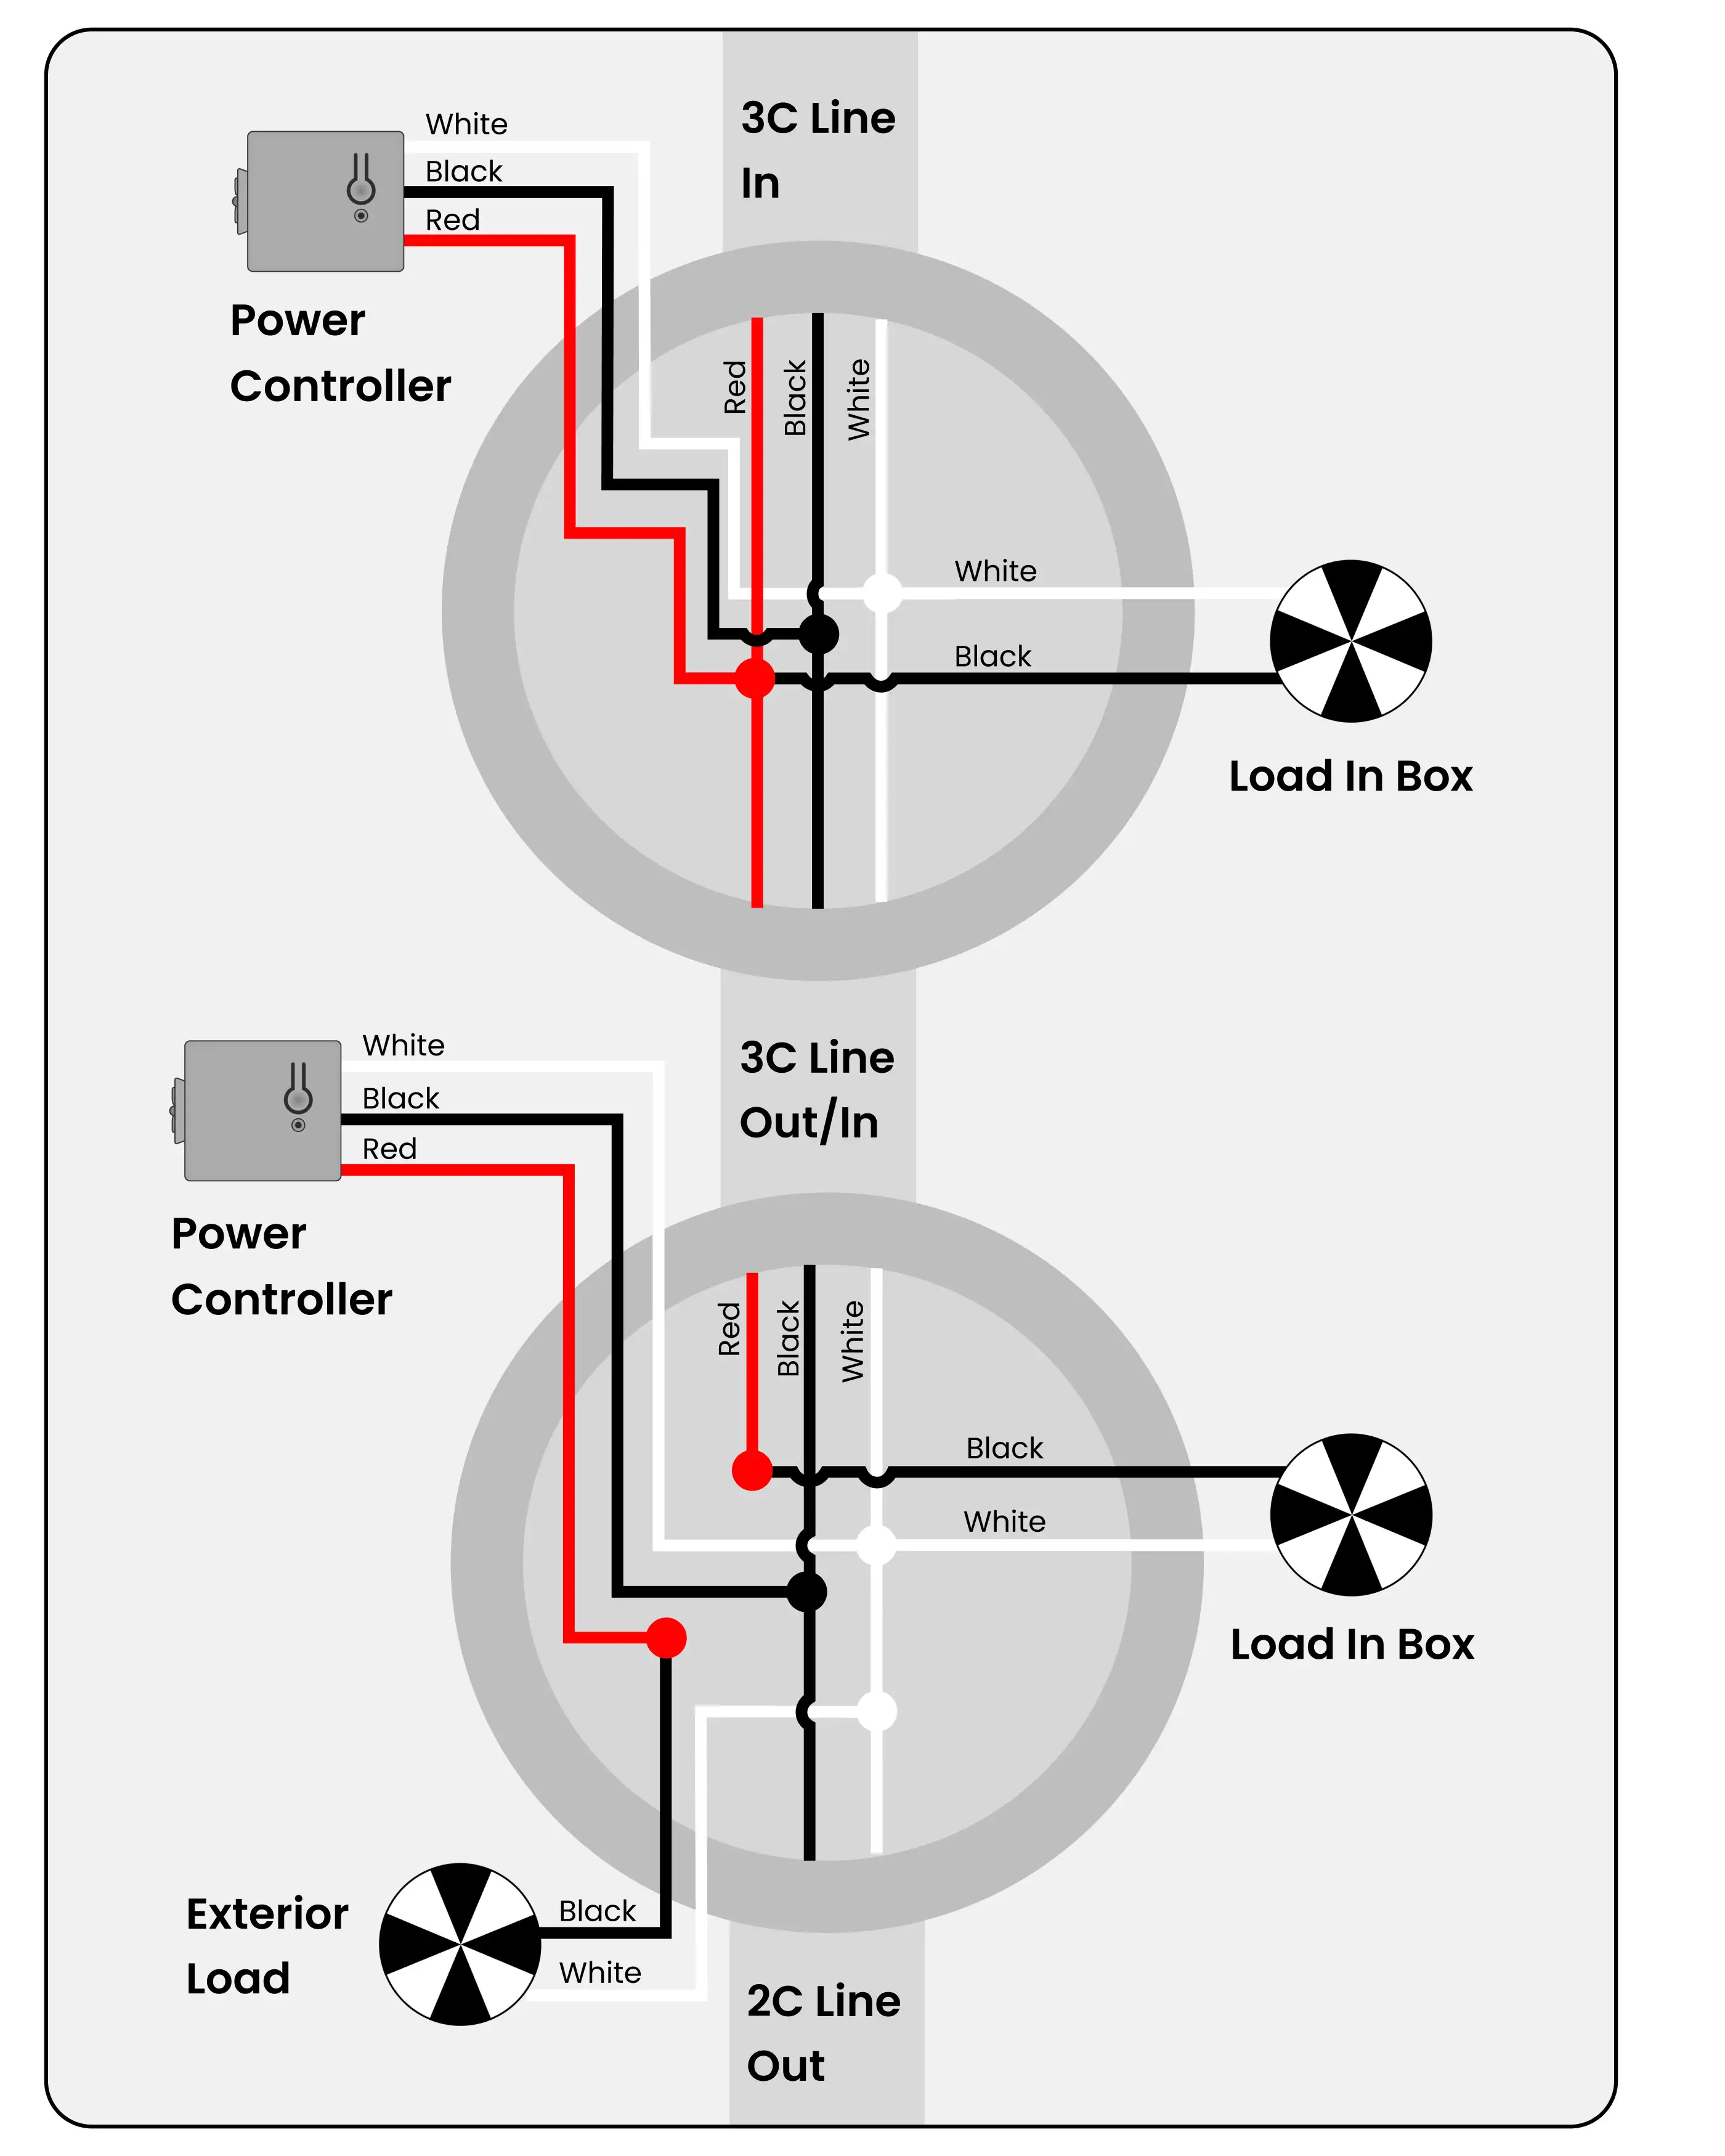
2f - Power Controller in Load in Different Box with Continuous Power for Next Box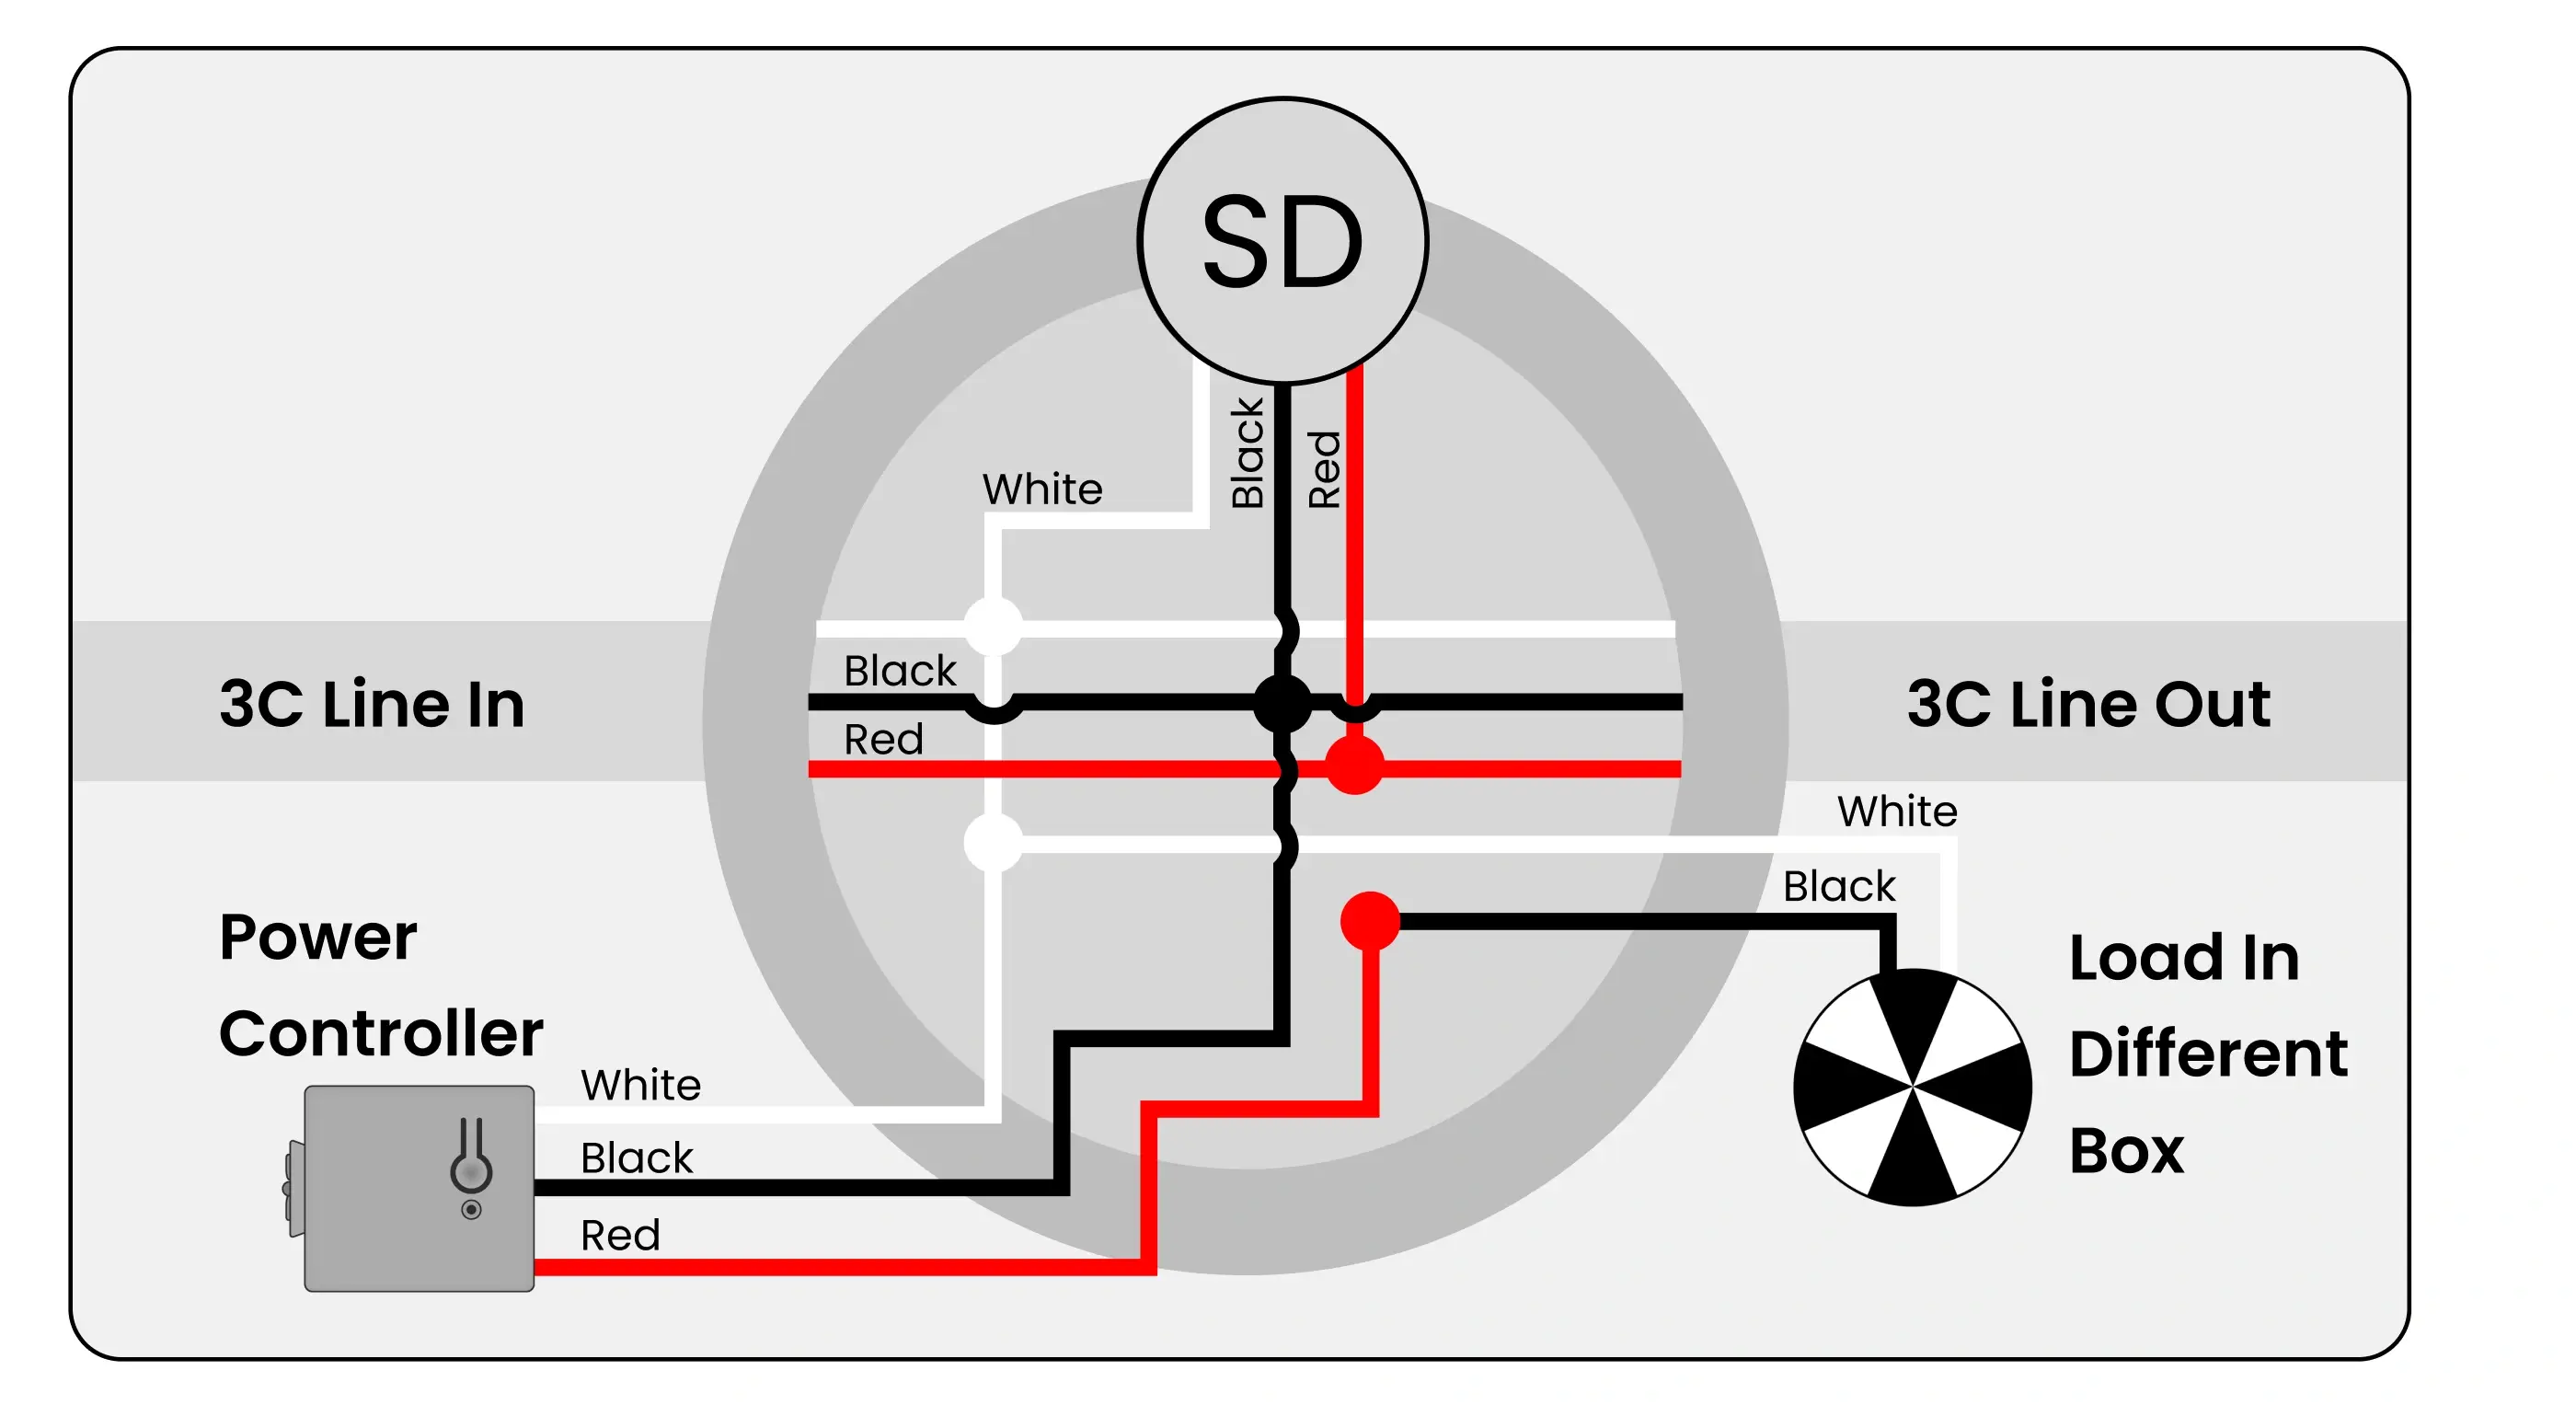
2g - Two Power Controllers for Two Loads in Same Box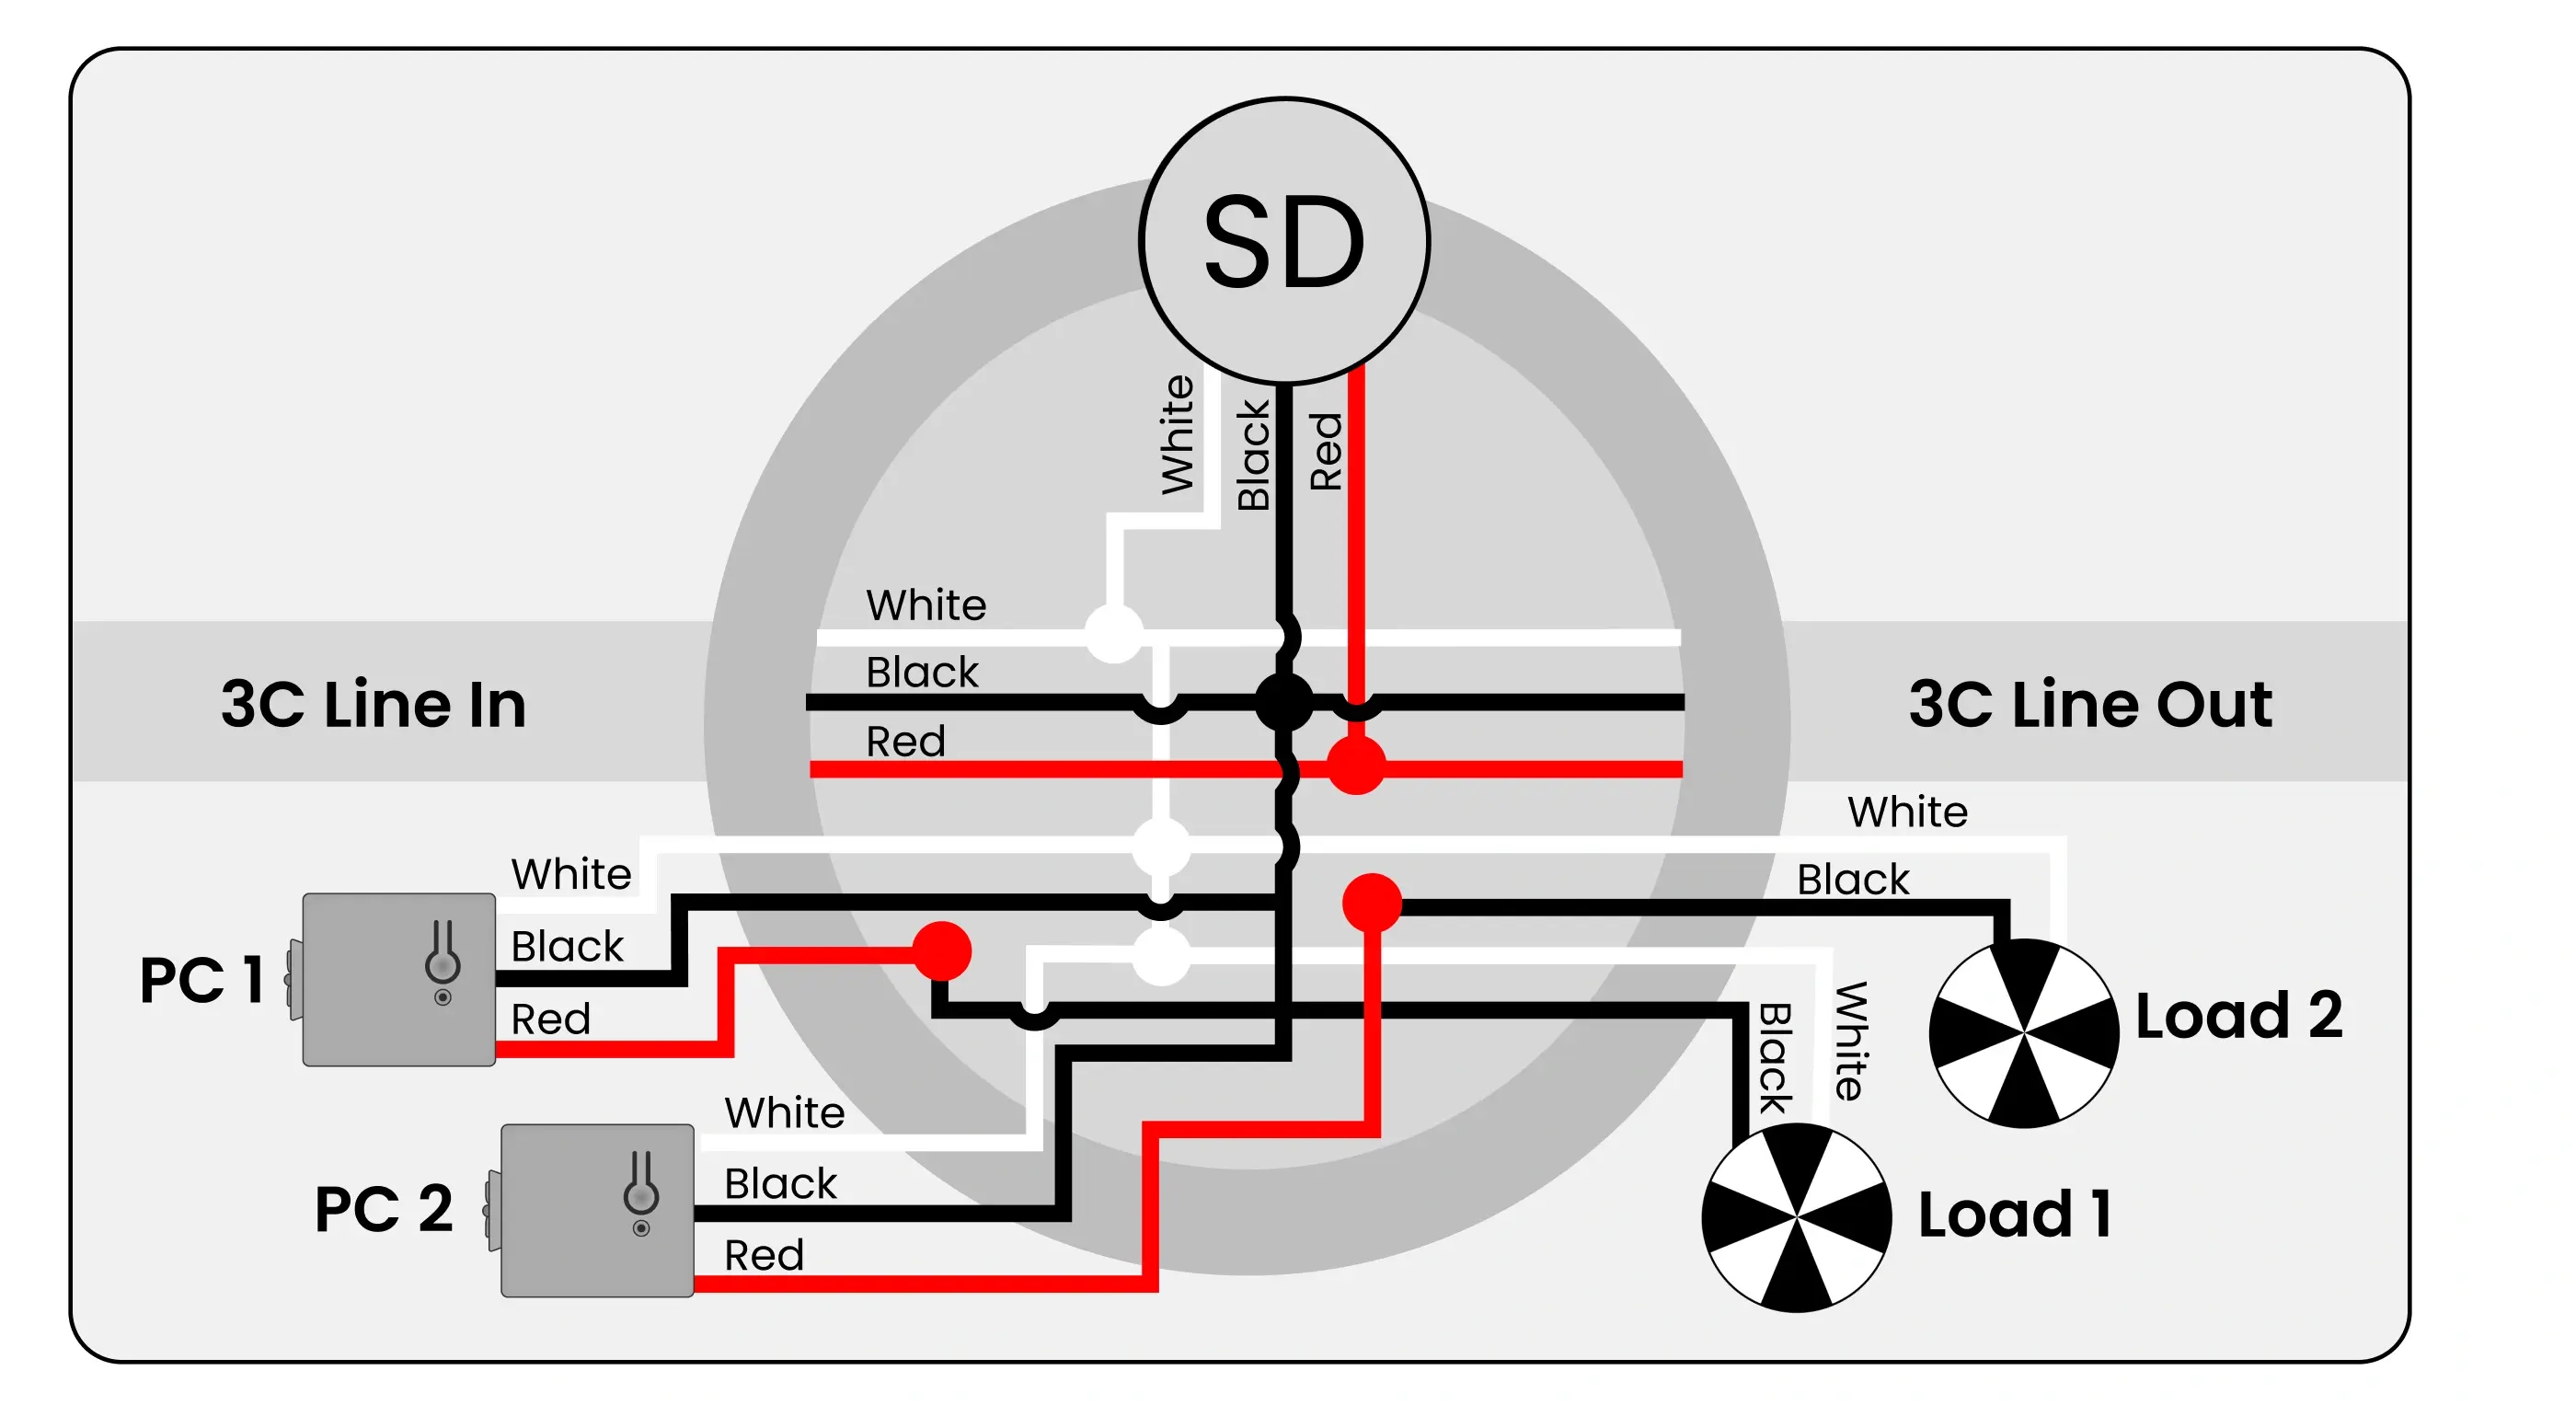
2h - Two Power Controllers for Light + Fan Combo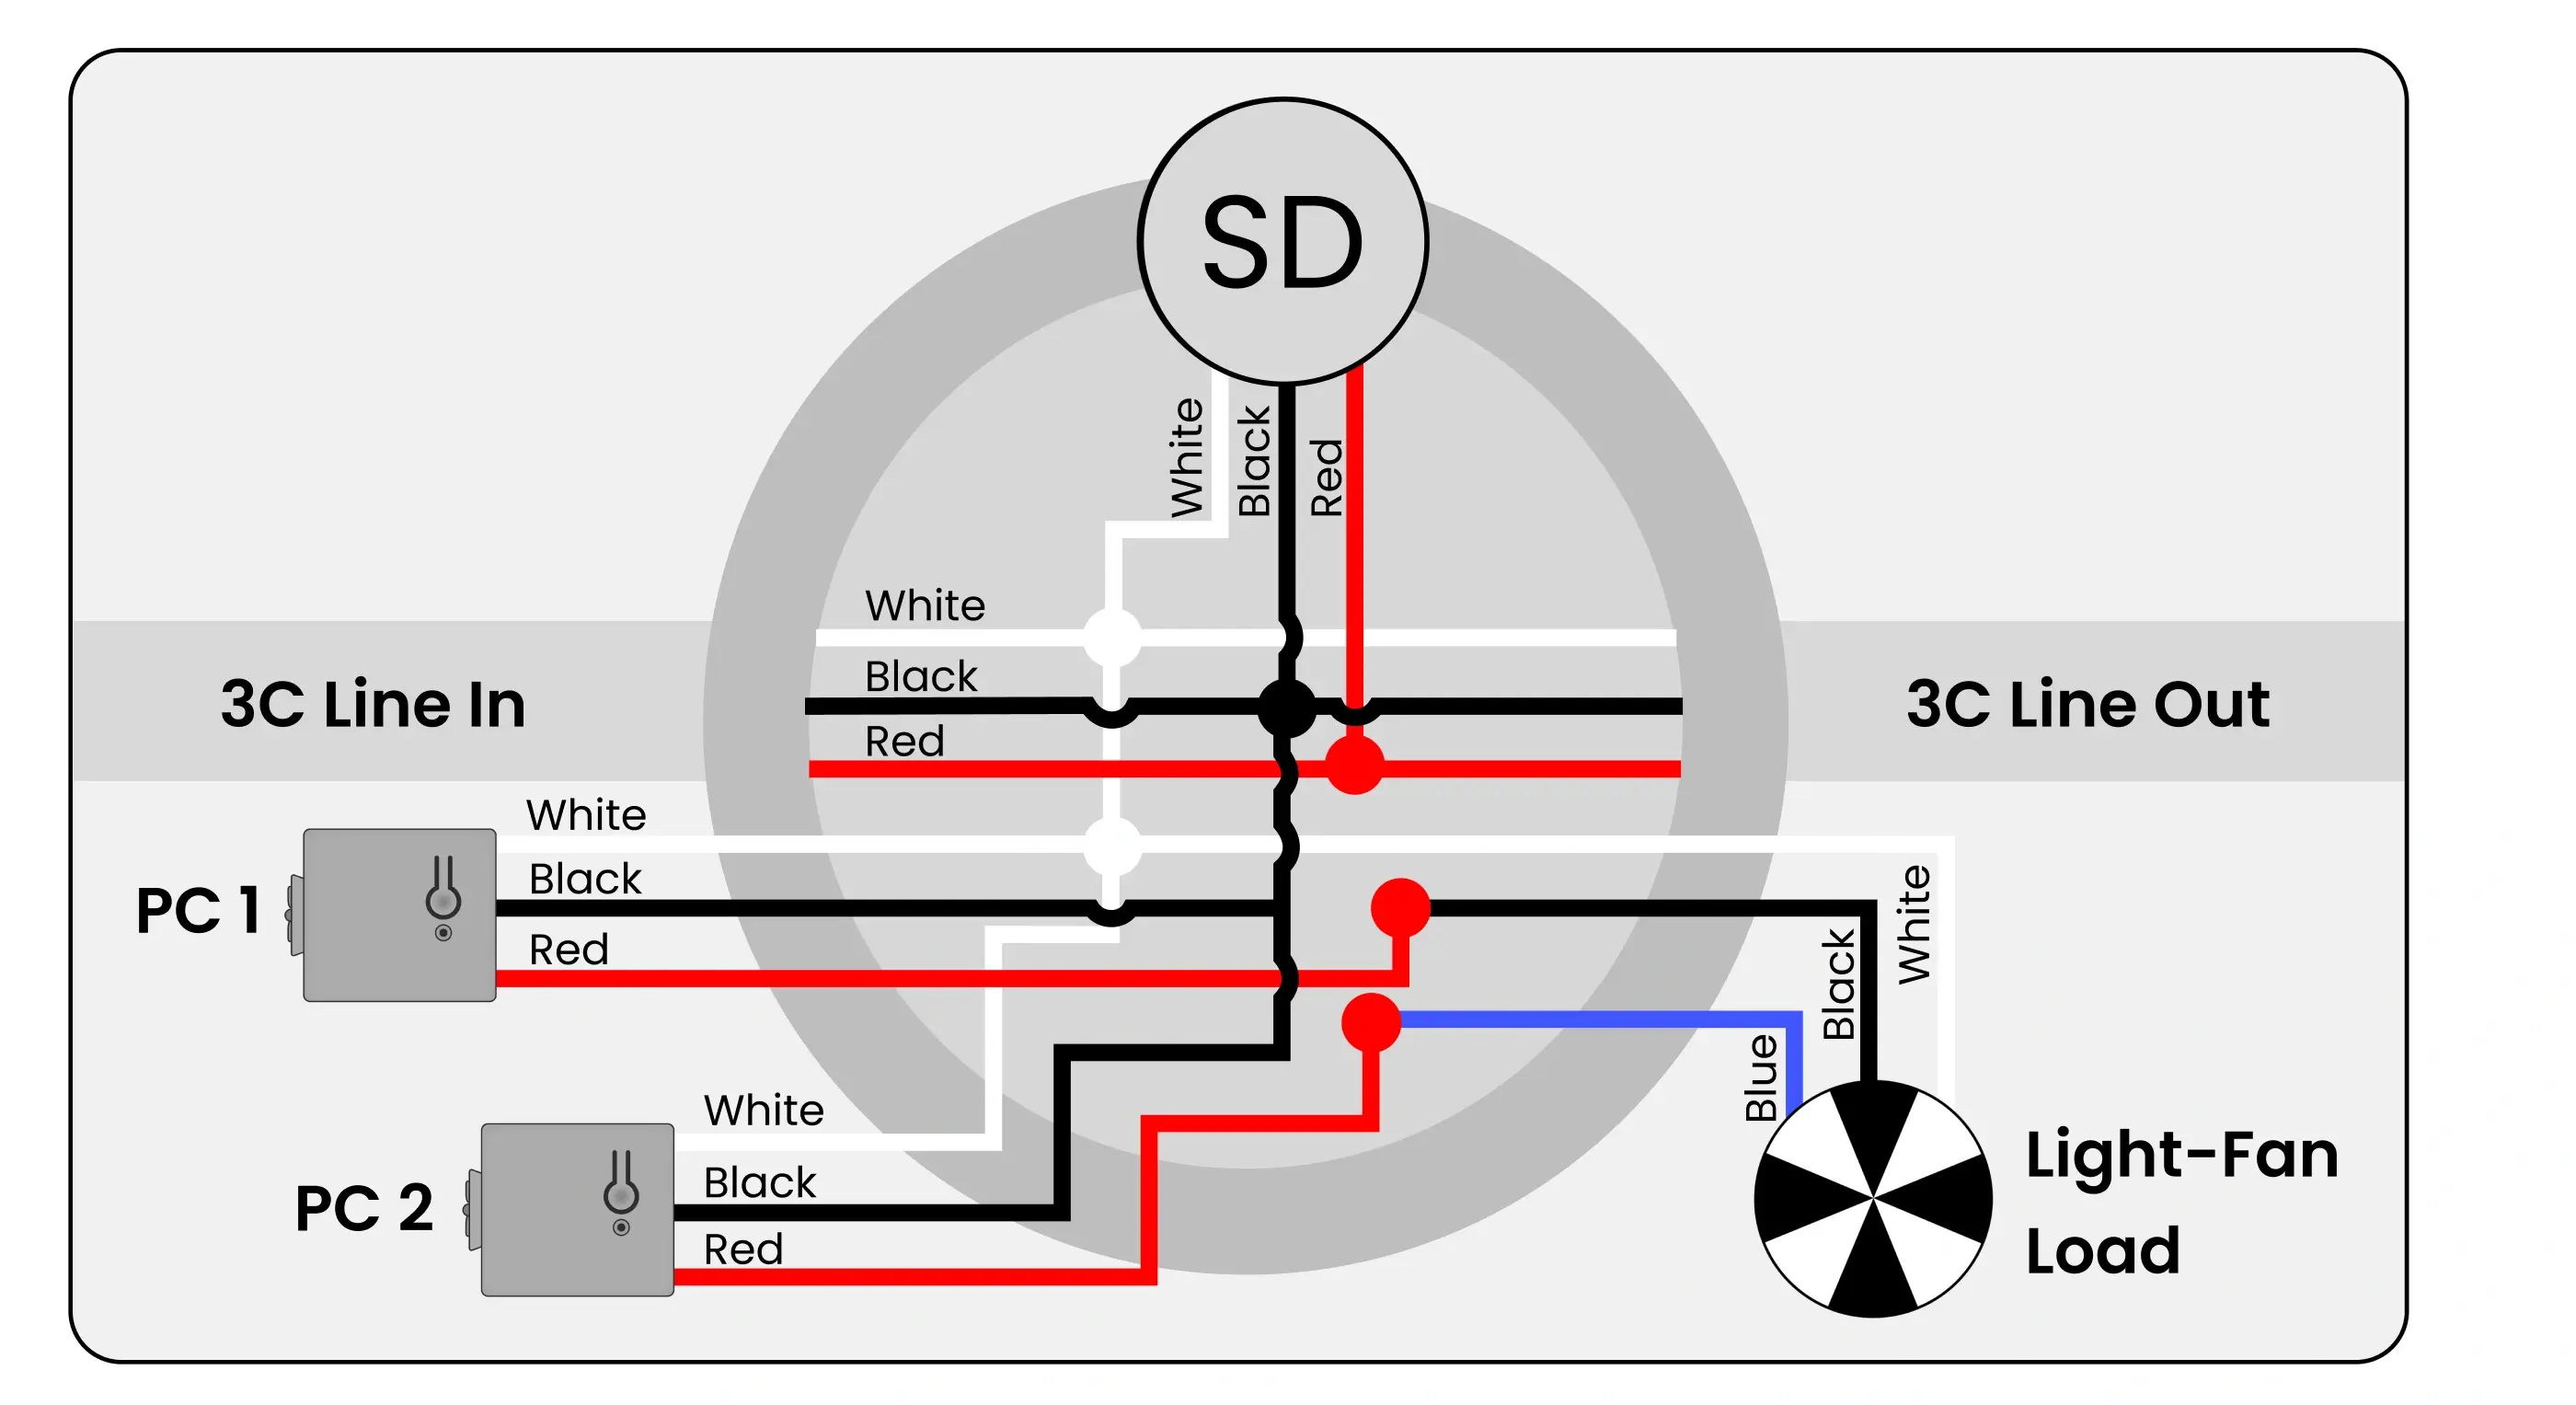
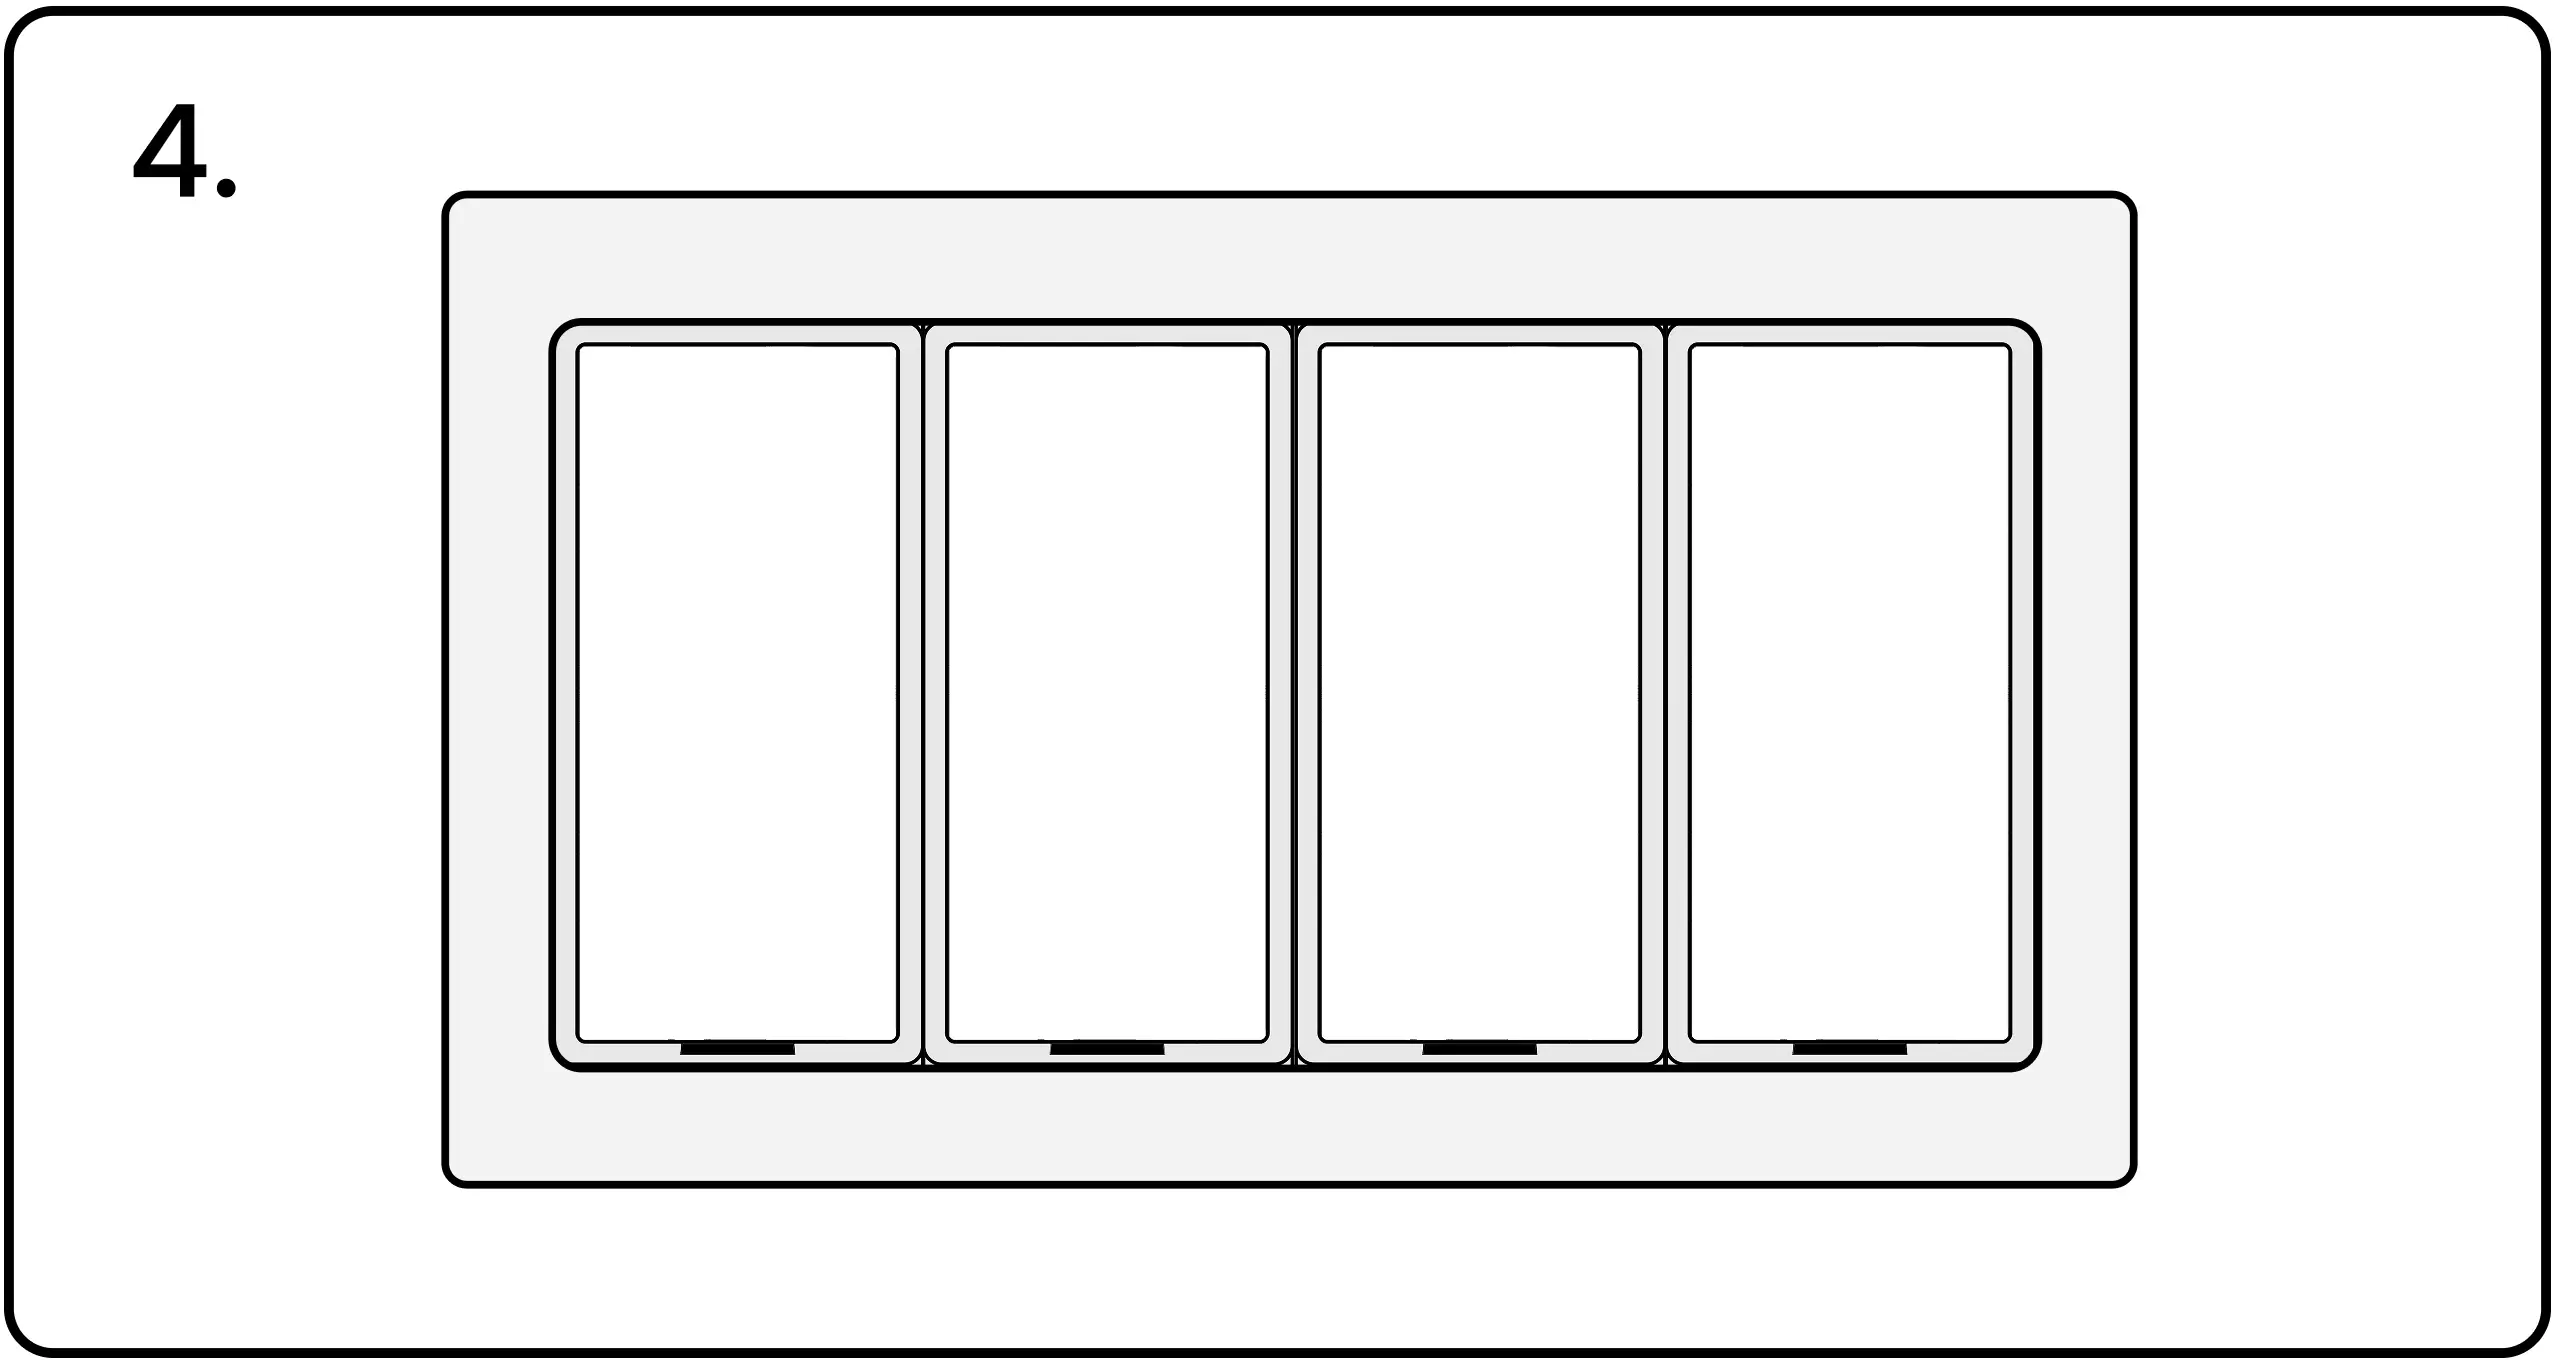
Mounting Switches Onto Wall
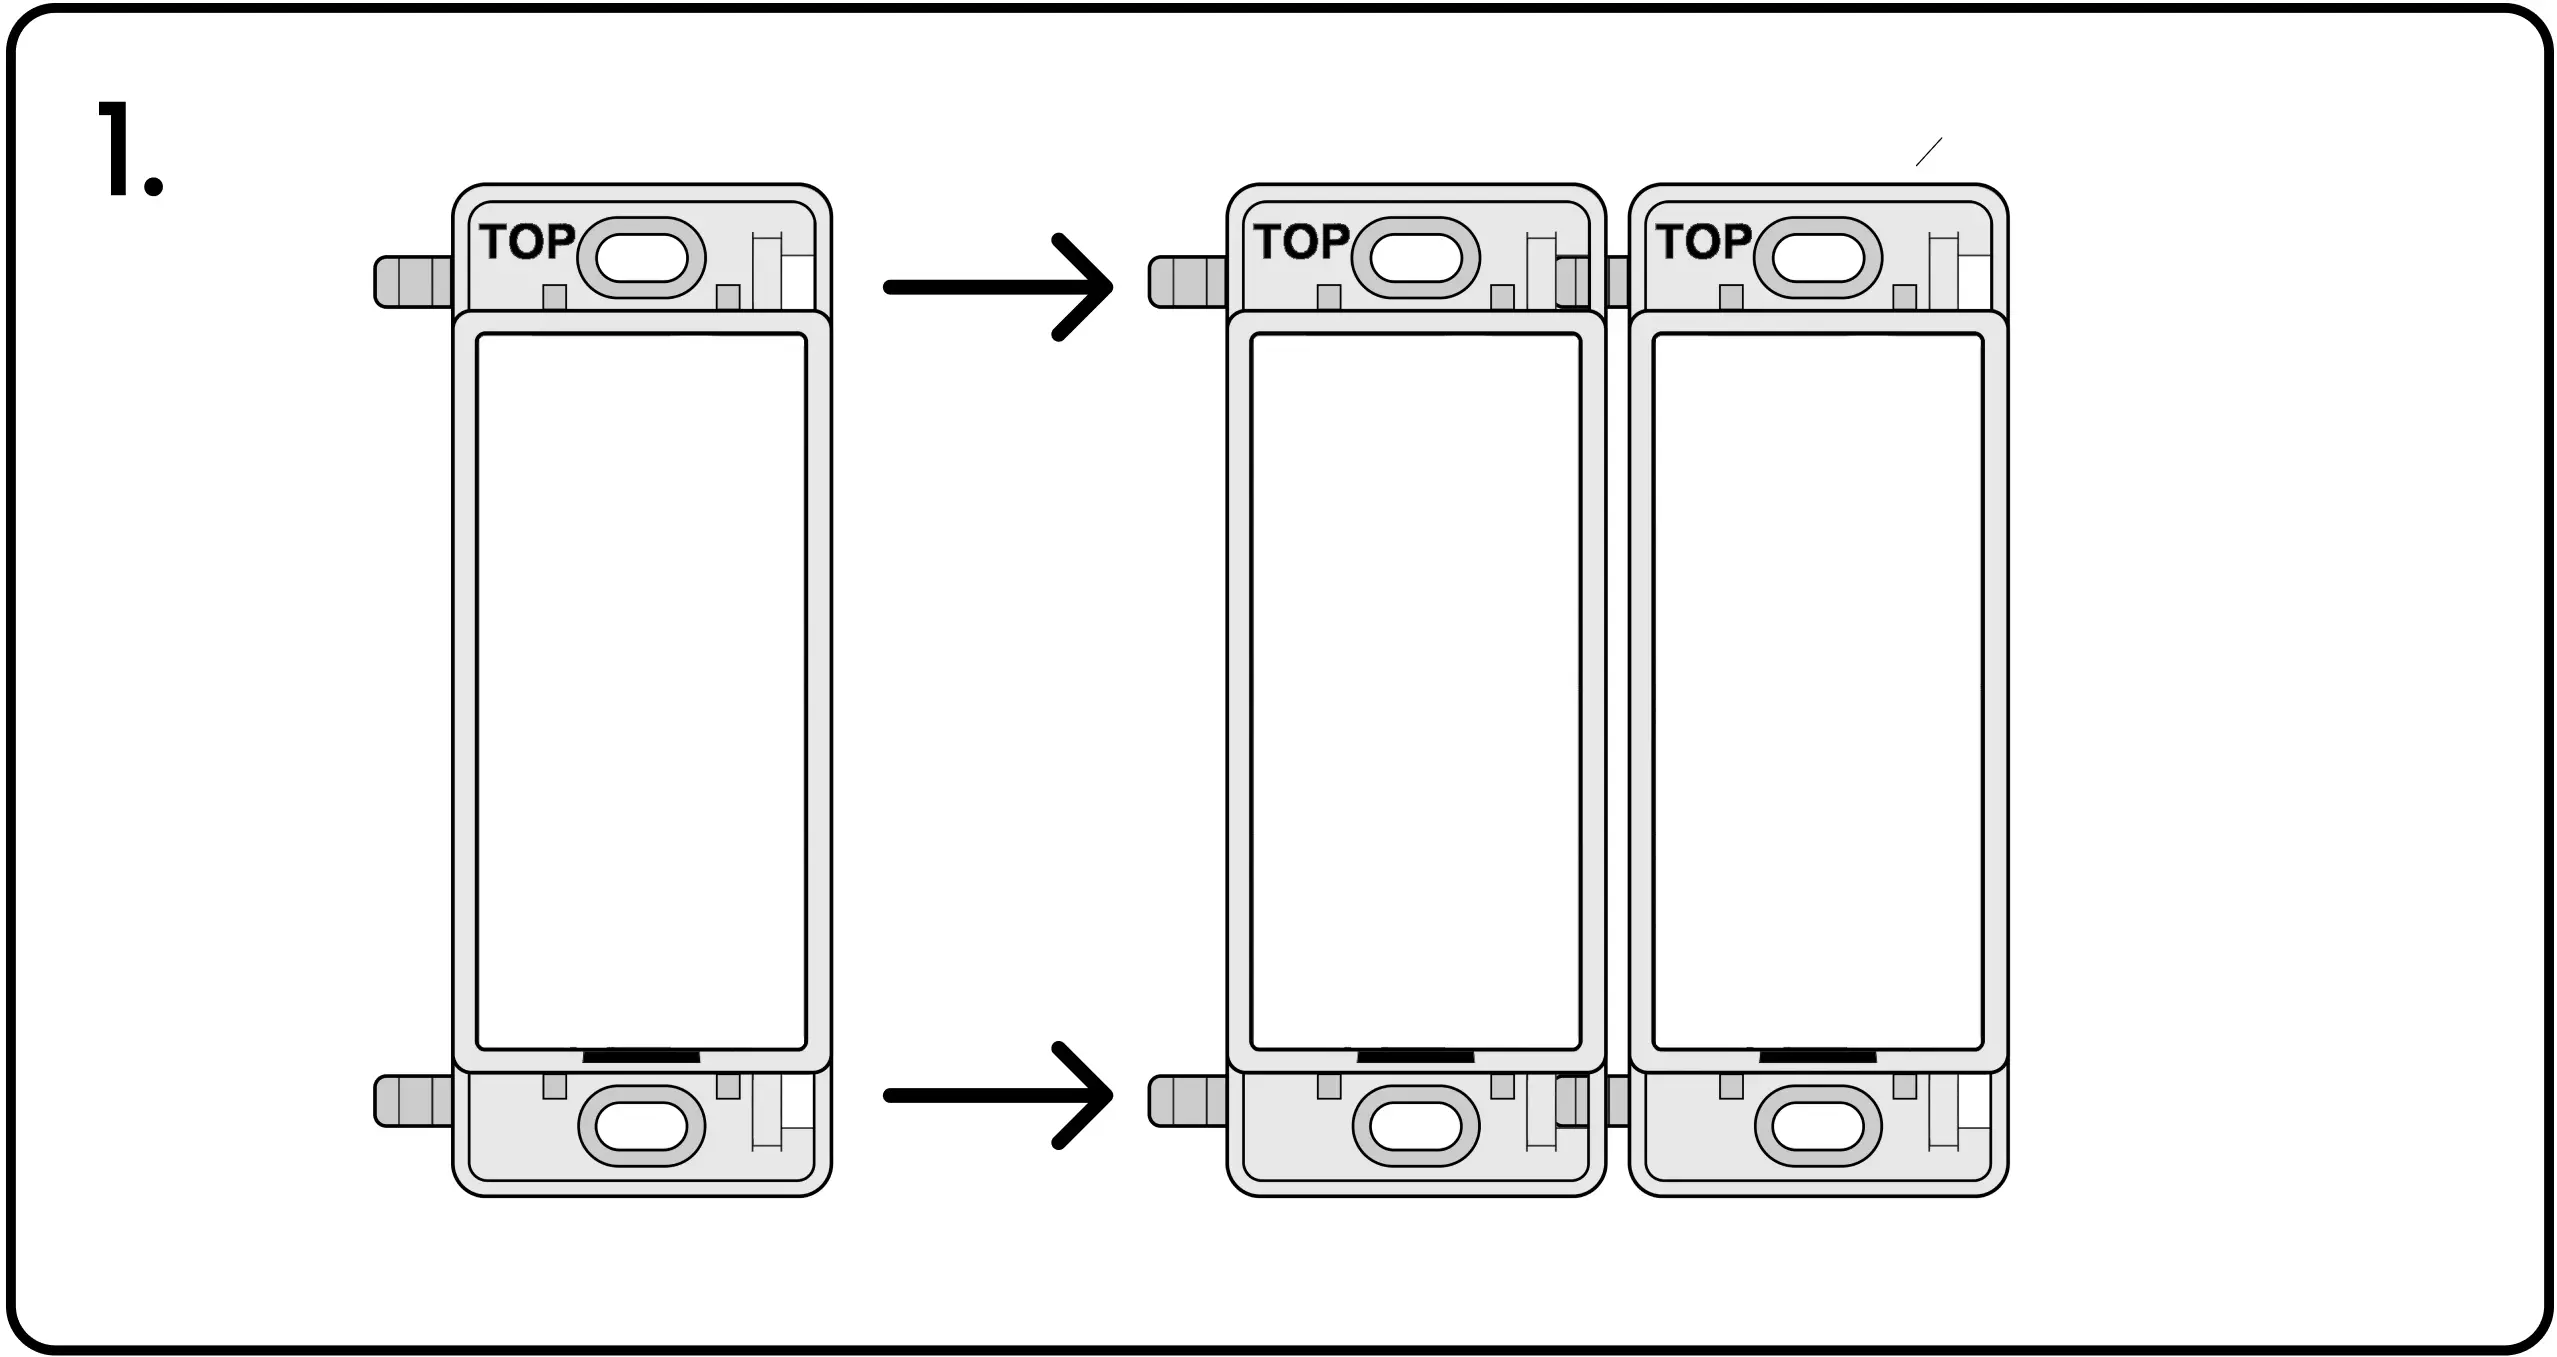
1. Create multi-gang switches by snapping two or more switches together as shown (2-, 3-, or 4-gang).
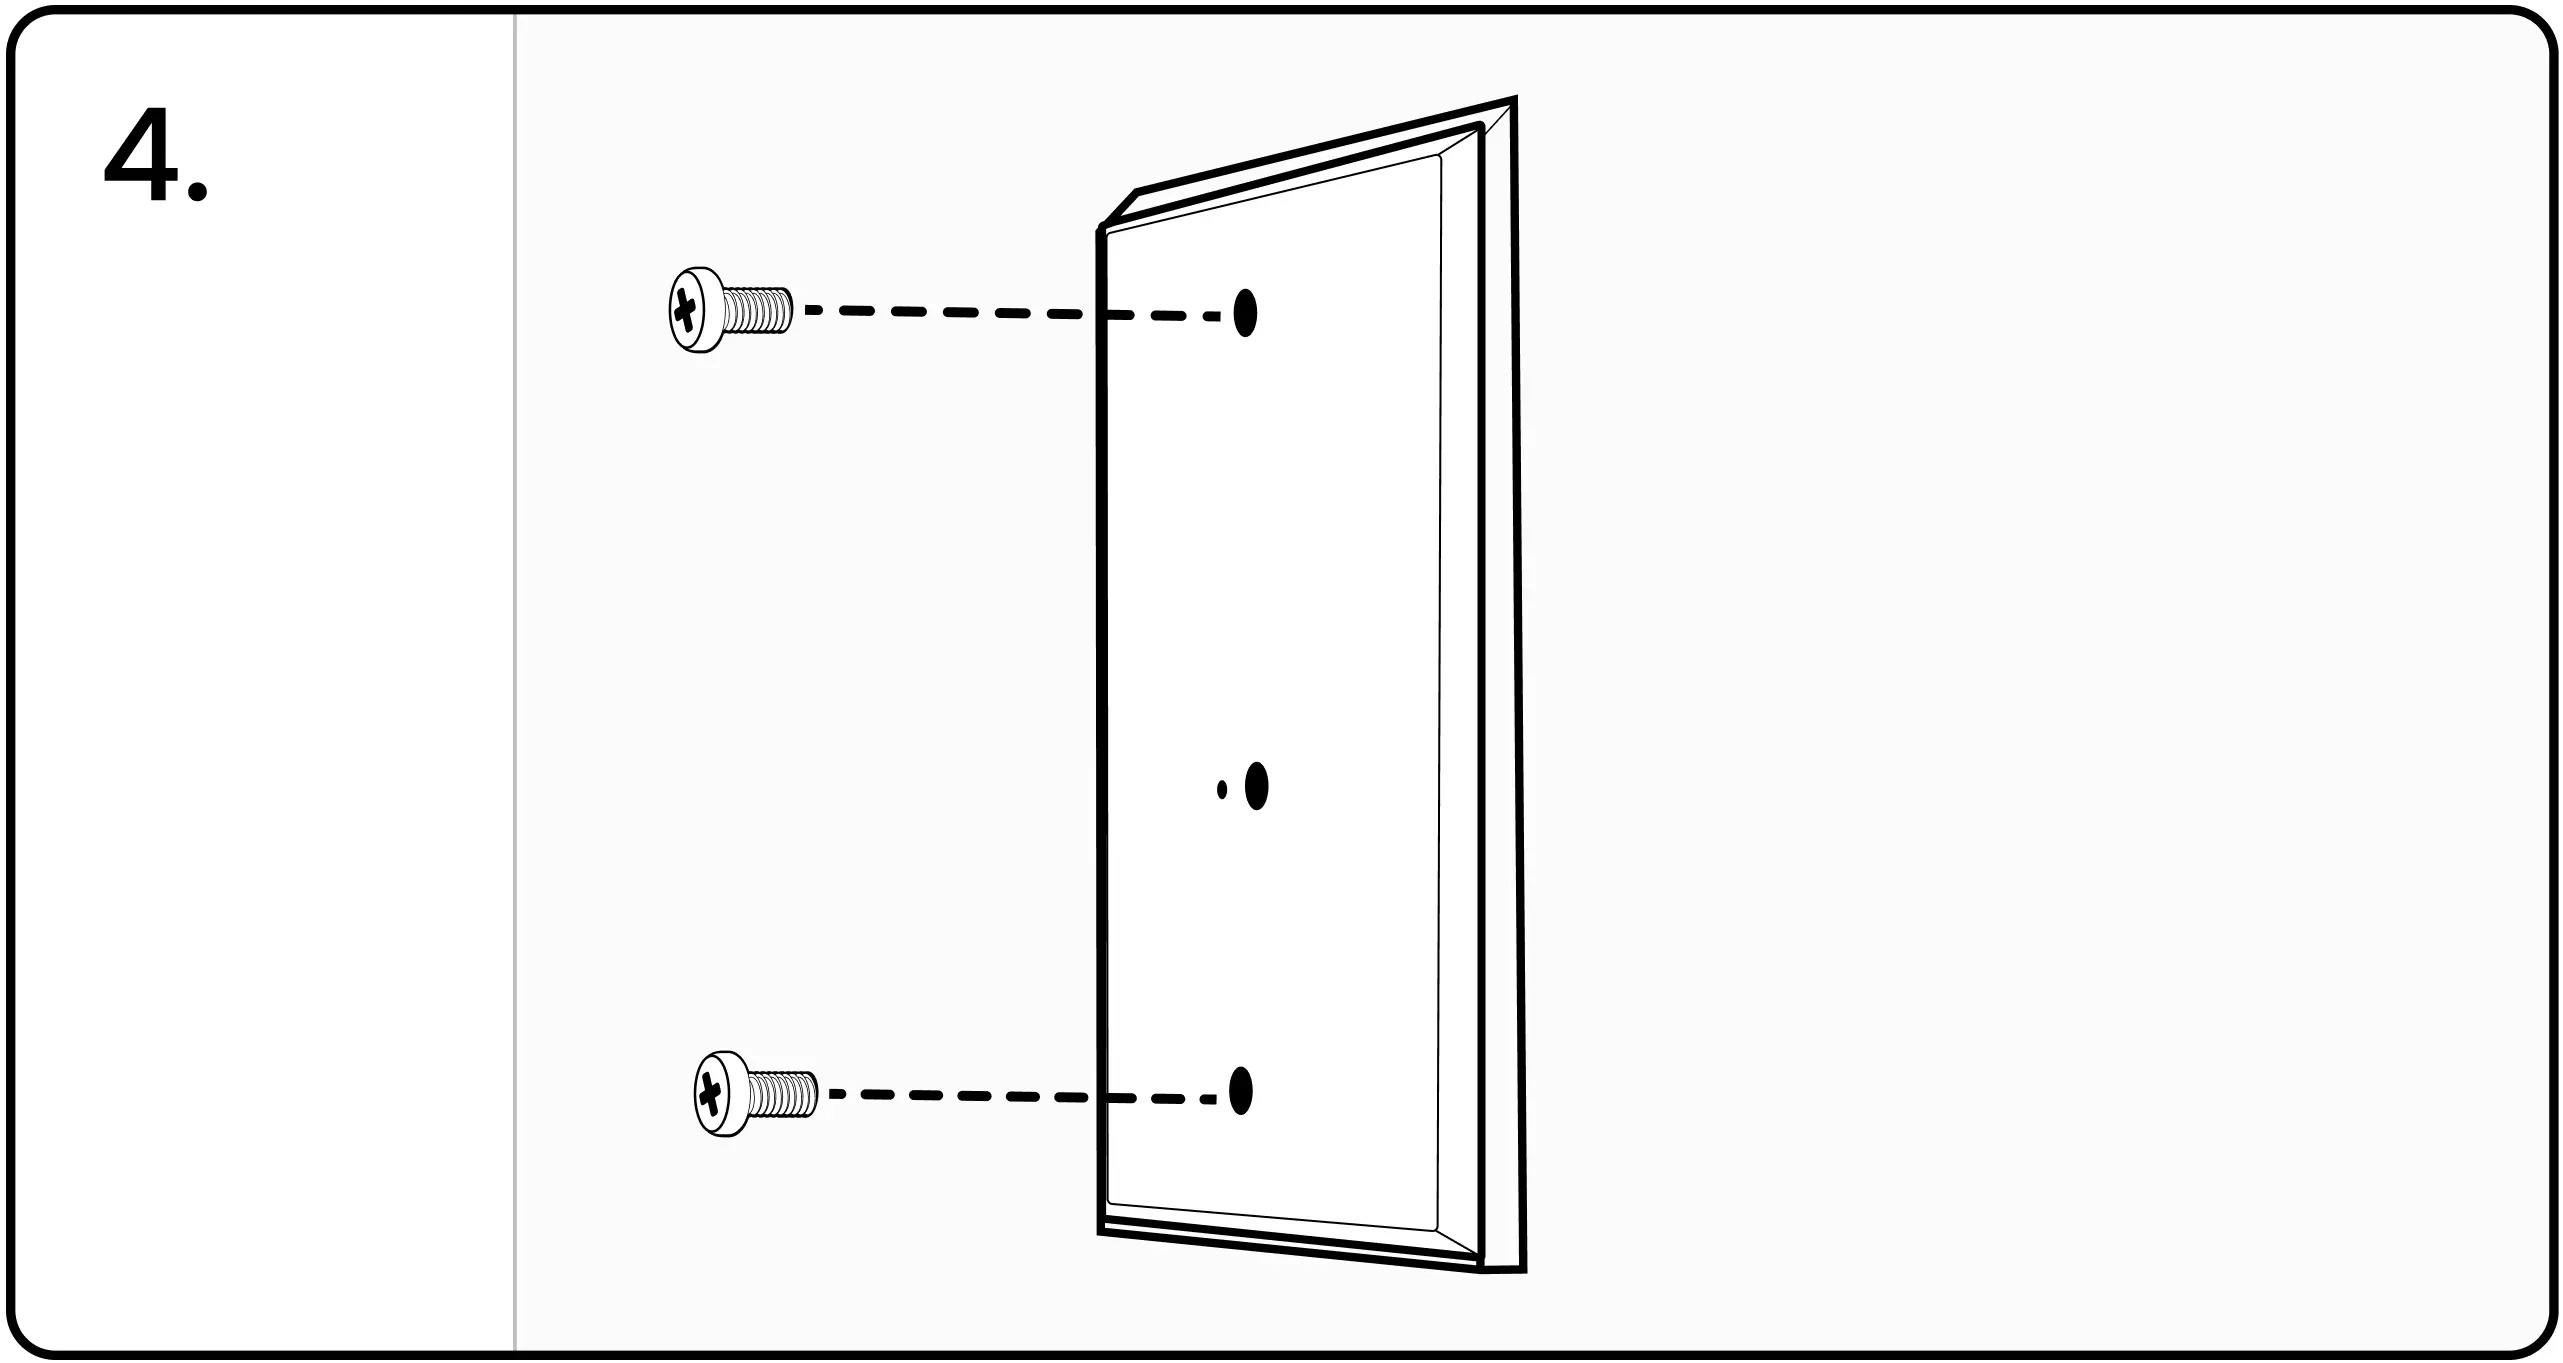
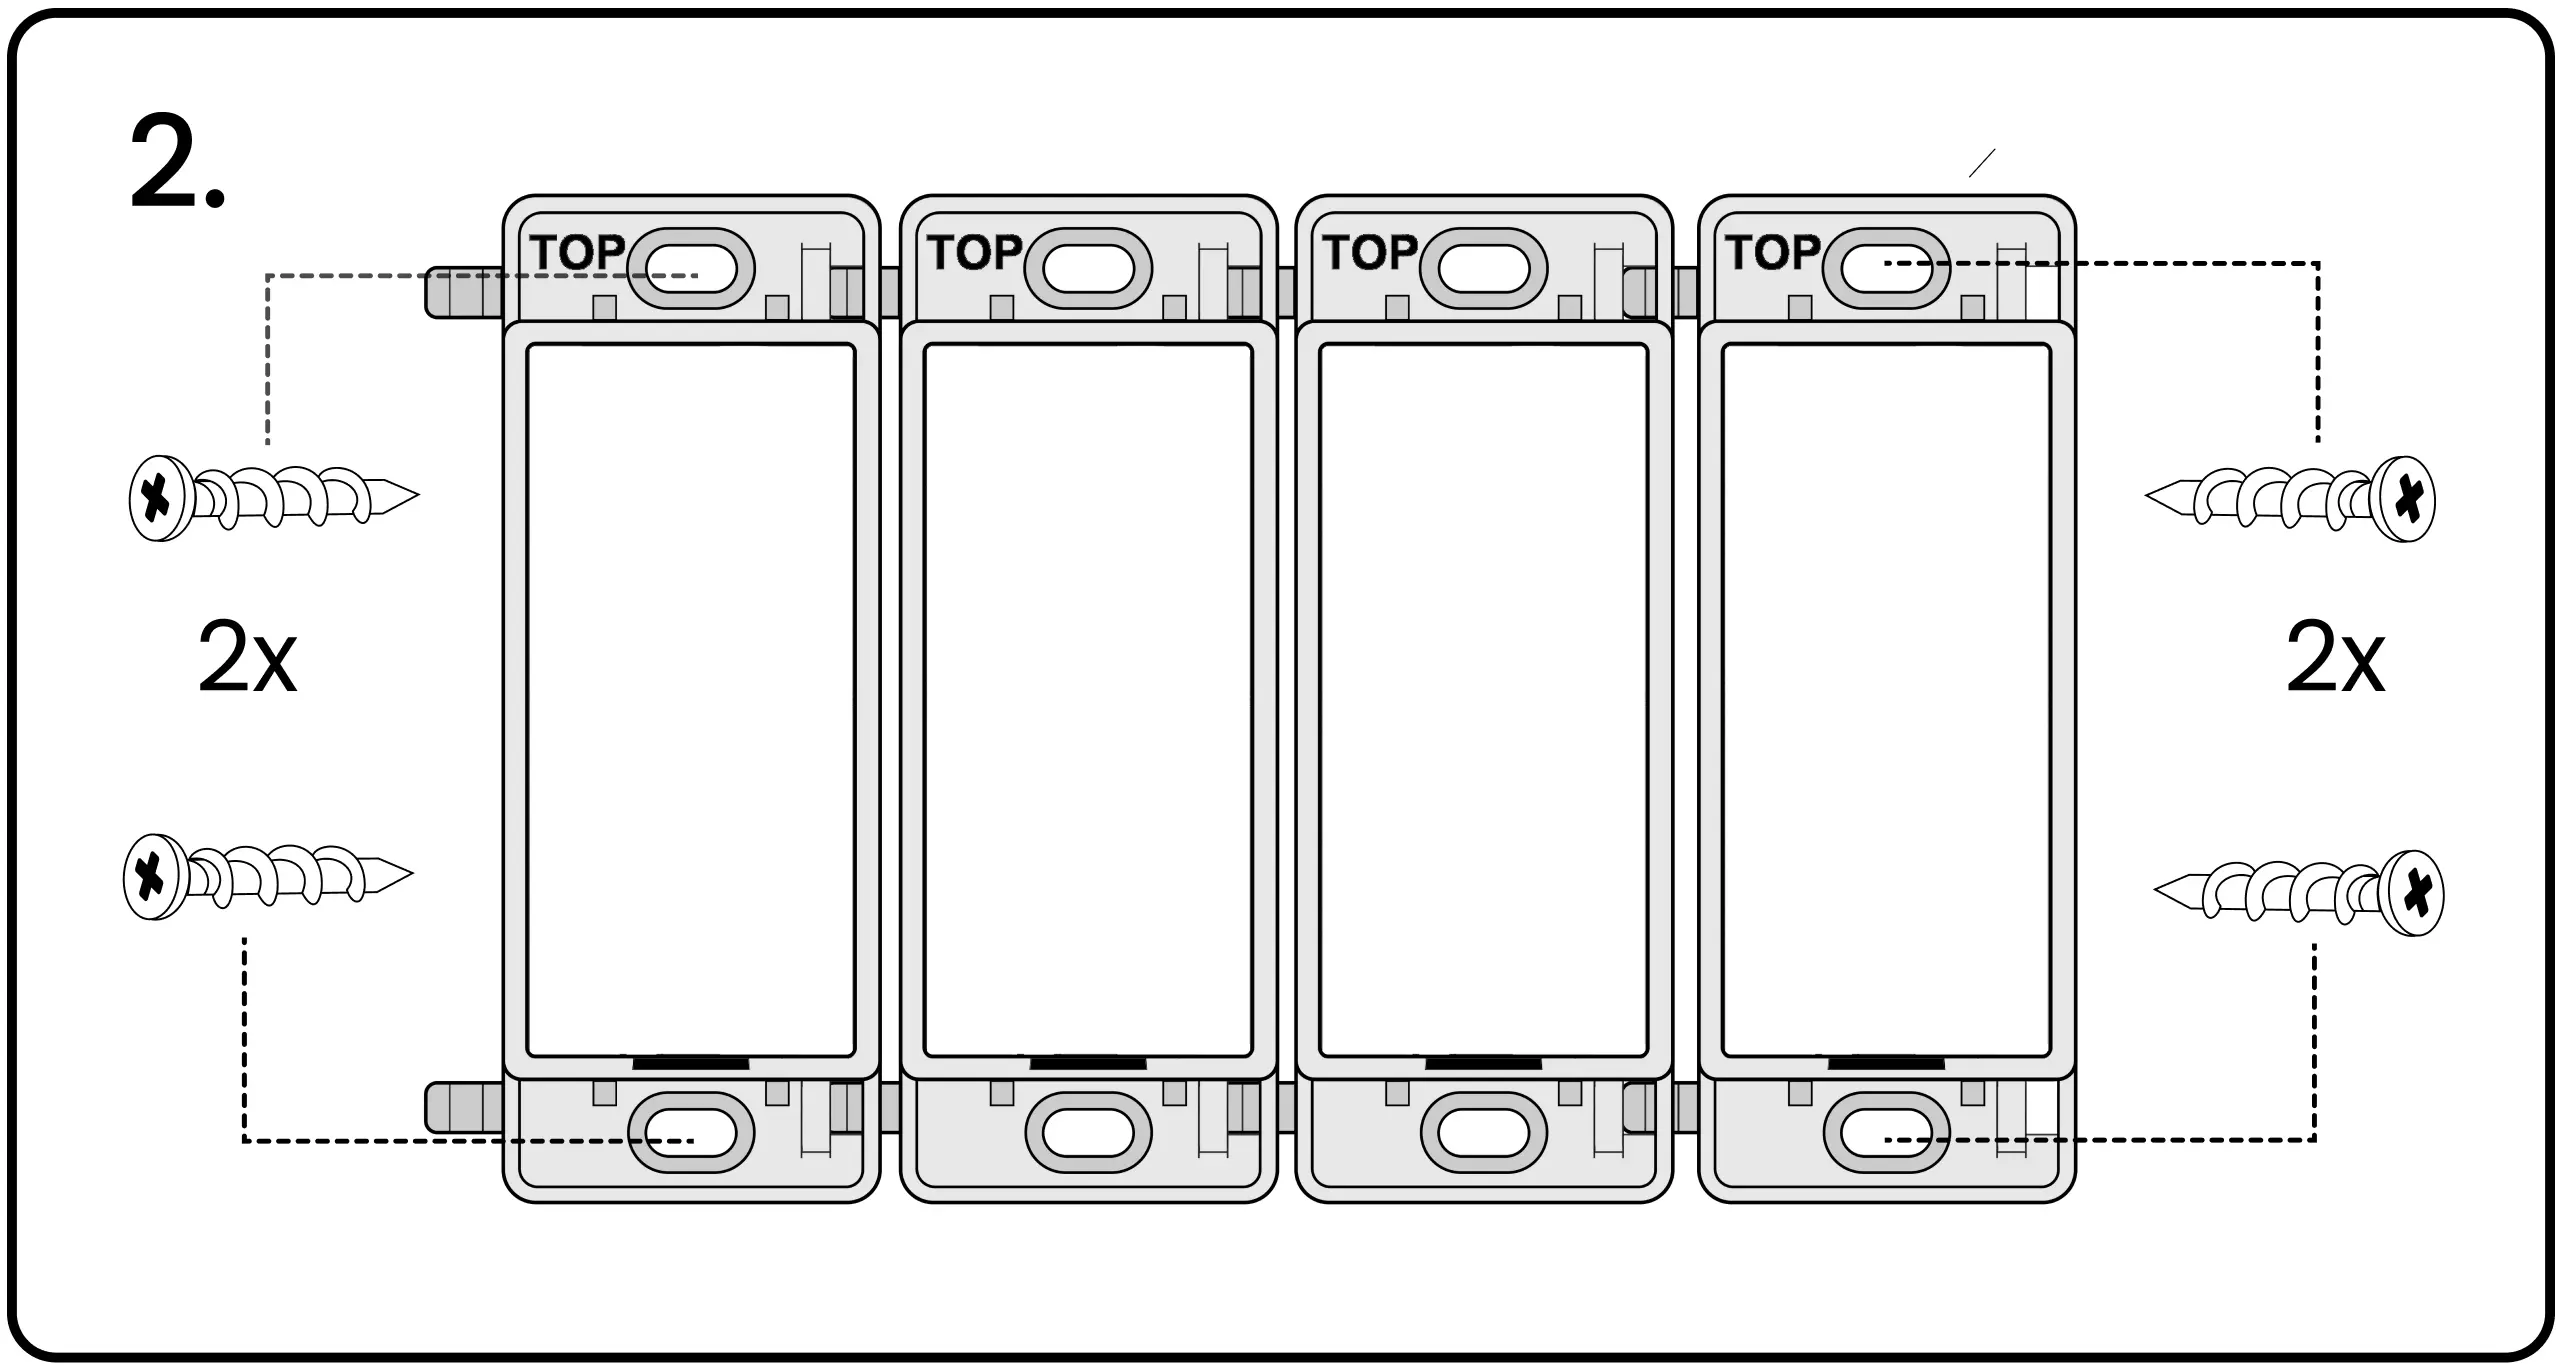
2. Switches are mounted with drywall/sheetrock anchor screws. Single-gang switches use two screws (one on the top and bottom). Multi-gang switches use four screws (one on each corner).
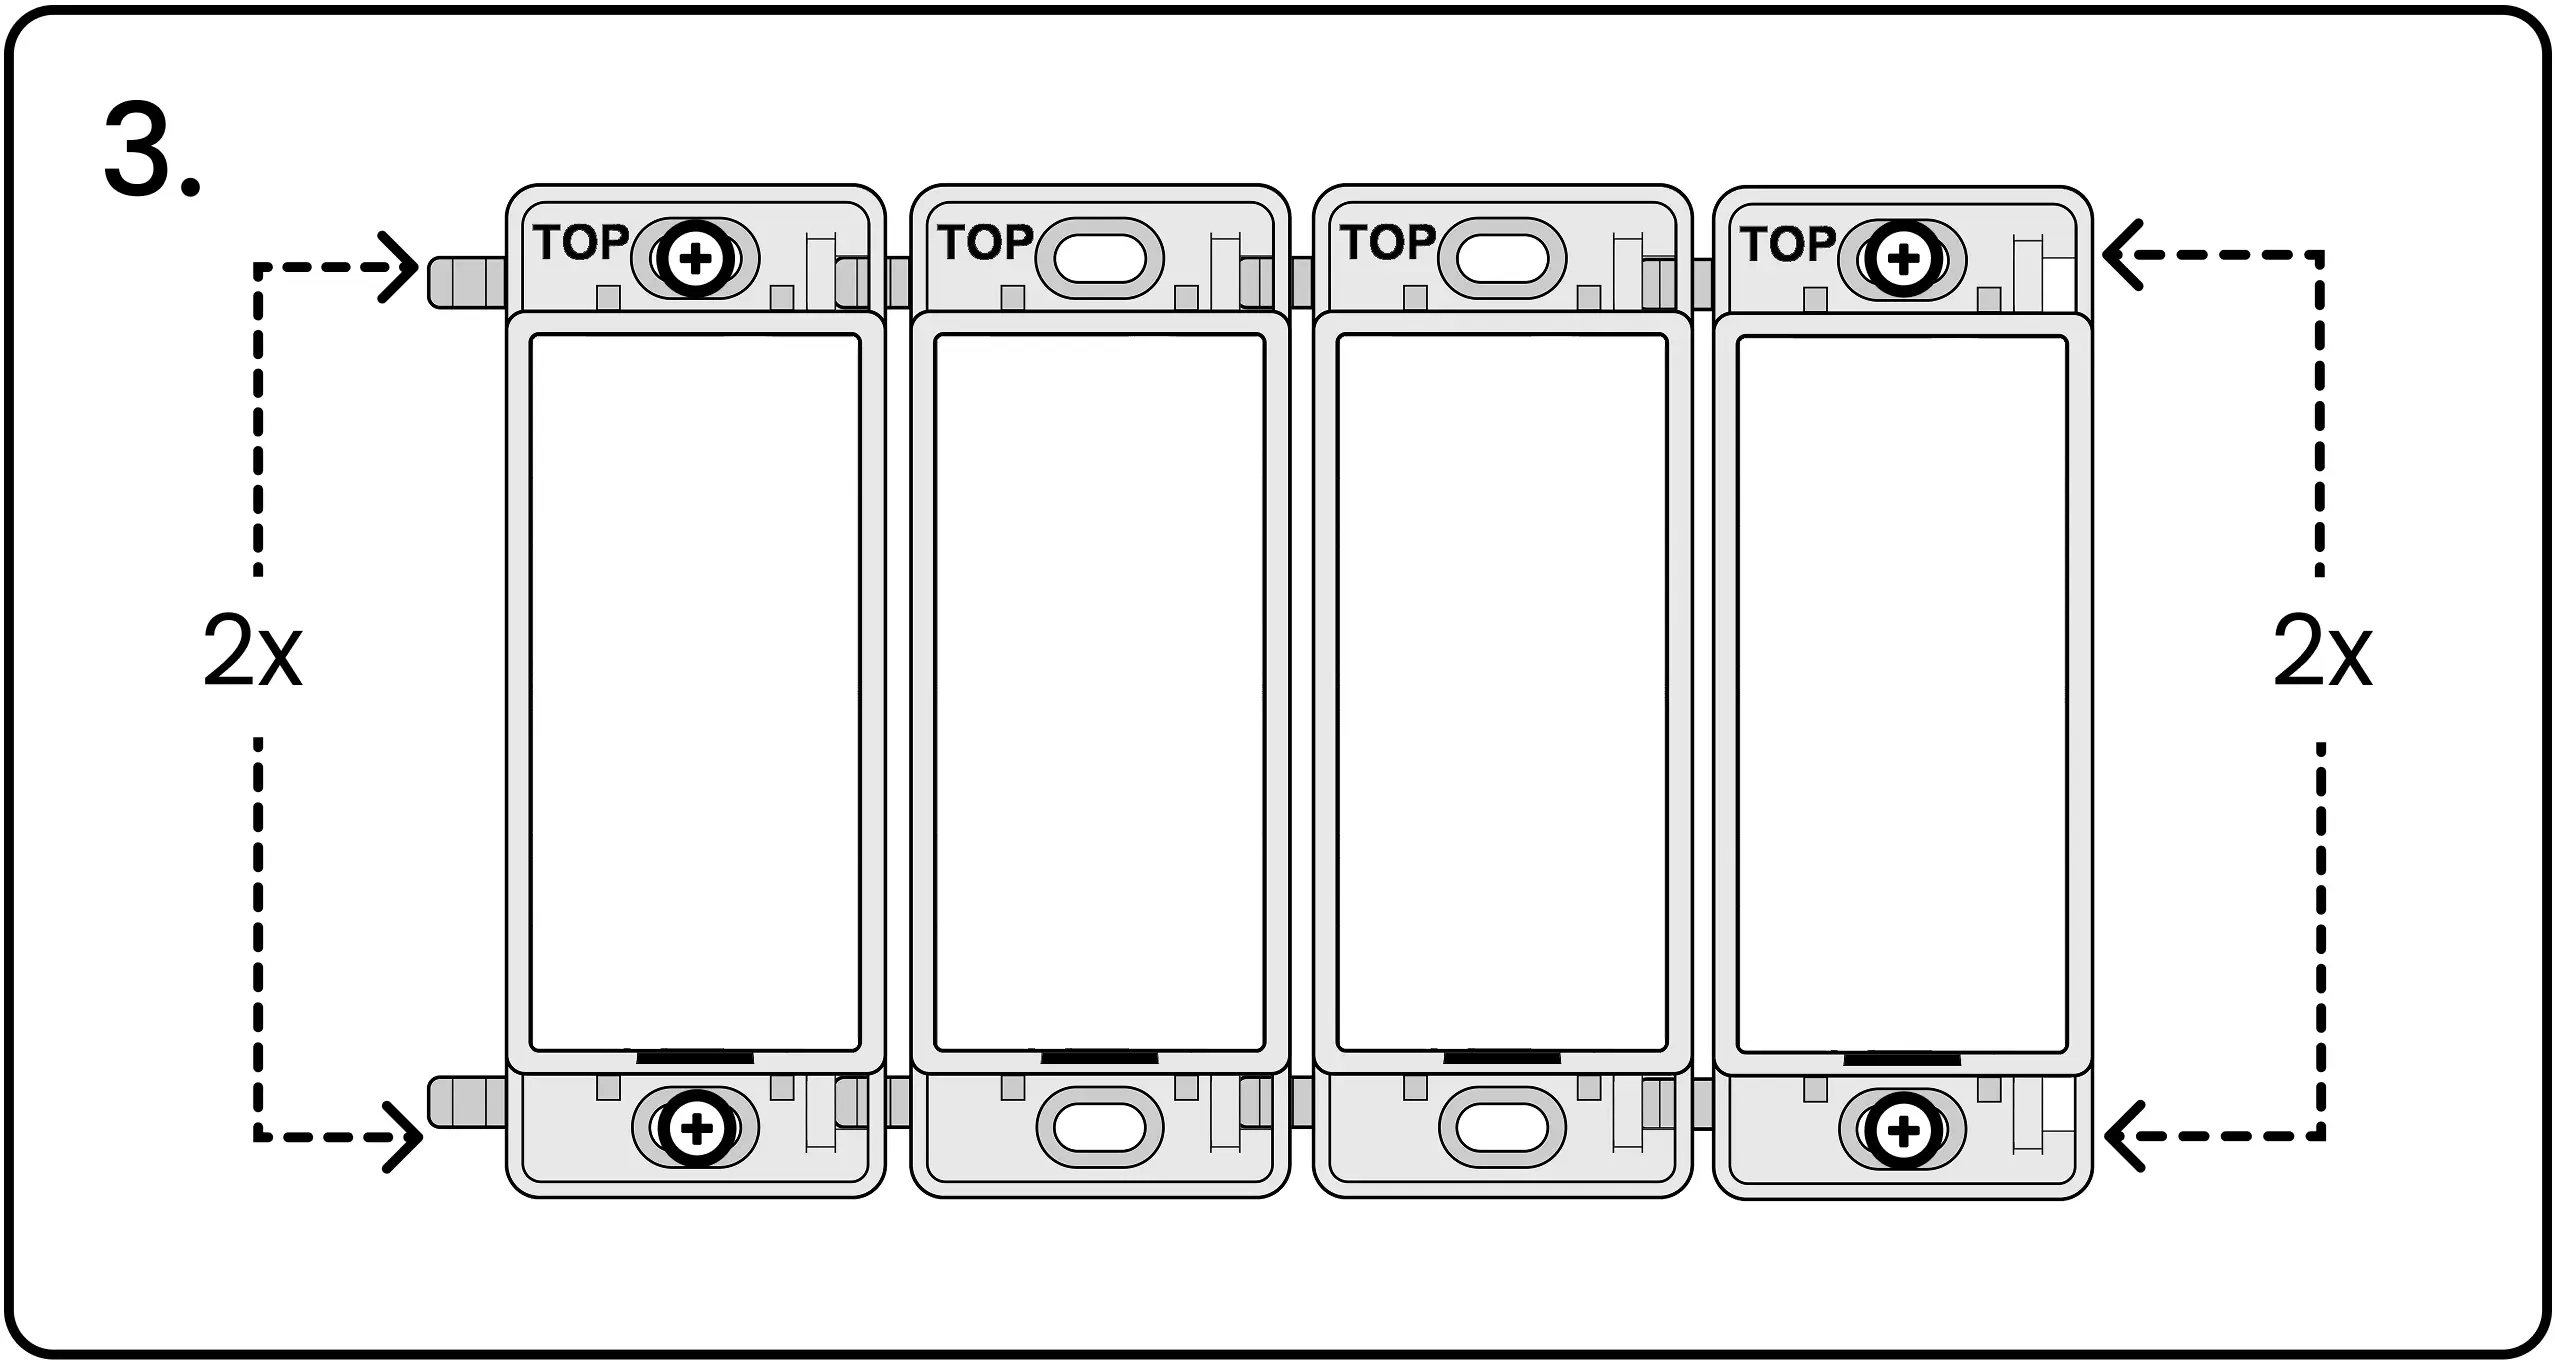
3. With a screwdriver, gently screw the screws into the wall to secure the switch.
4. Finish the installation with a screwless snap-on Levven wall plate.
Mounting the Levven Q Gateway
1. Secure the mounting bracket to a wall stud using two screws.
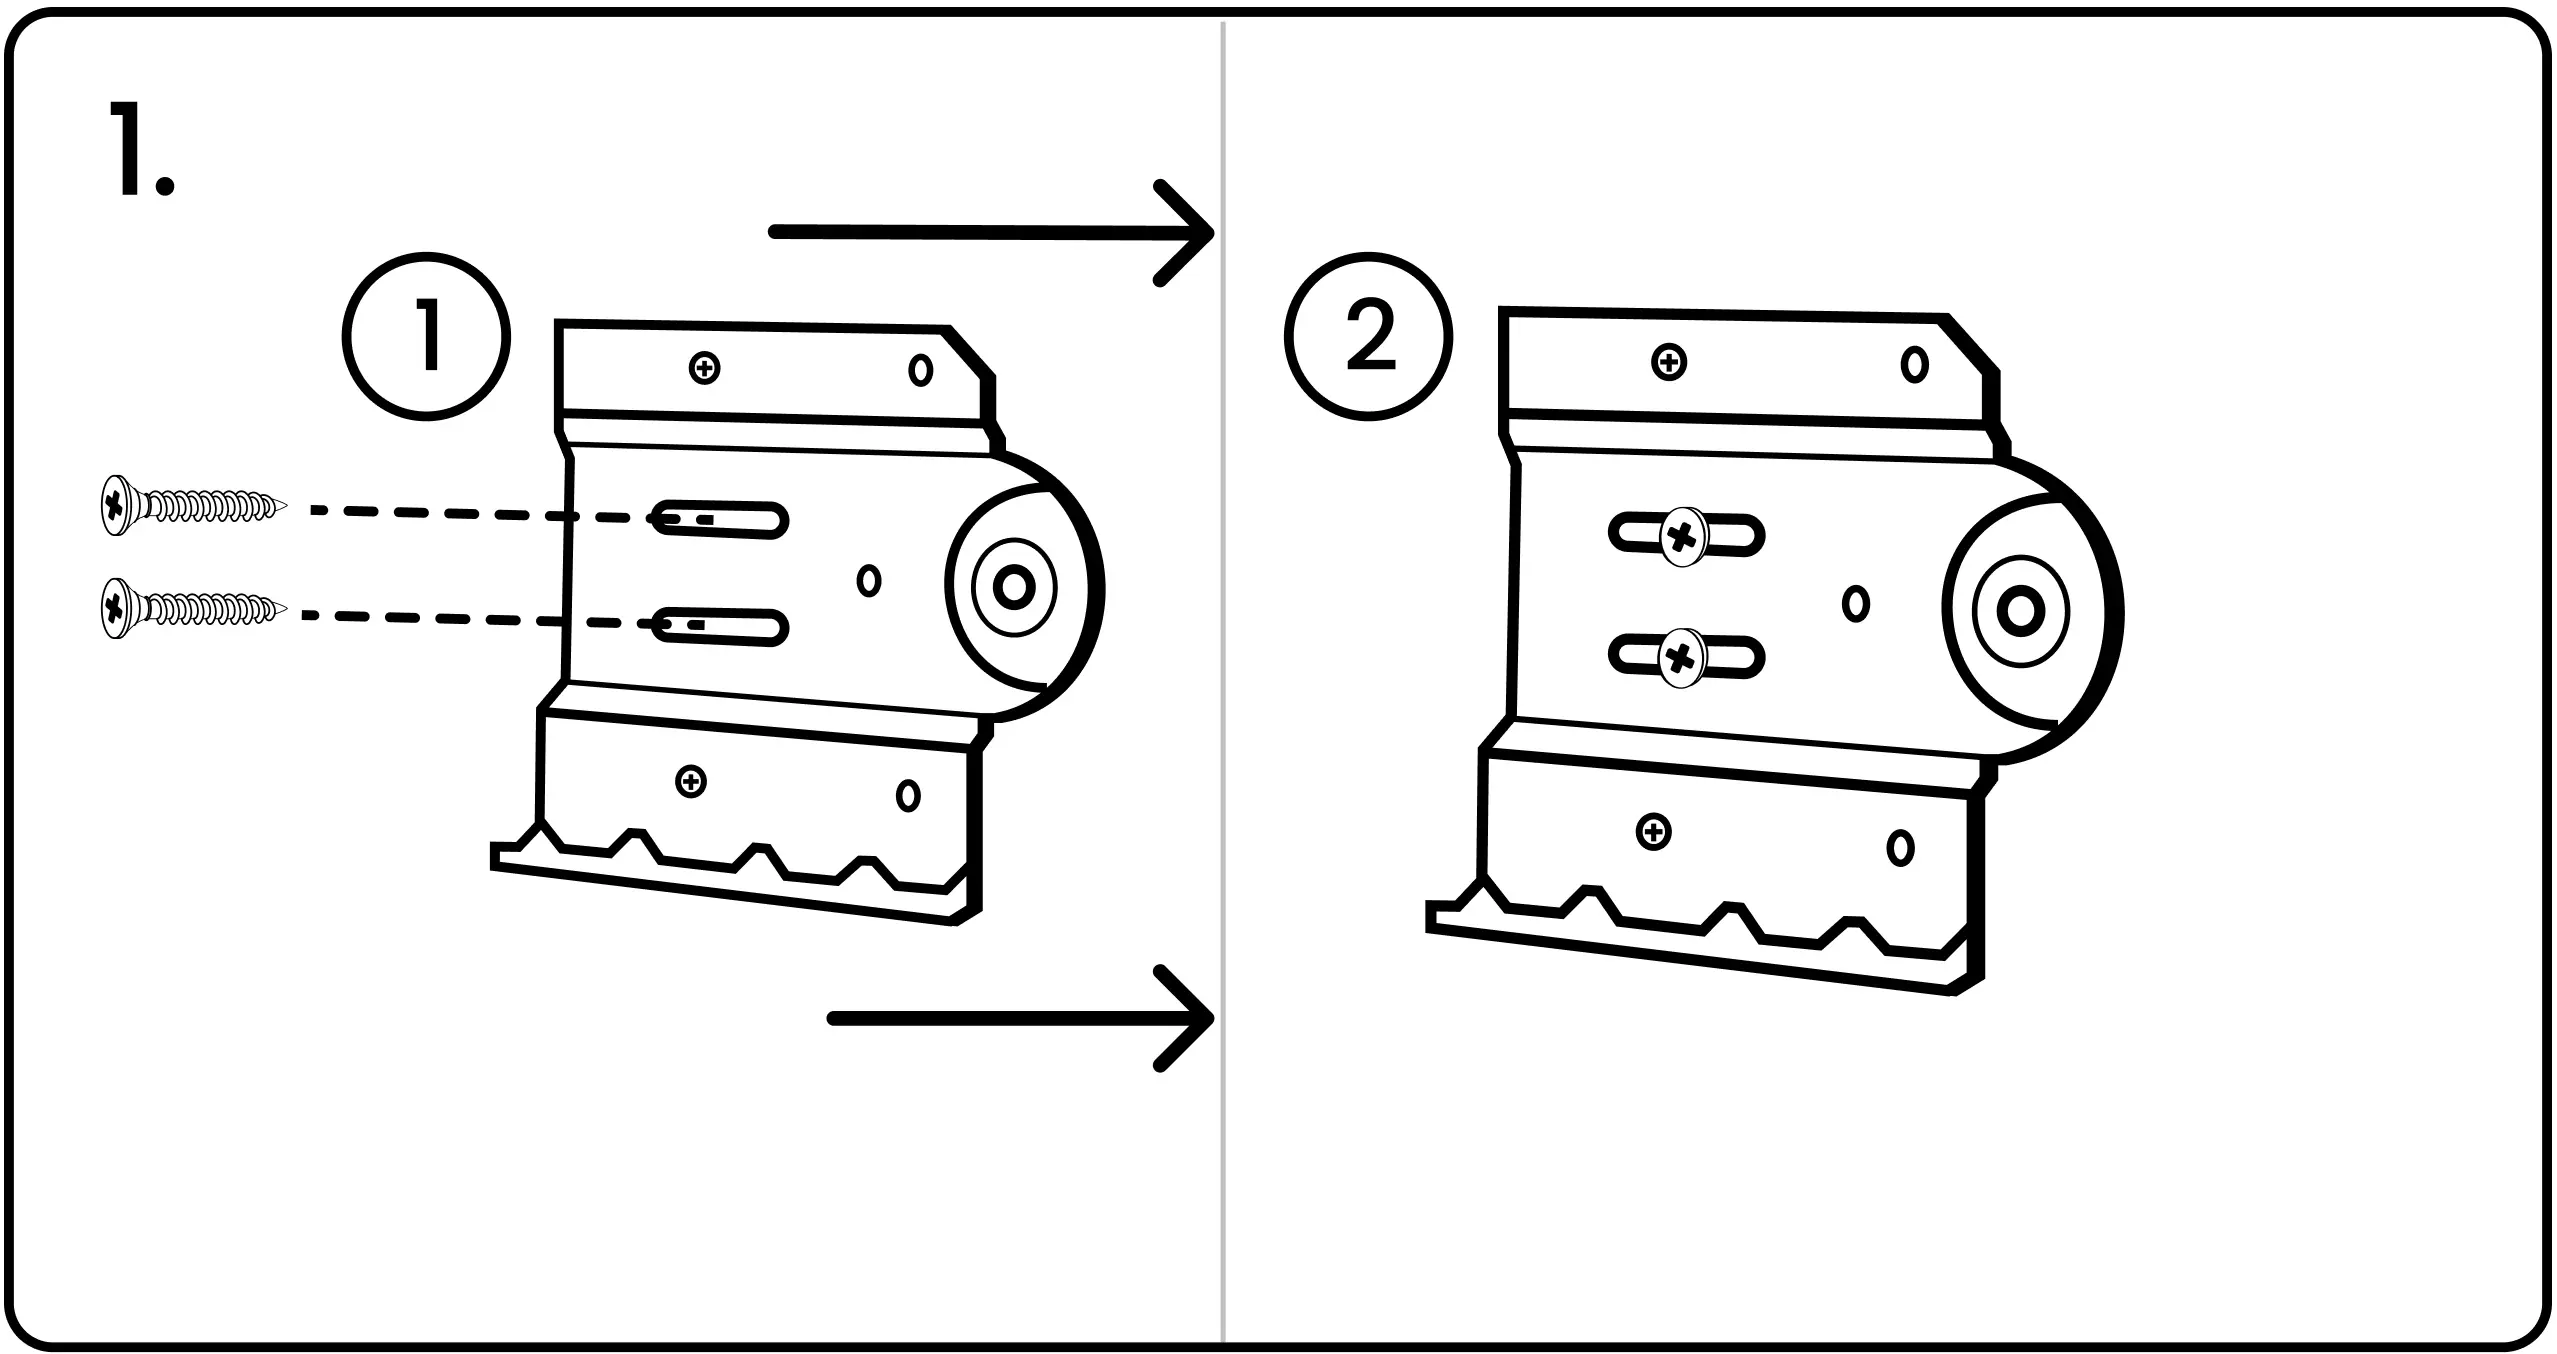
2. Align the slots on the Q Gateway with those on the mounting bracket.
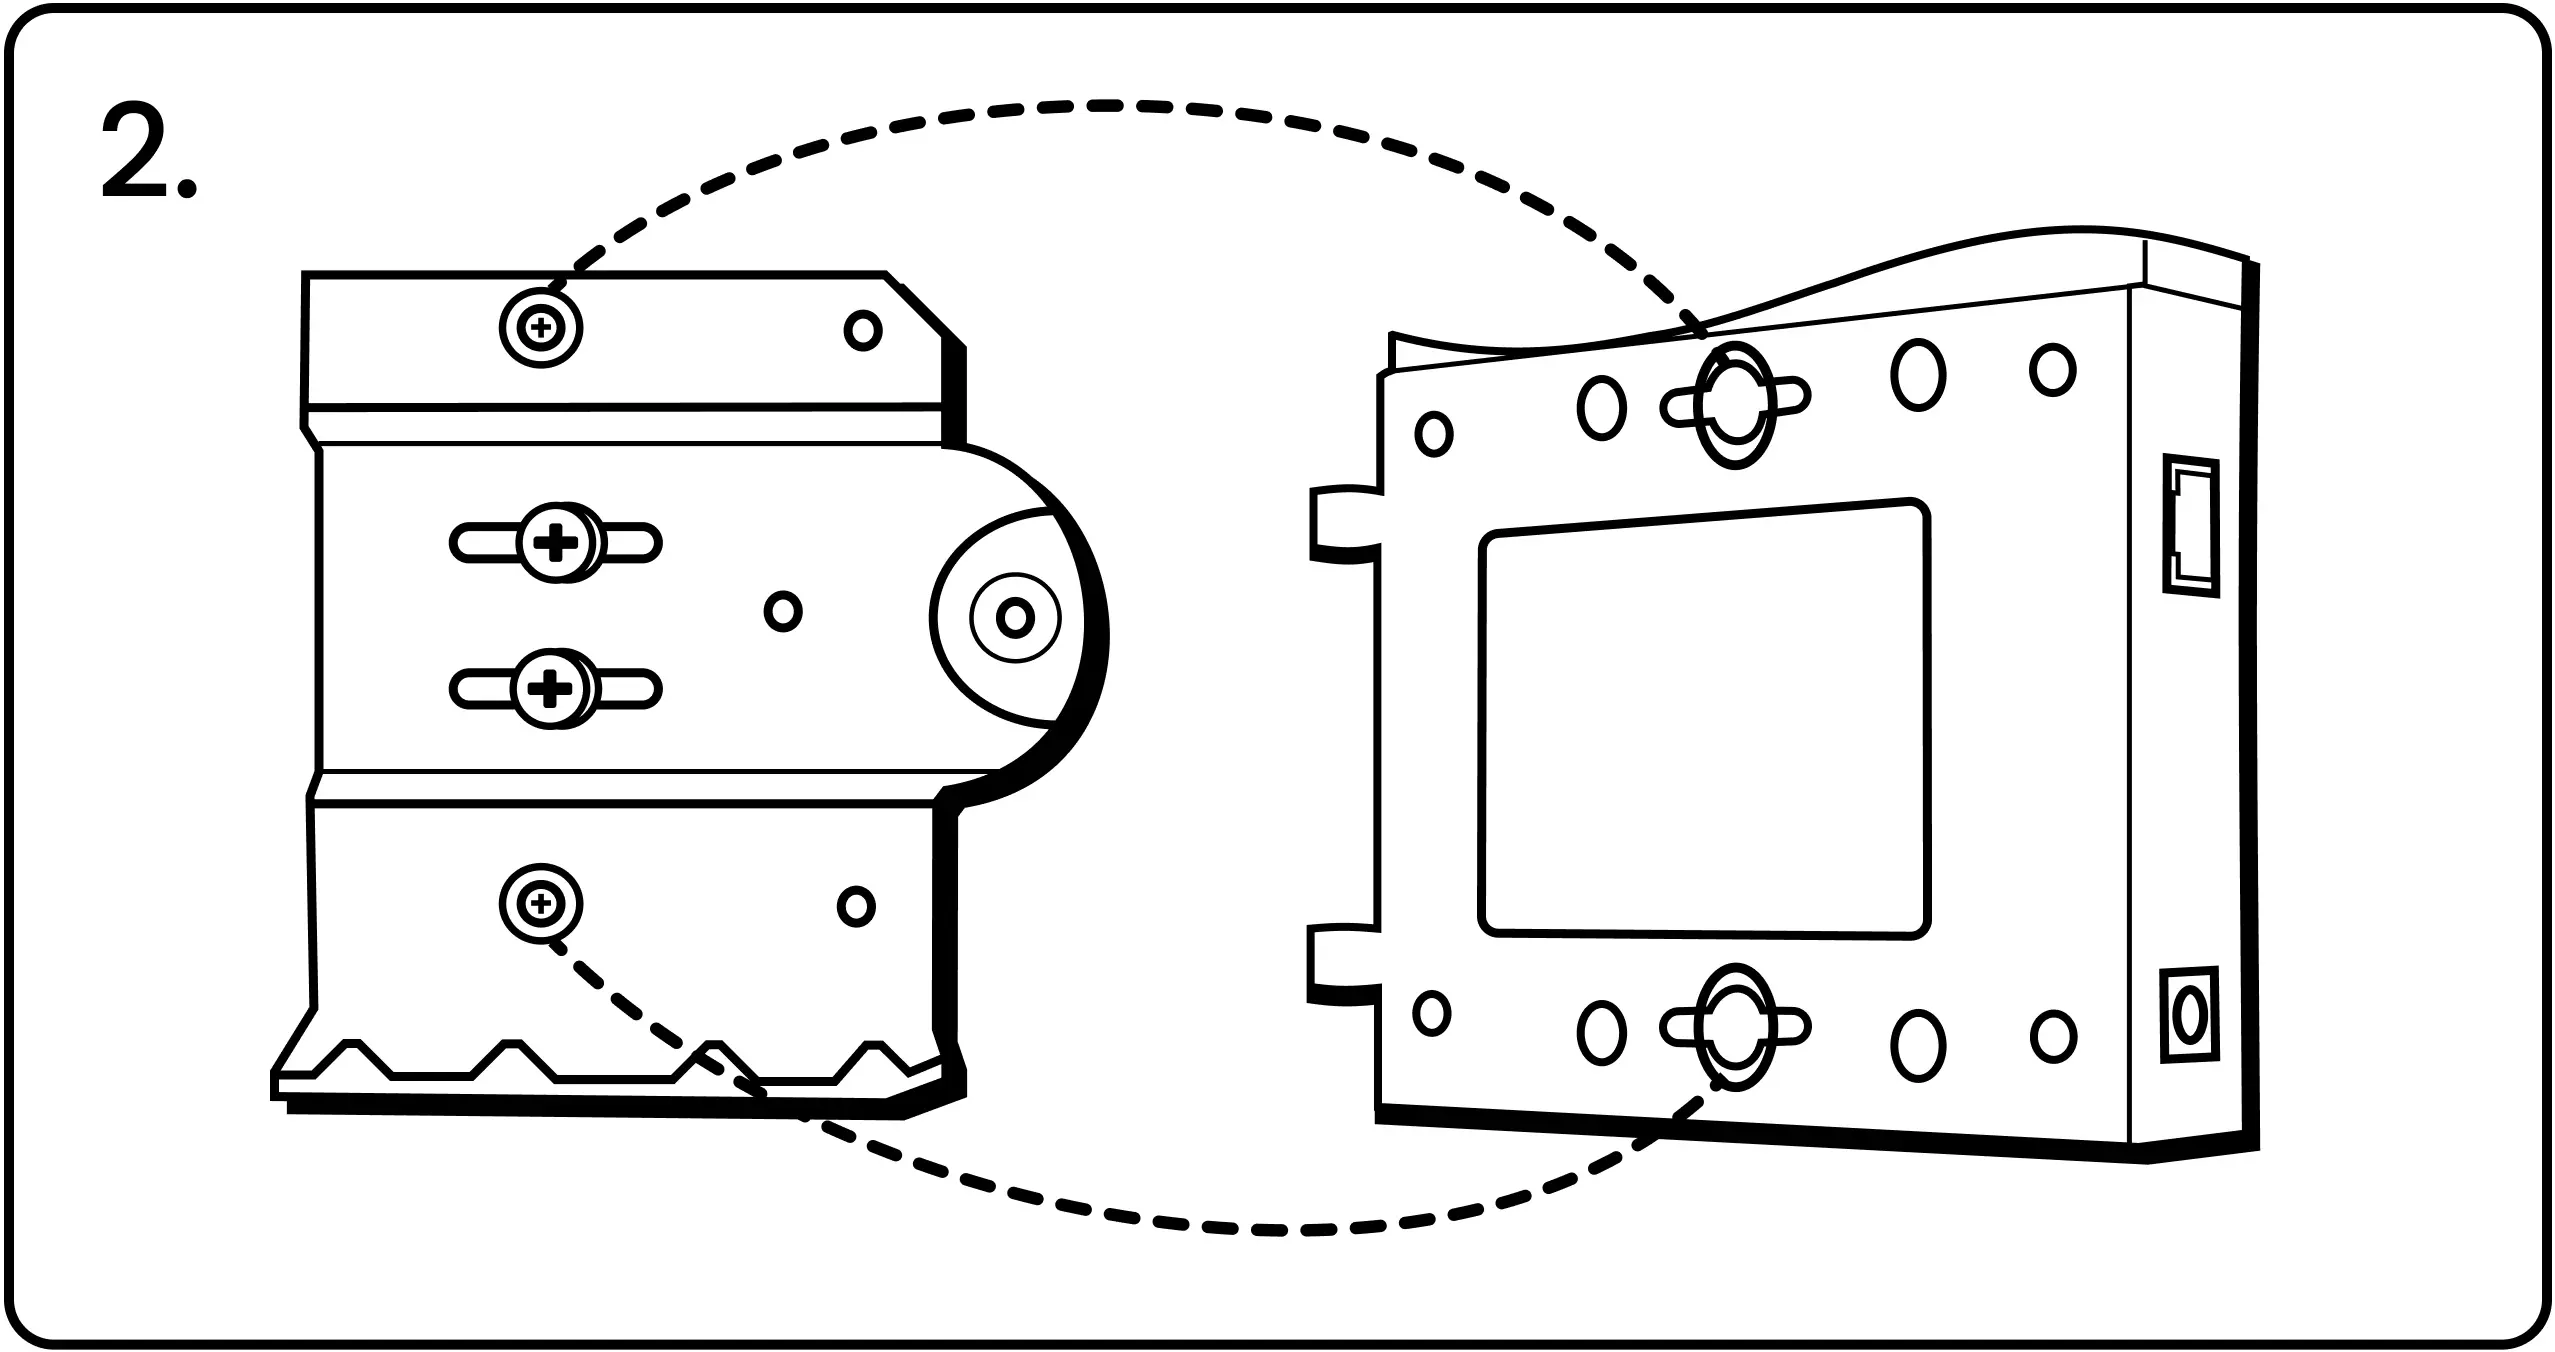
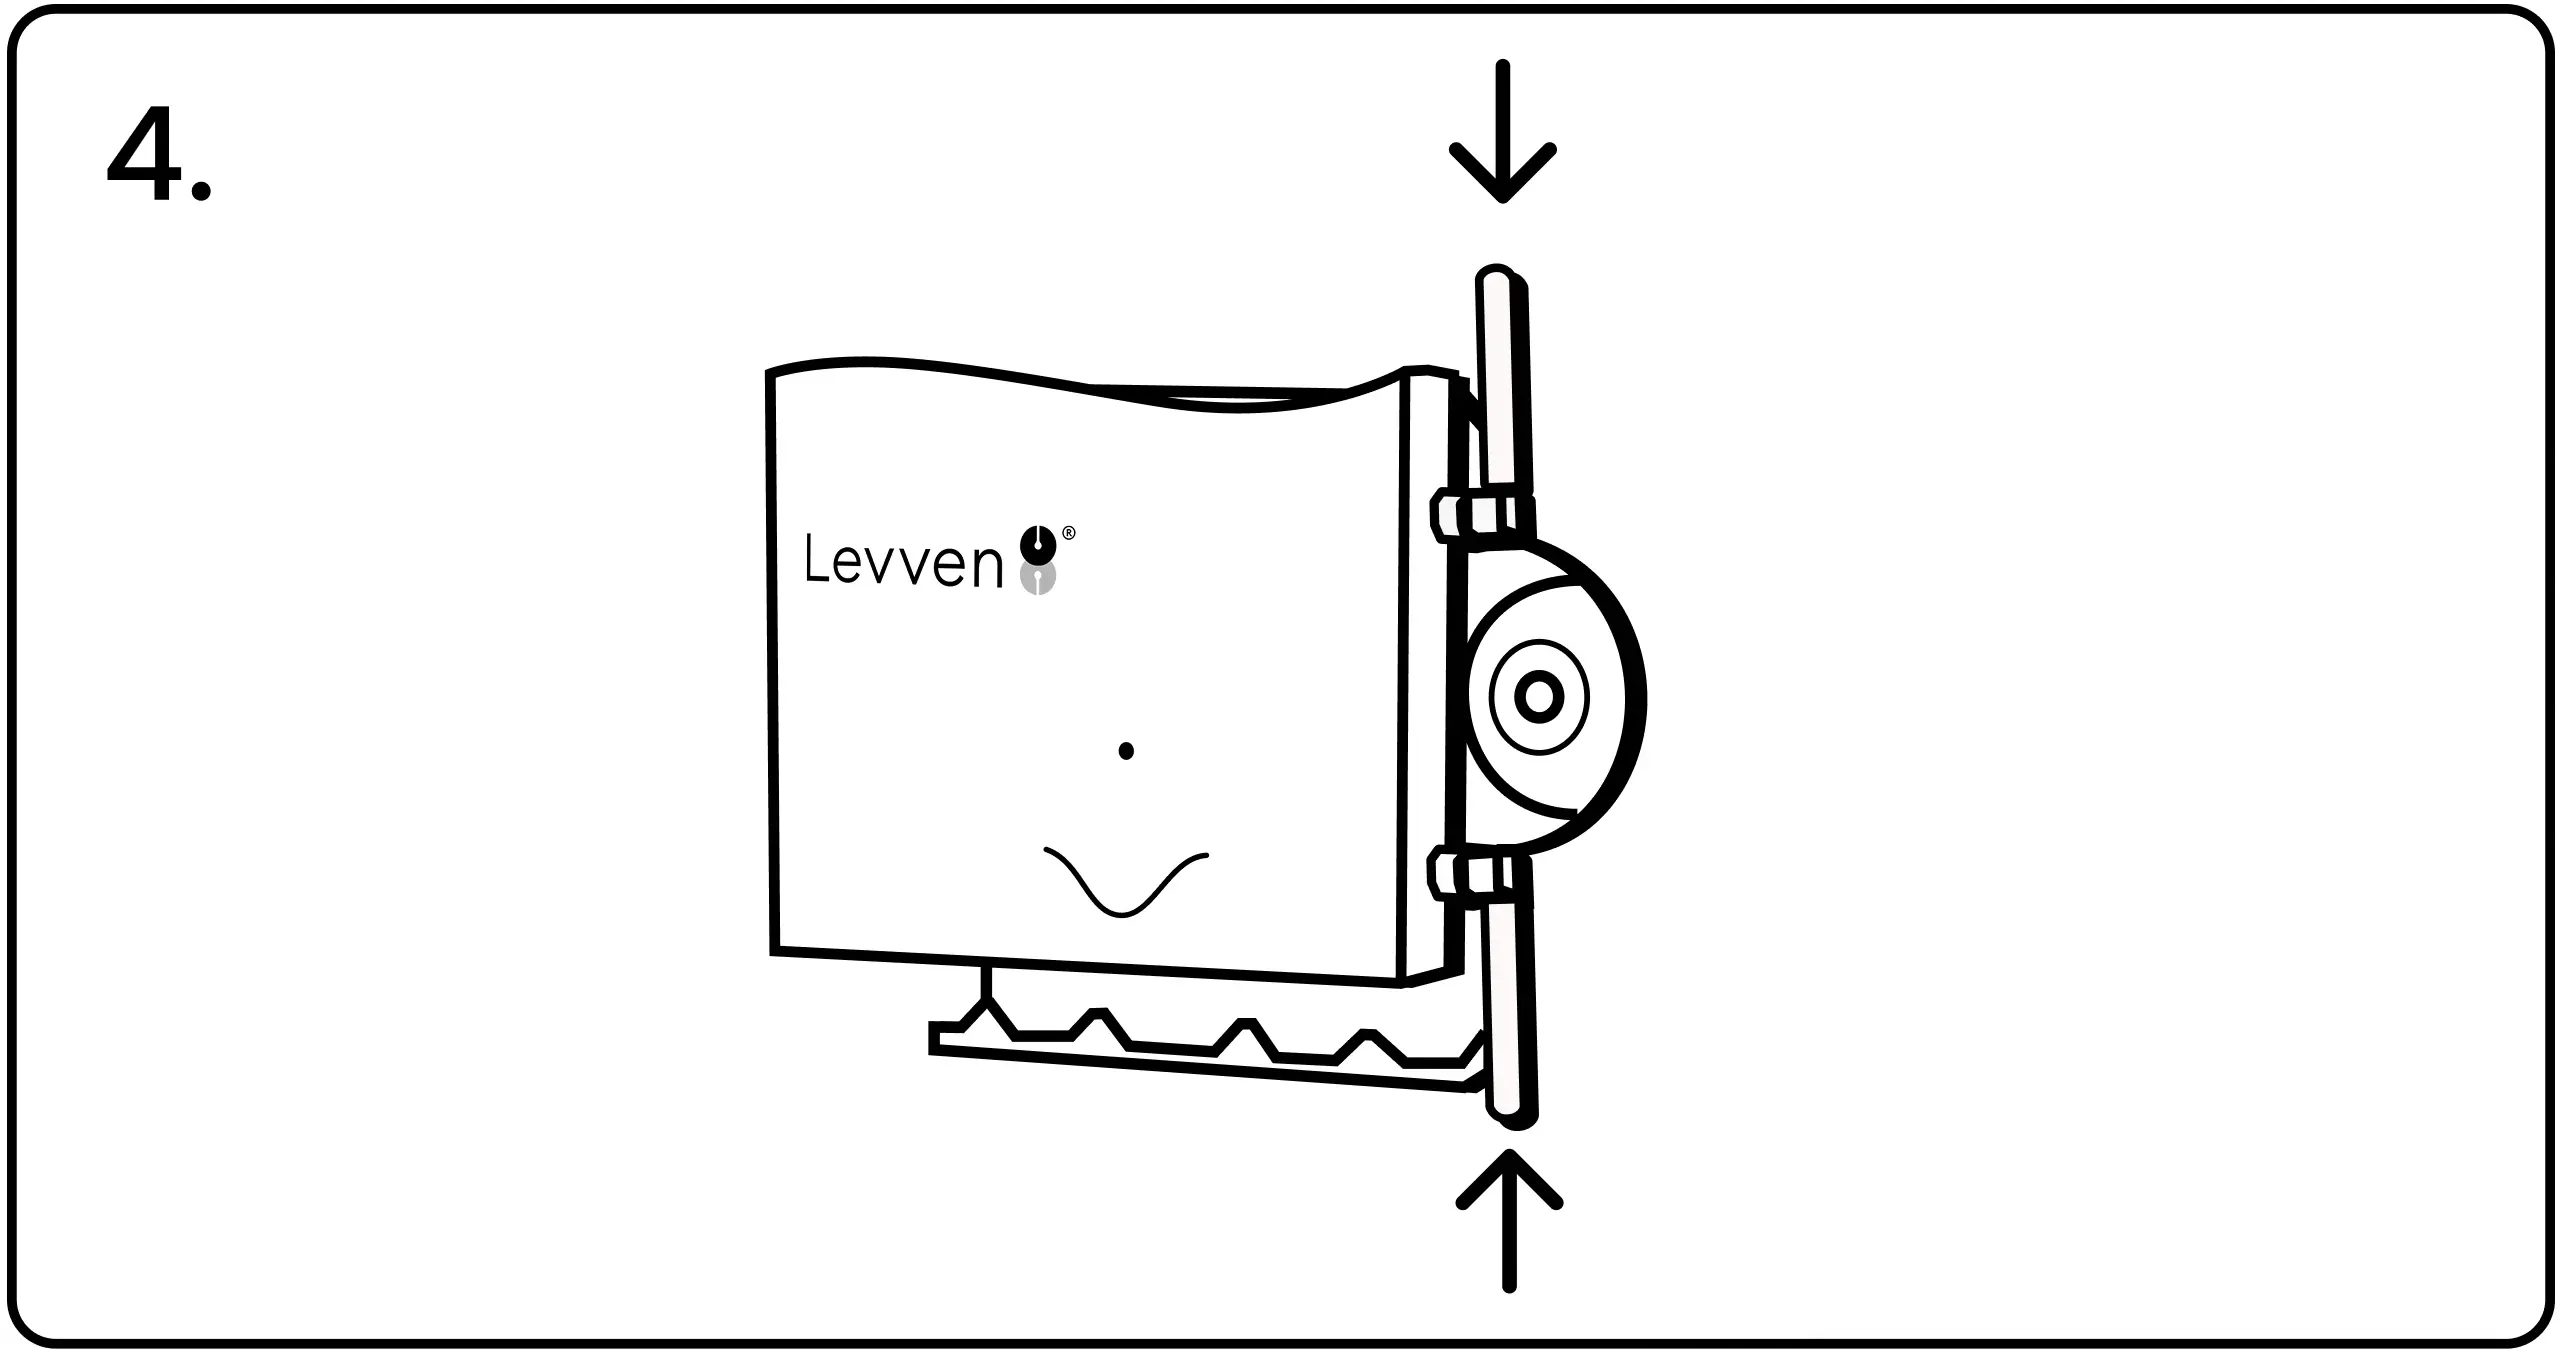
3. Slide the Q Gateway to the left onto the bracket.
4. After mounting the Q Gateway, adjust the top antenna to point up and the bottom antenna to point down. Ensure there is enough space to install the security screw on the right side of the mounting bracket.
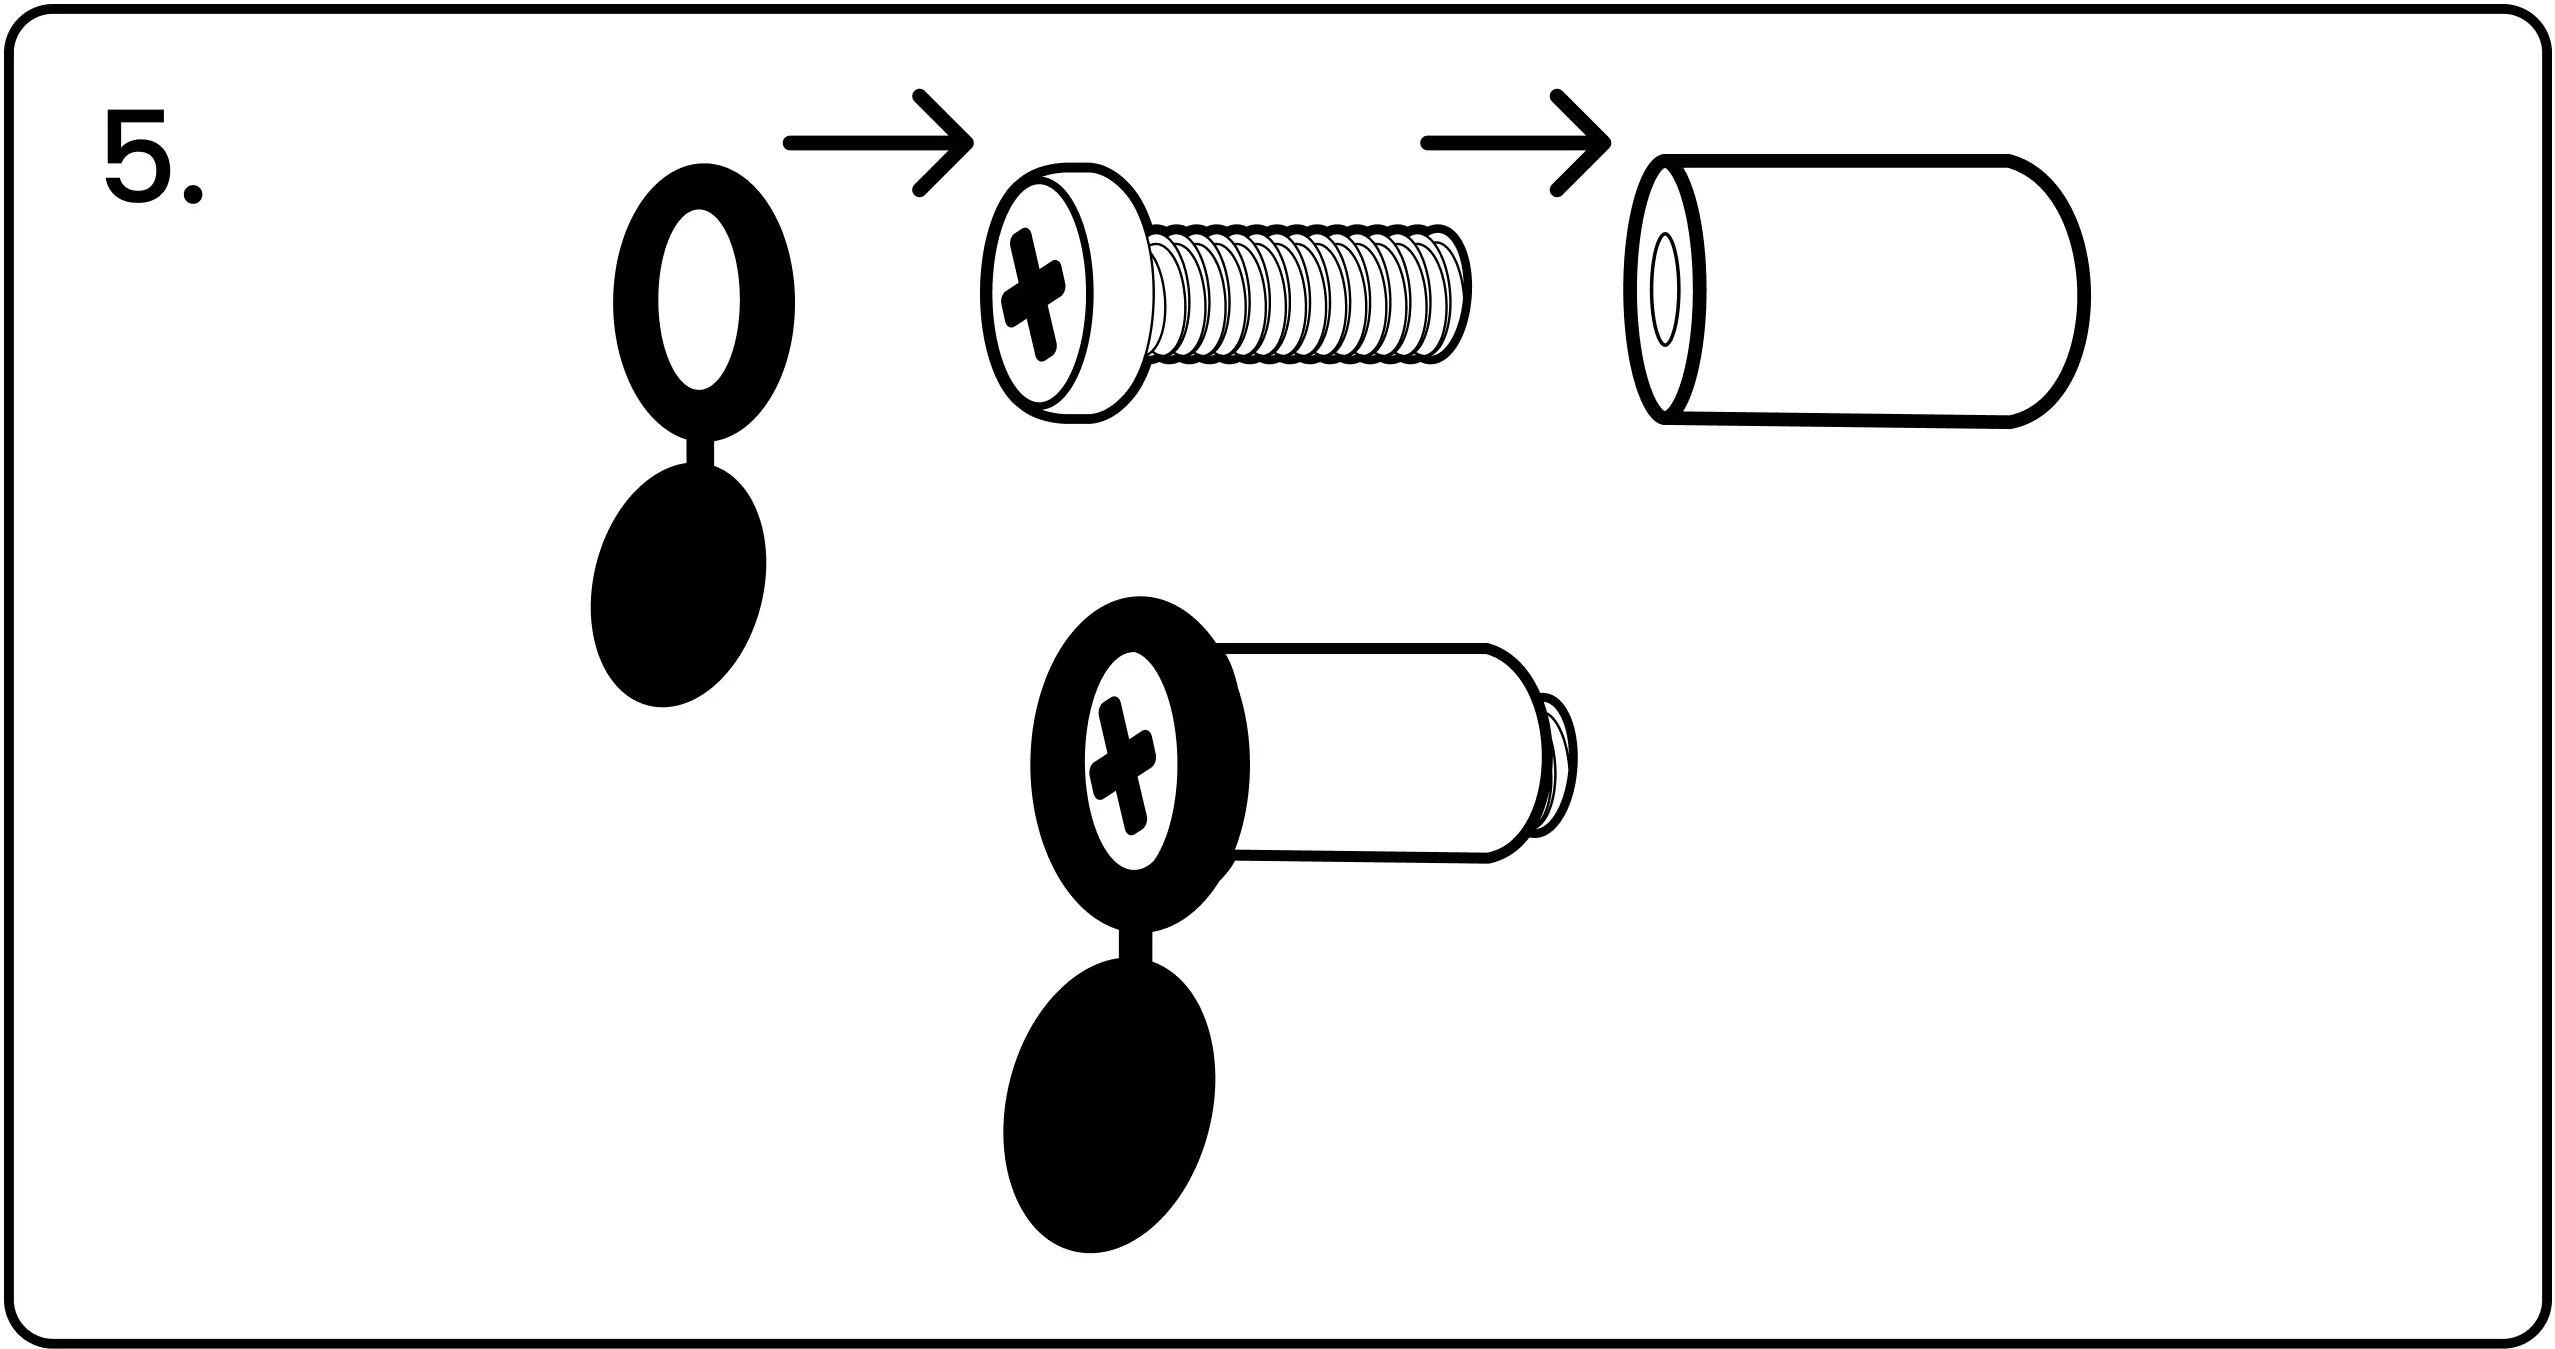
5. Collect the Screw Screw, Cap, and Post from the Quick Kit. Assemble the parts as shown here.
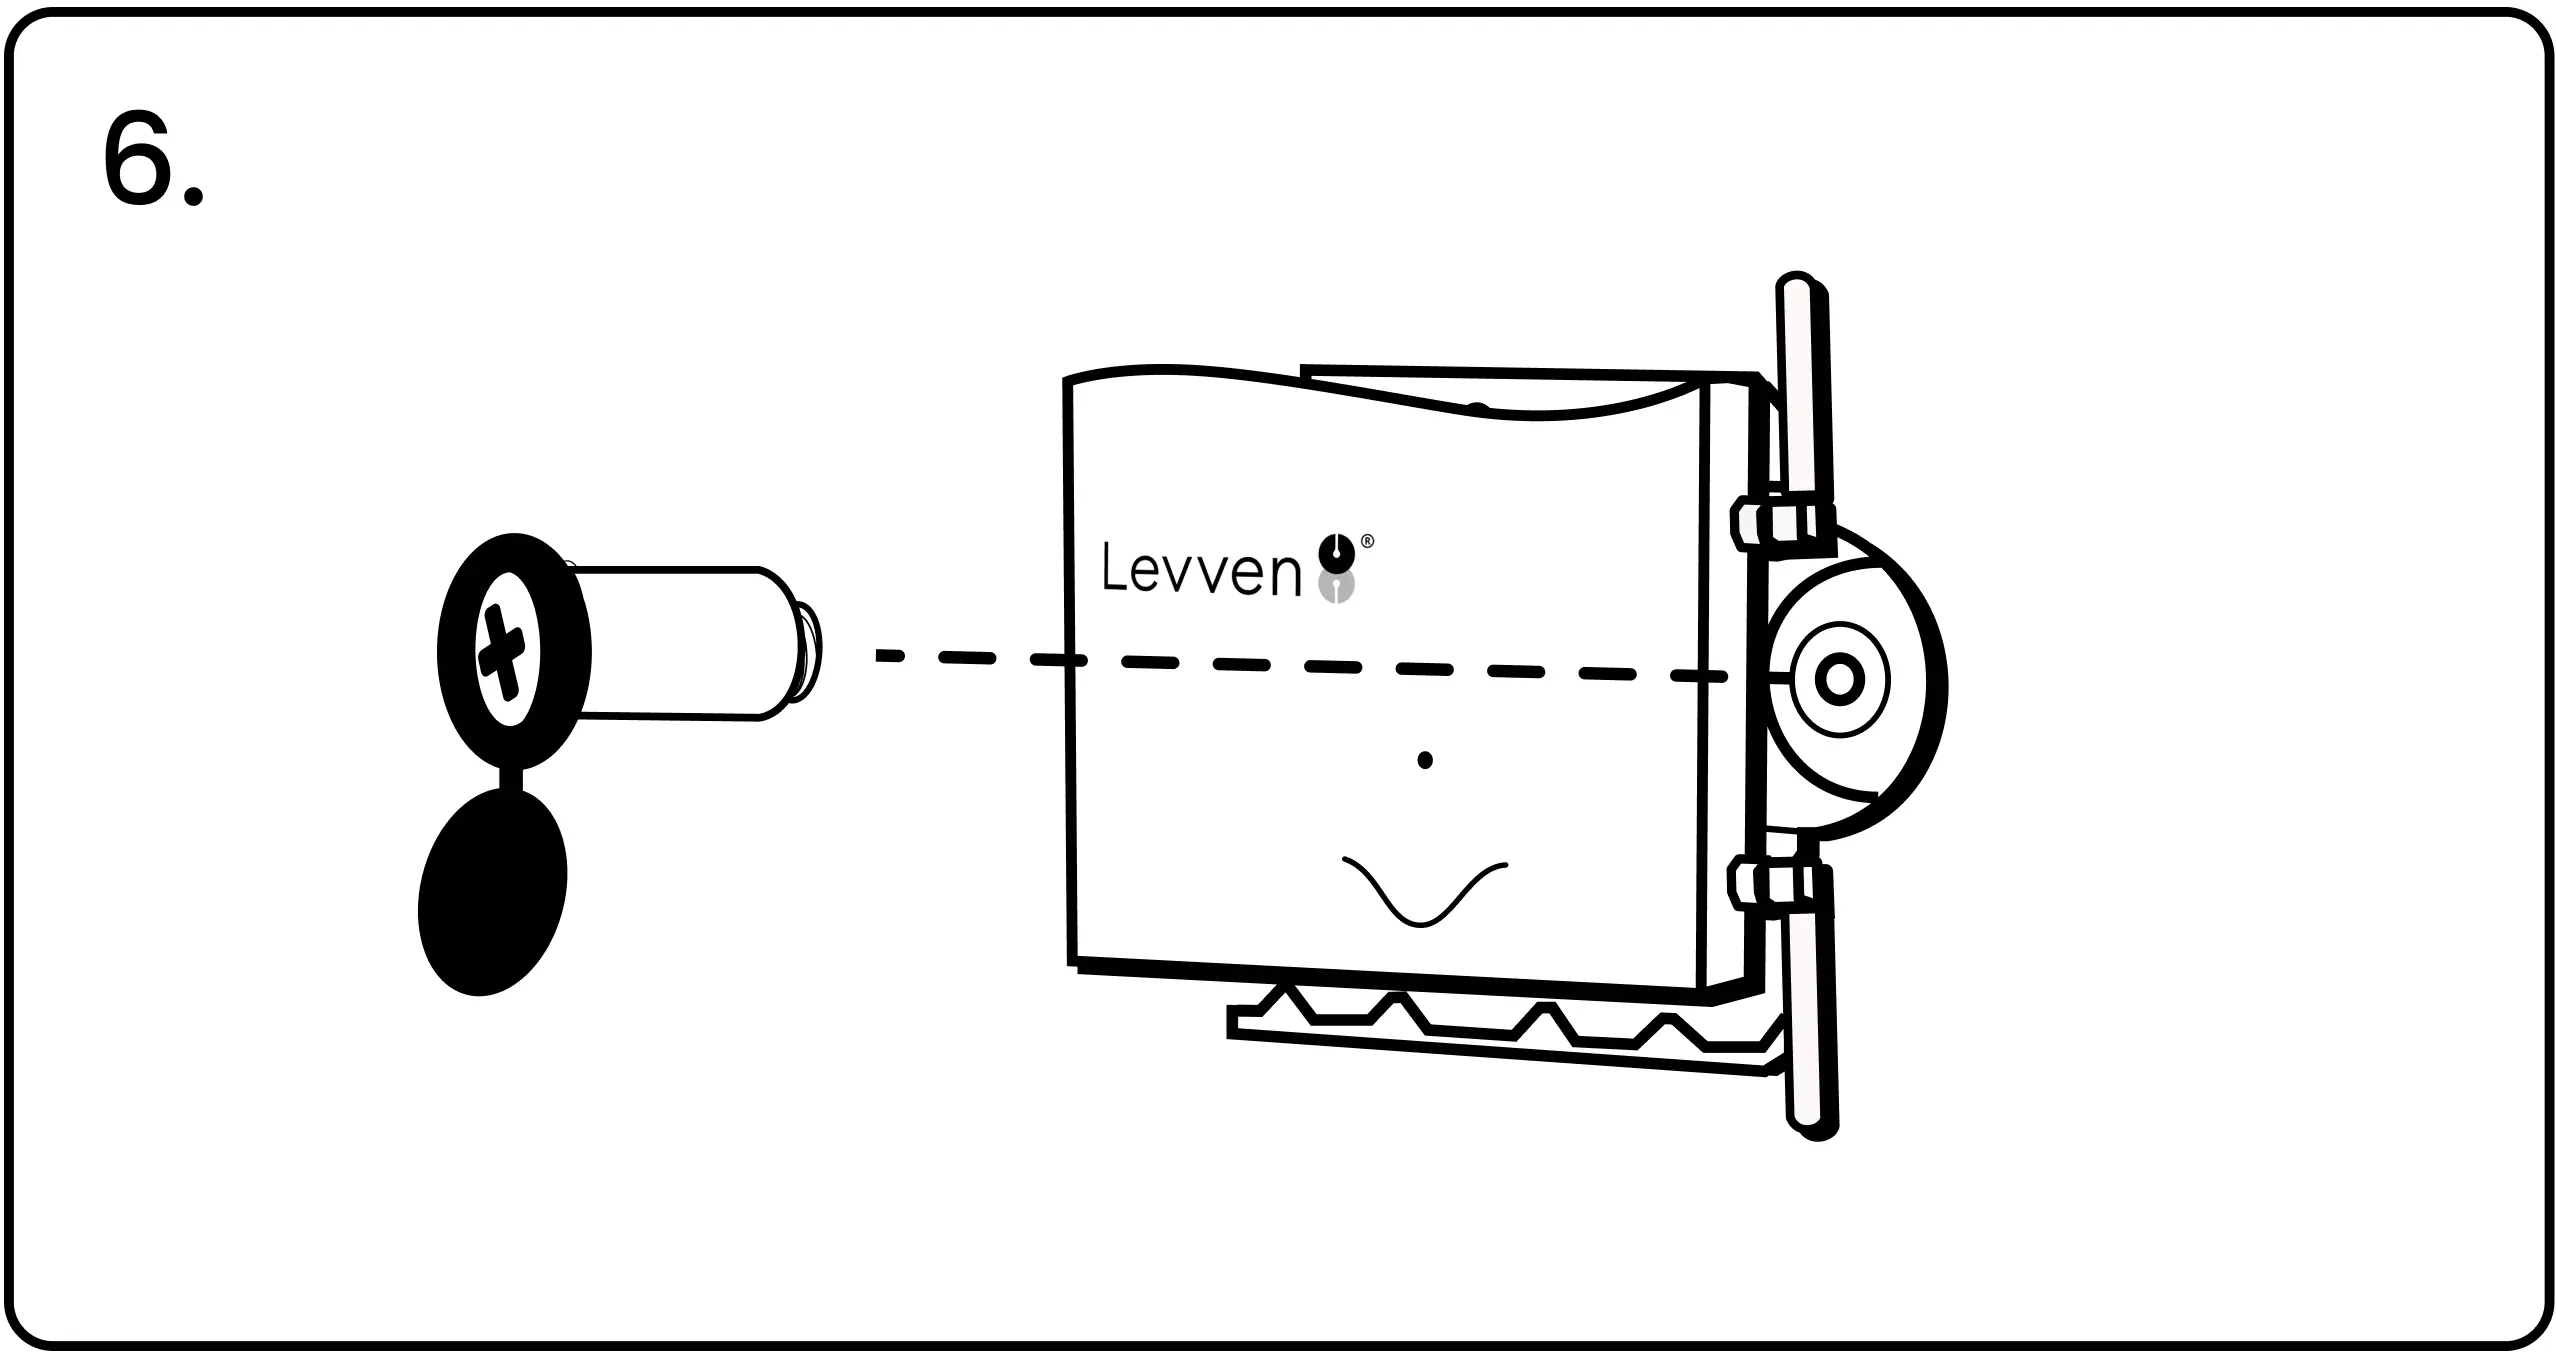
6. Screw the cap/screw/post assembly into the Mounting Bracket.
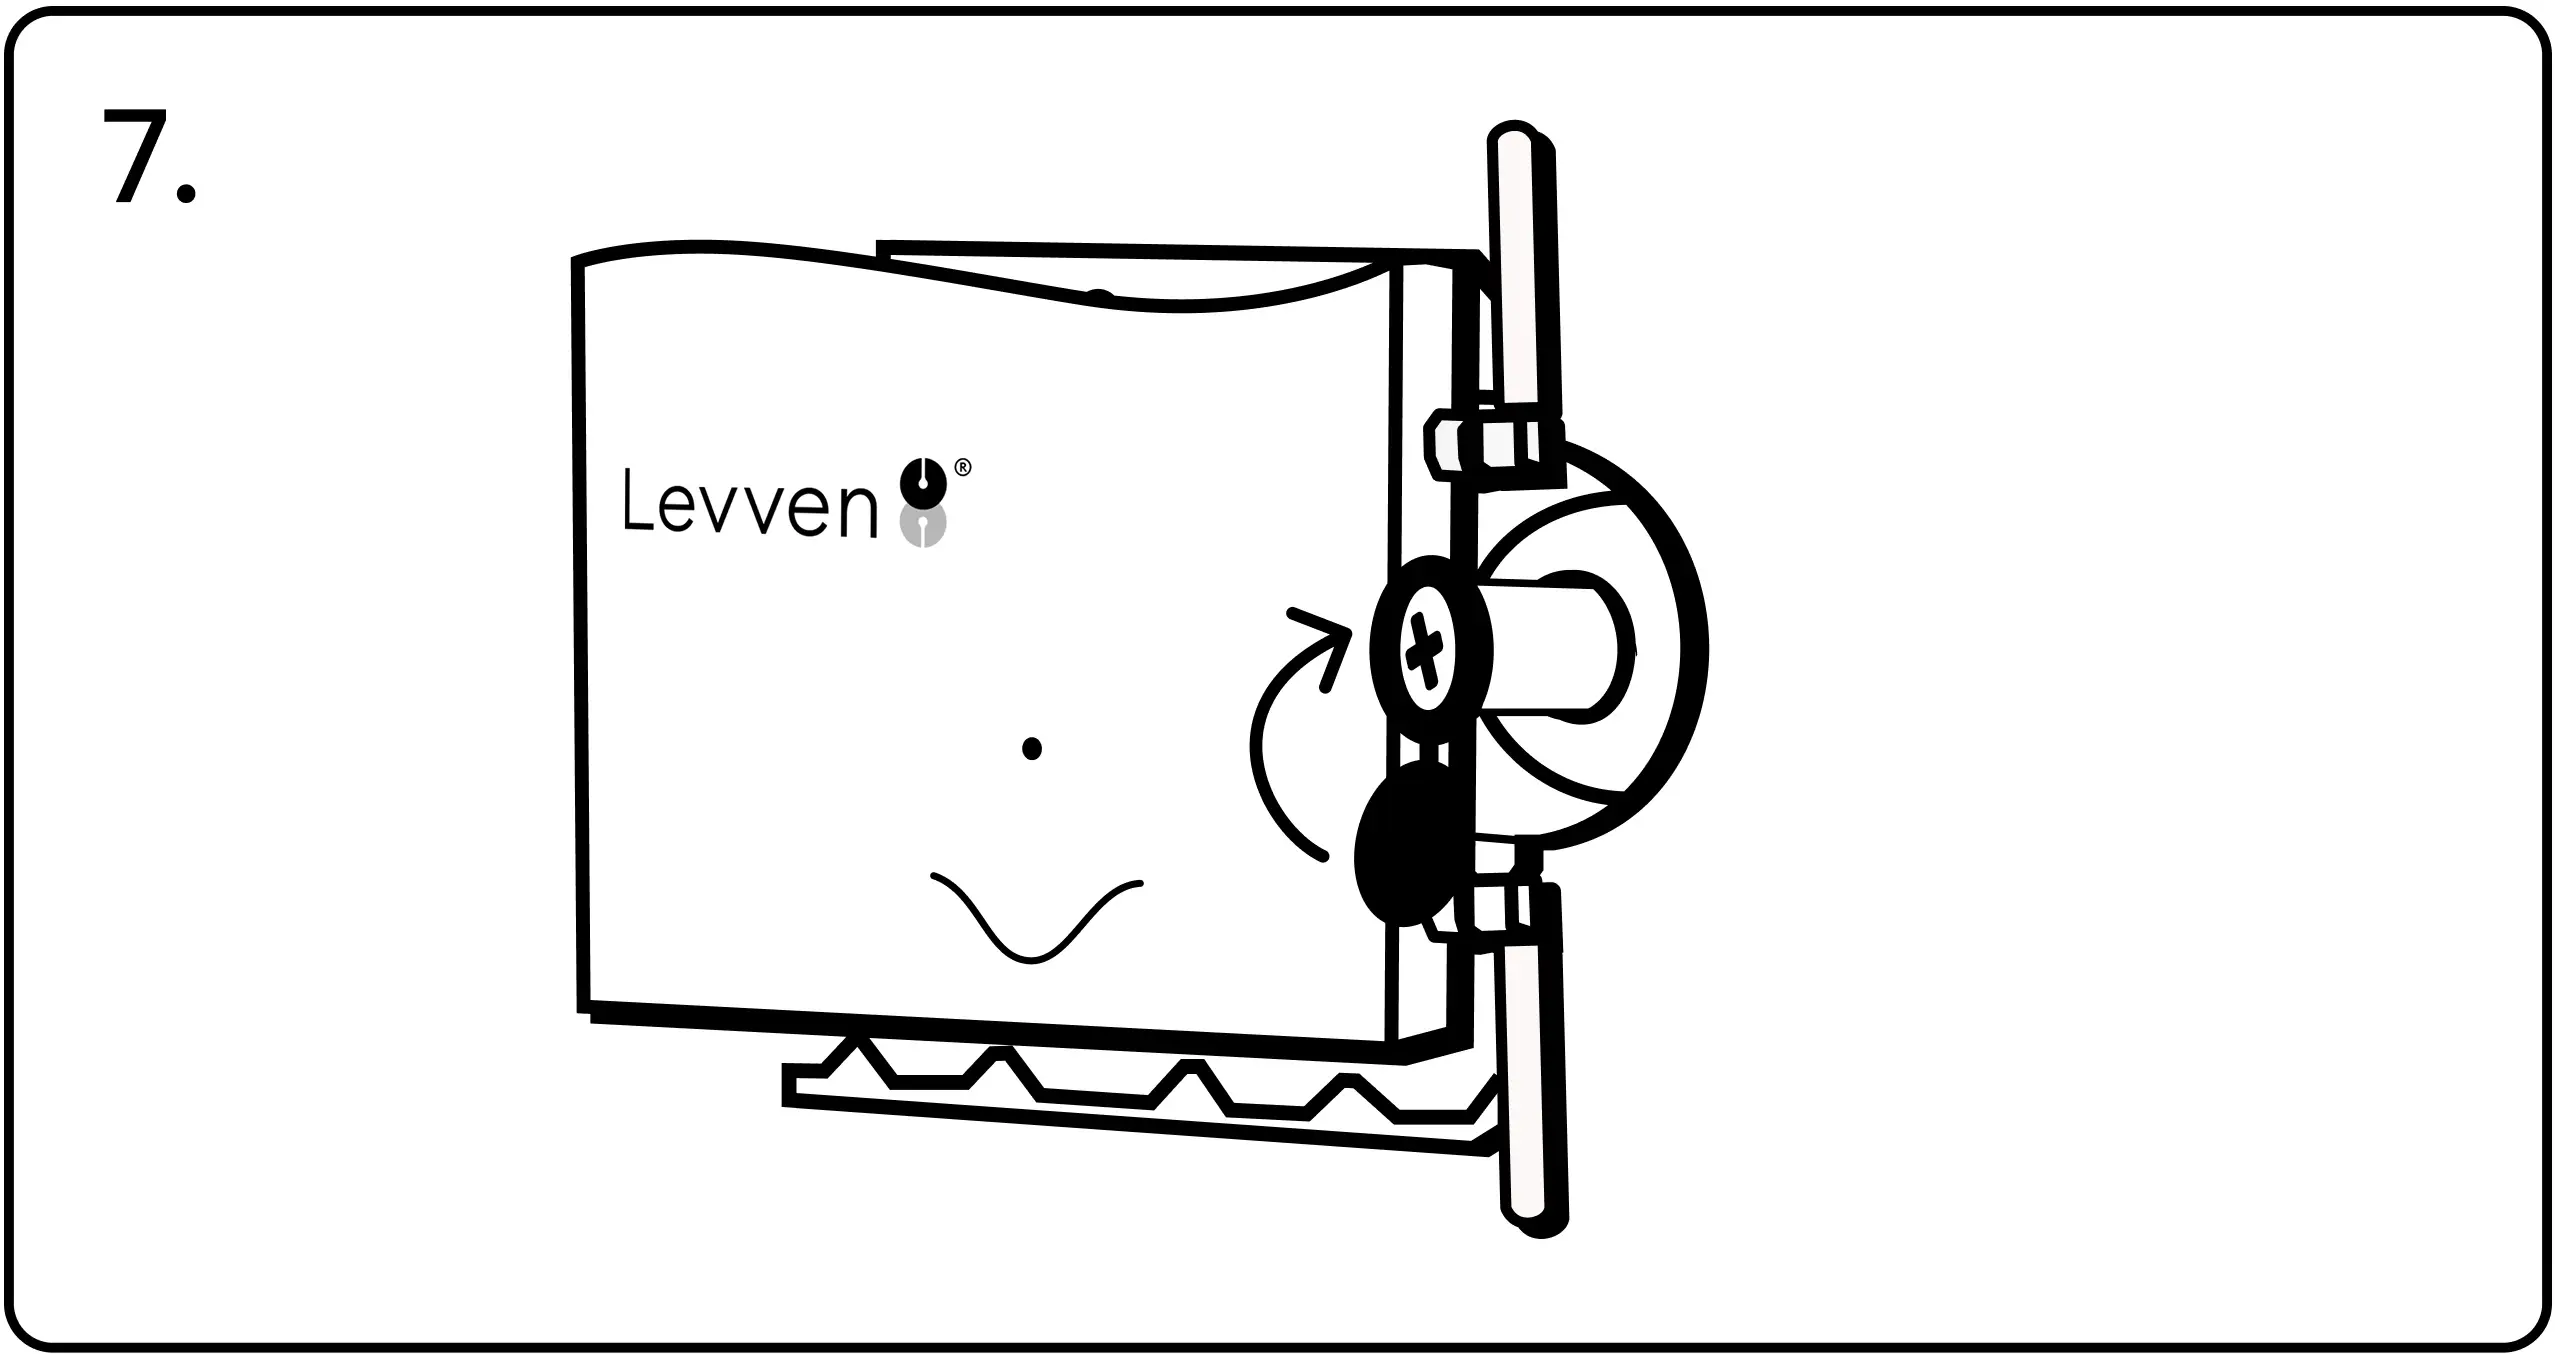
7. Close the cap over the end of the screw to finish.
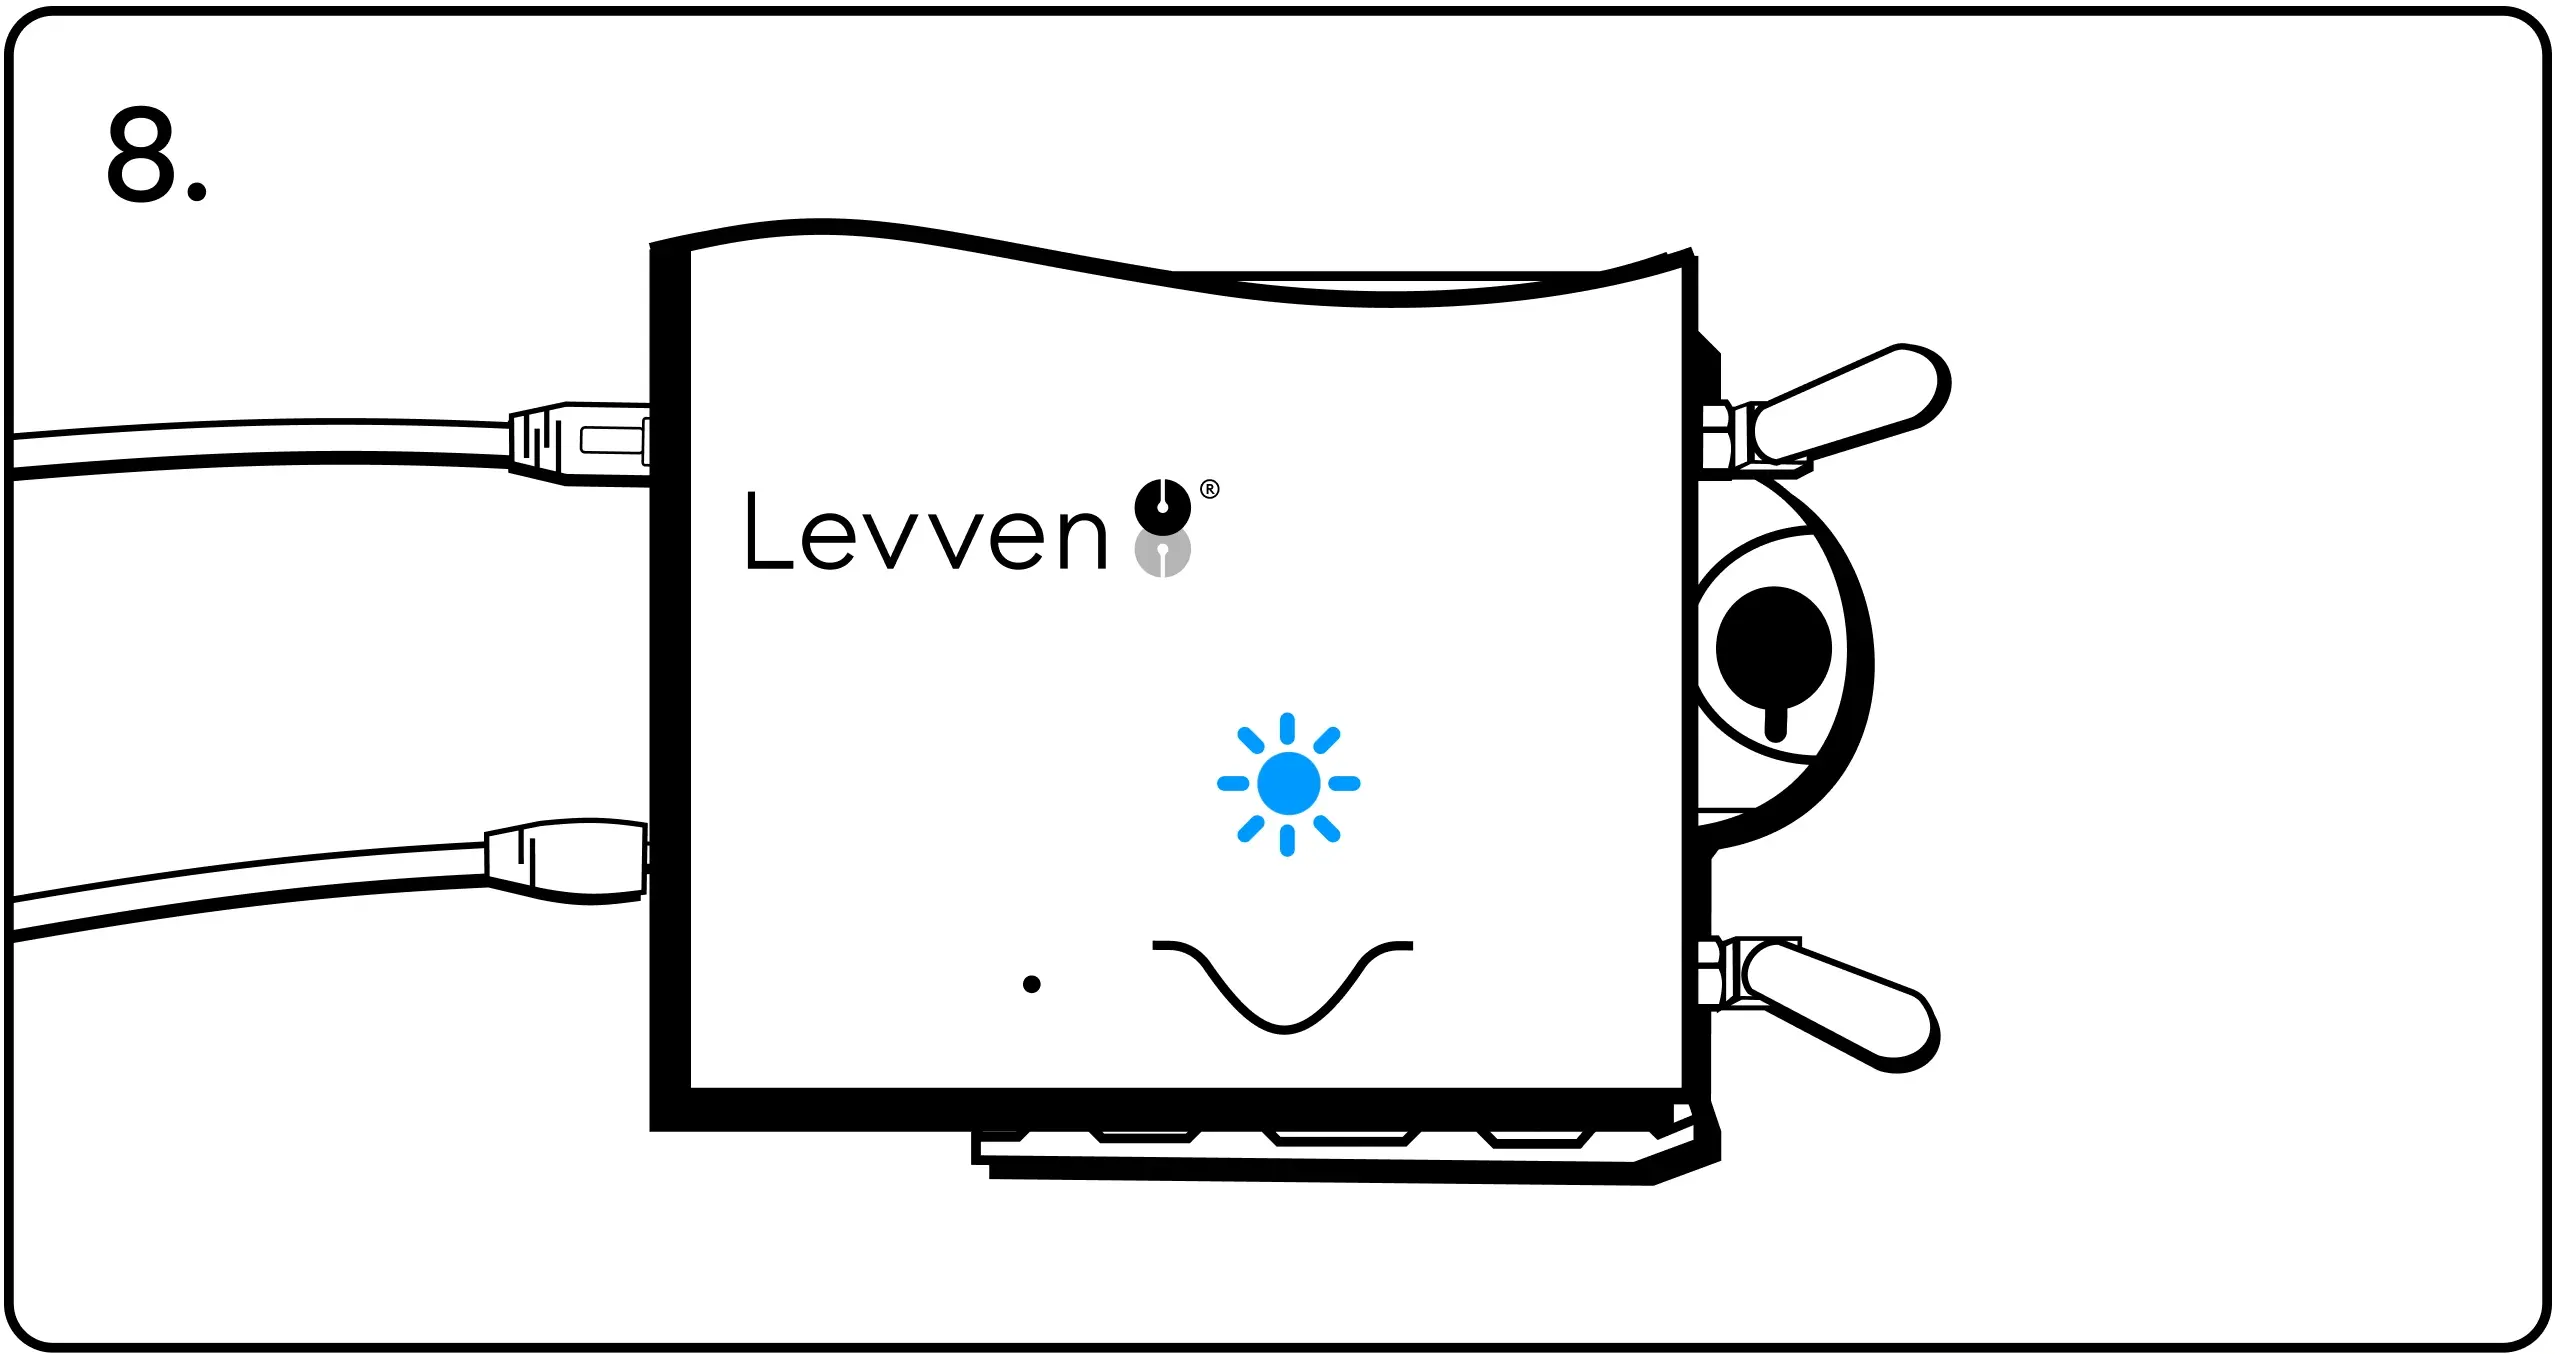
8. Connect the power adapter and network cable to the Levven Q to complete the installation. The LED on the Q Gateway will blink blue, indicating it is discovering the devices installed in the home.
Grouping Power Controllers
Adding Extra Power Controllers to Home Group
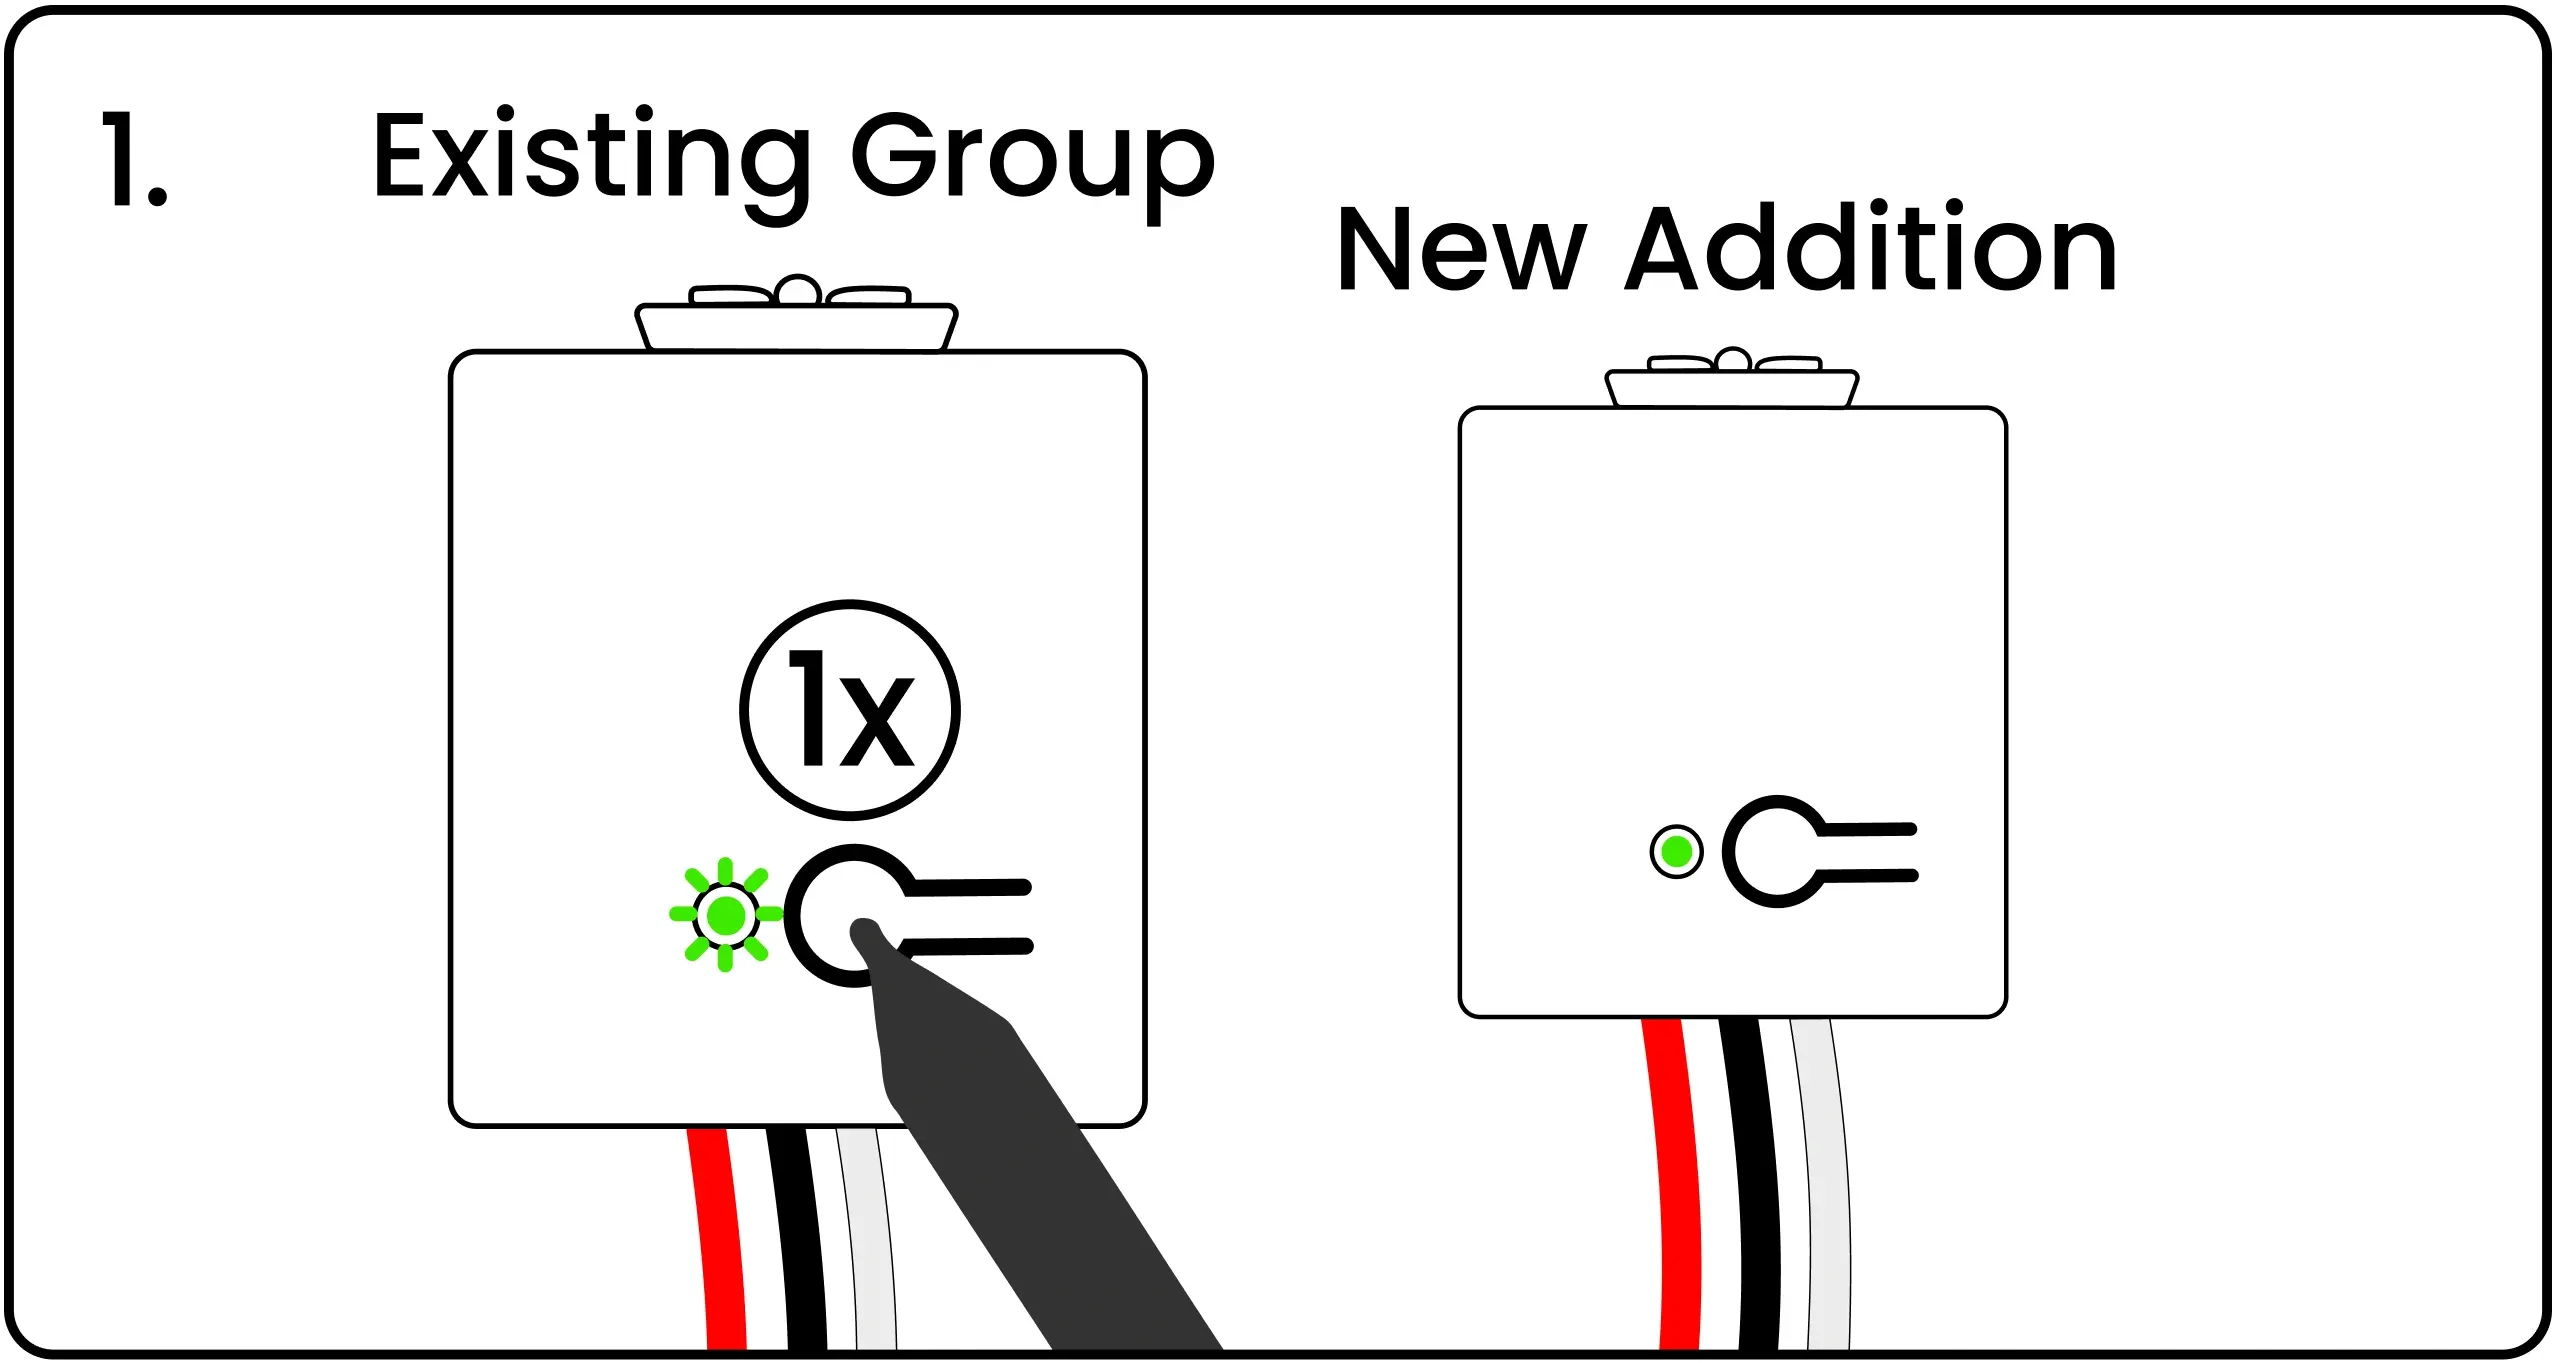
1. Adding an extra power controller to the group requires a power controller from the Quick Kit. The power controllers in the kit are already grouped together. Energize one of these power controllers by connecting to power or by using the Levven CTKL2 'Plug N Pair' wiring kit.
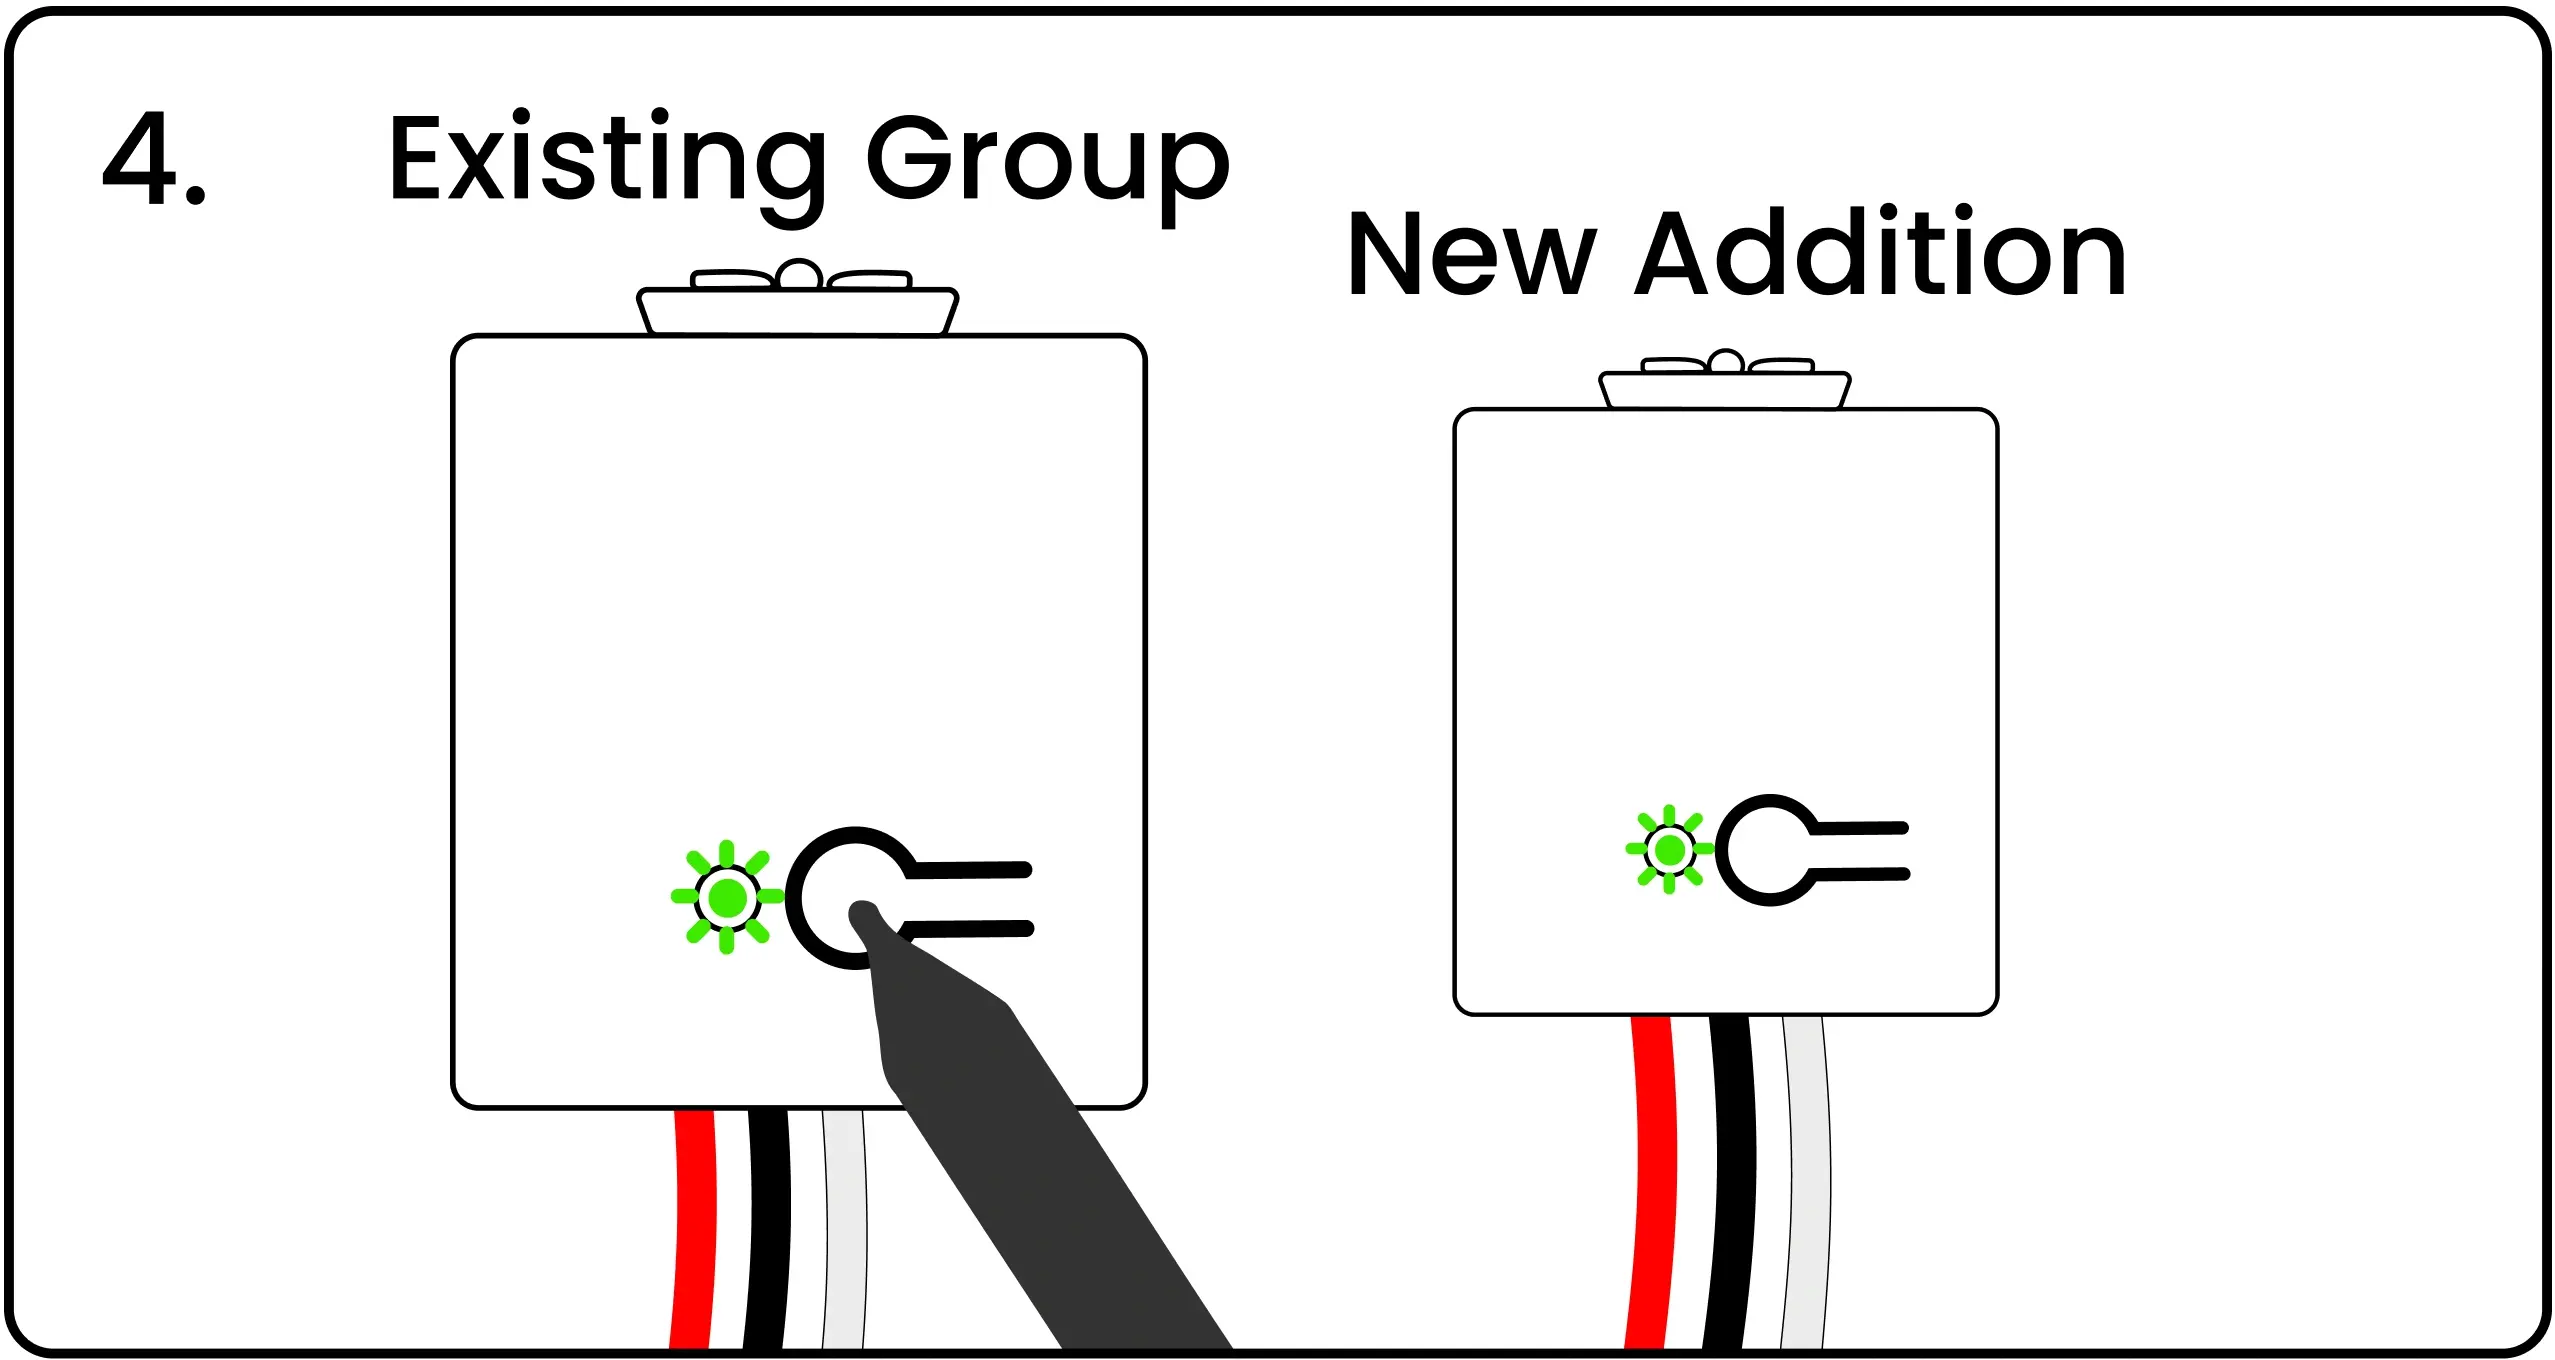
Using a pen, press and release the "Existing Group" power controller's pairing button once. This initiates the grouping process. The power controller’s LED will blink green.
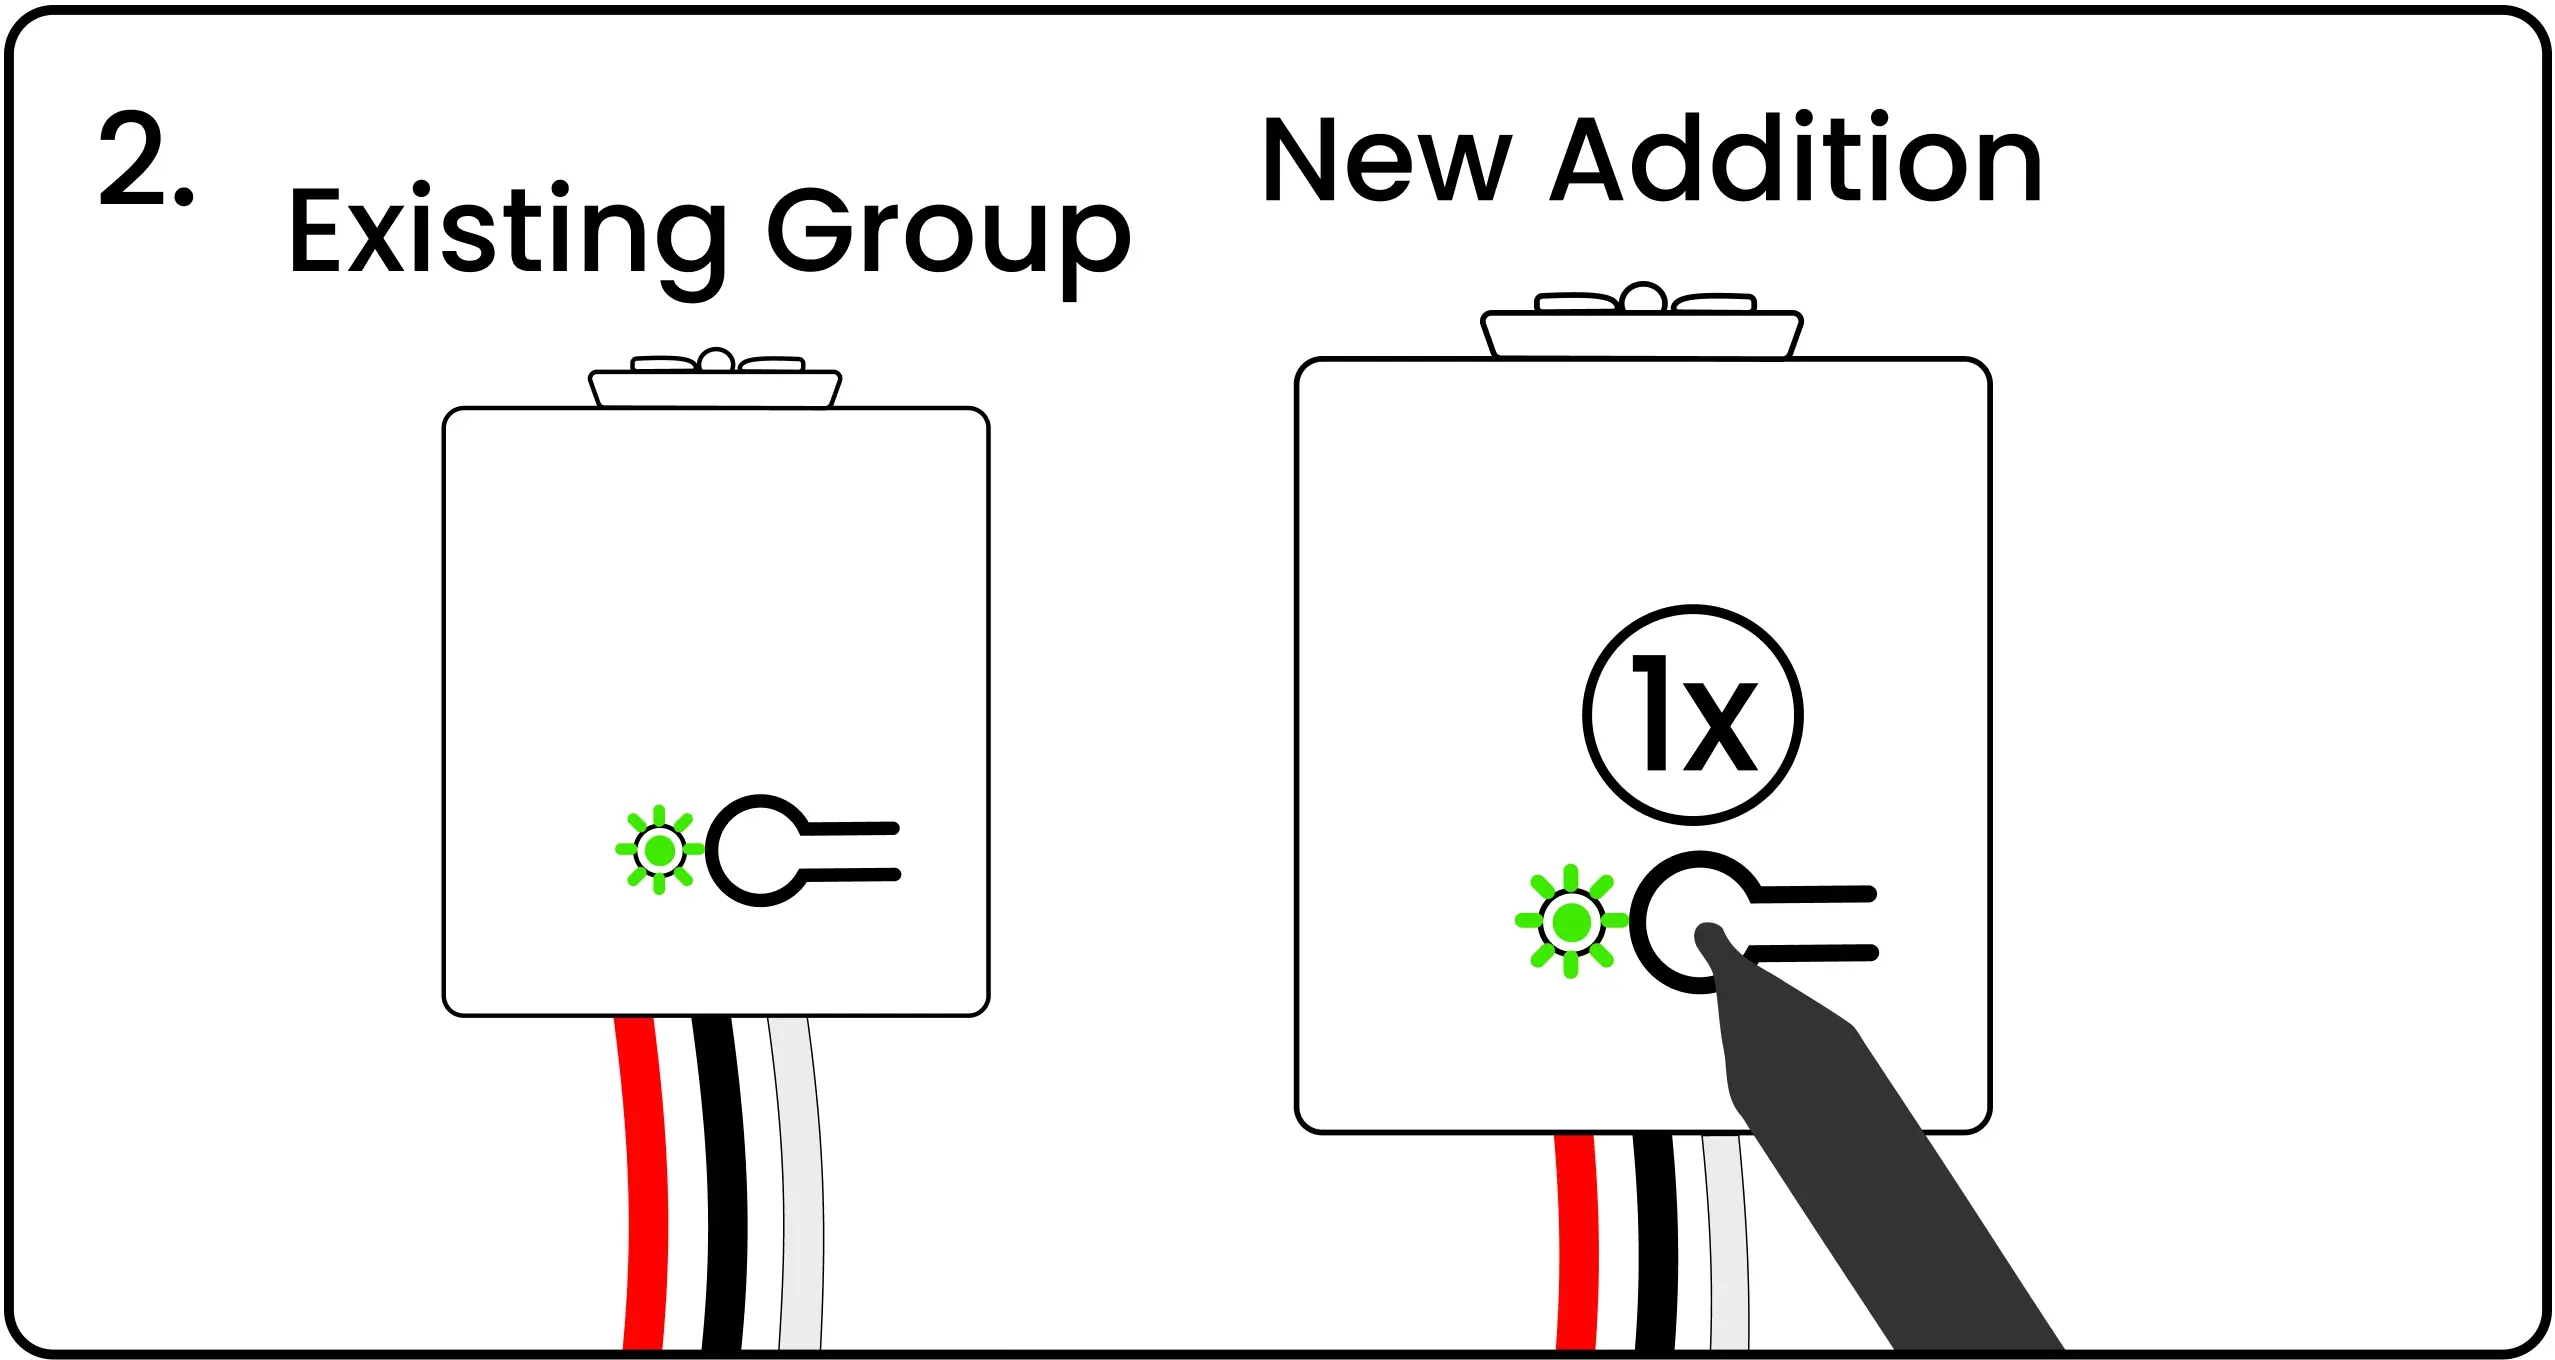
2. Energize the new power controller. Press and release the pairing button on the "New Addition" power controller being added to the group. This power controller’s LED will blink green.
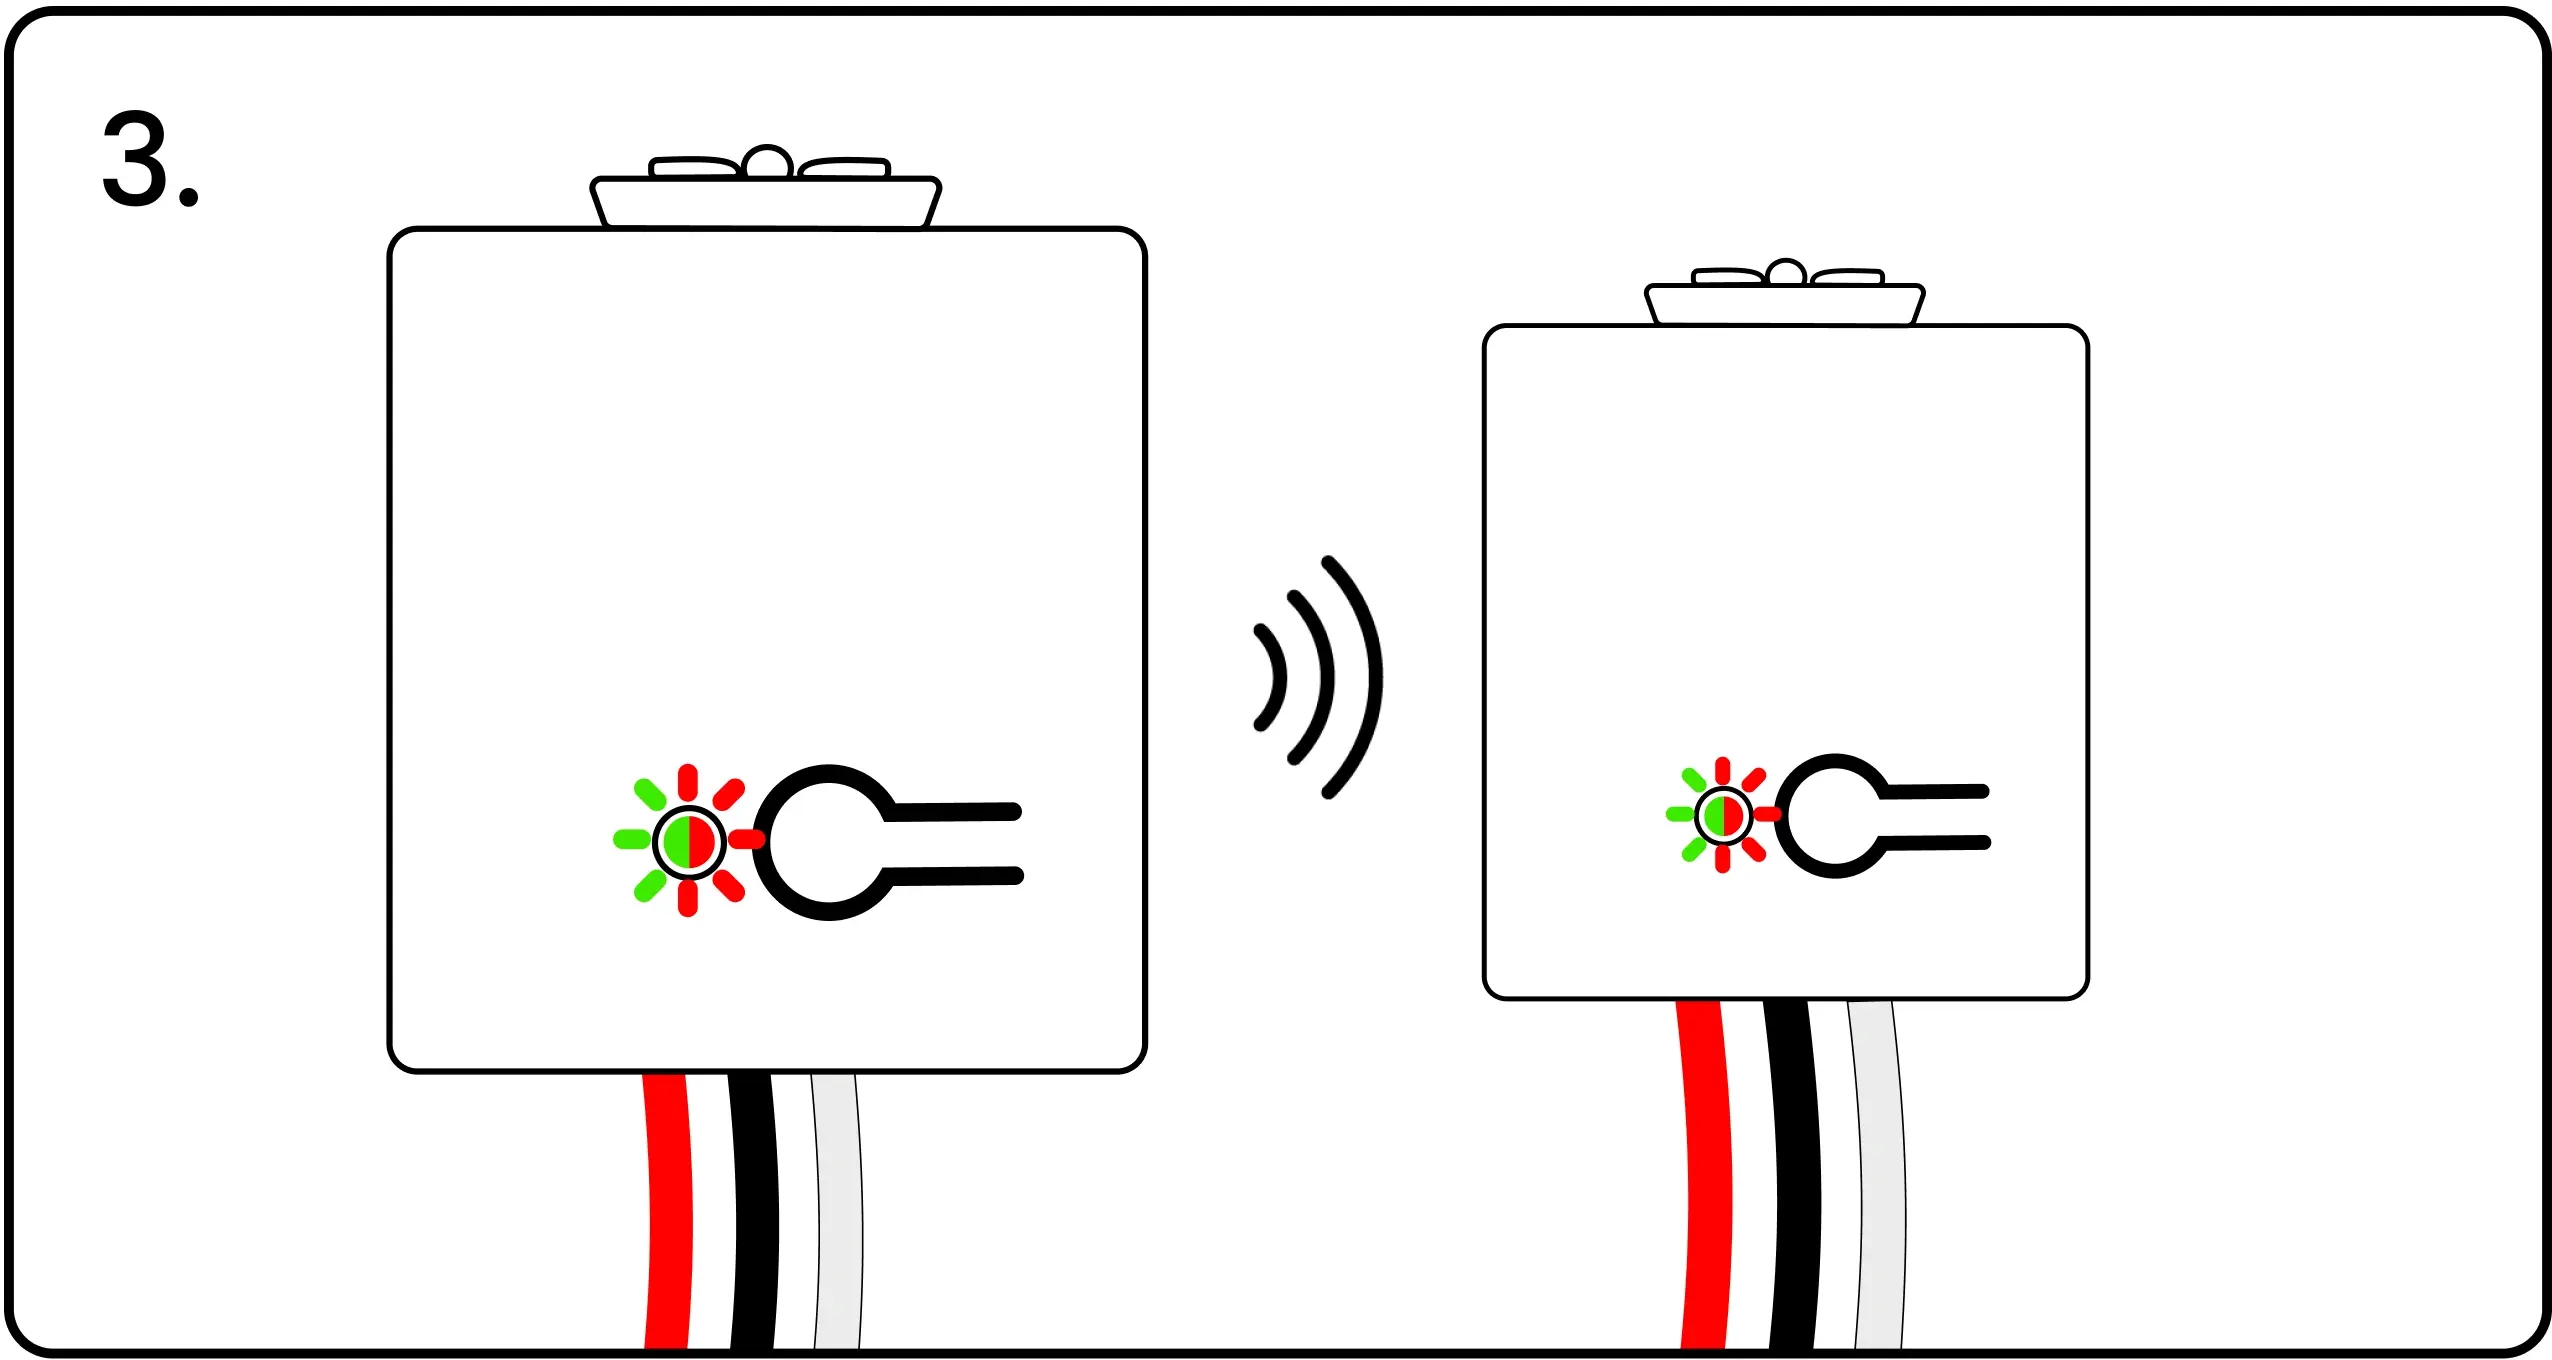
3. The LED on both power controllers will start blinking red and green to confirm their group/pairing signals have been successfully exchanged.
4. Press and release the pairing button on the first power controller one final time to complete the grouping process. The LED on both power controllers will flash green to confirm the grouping.
Pairing a Switch to a Power Controller
Pair a switch to a power controller so signals from that switch cause the power controller to turn on, off, or dim.
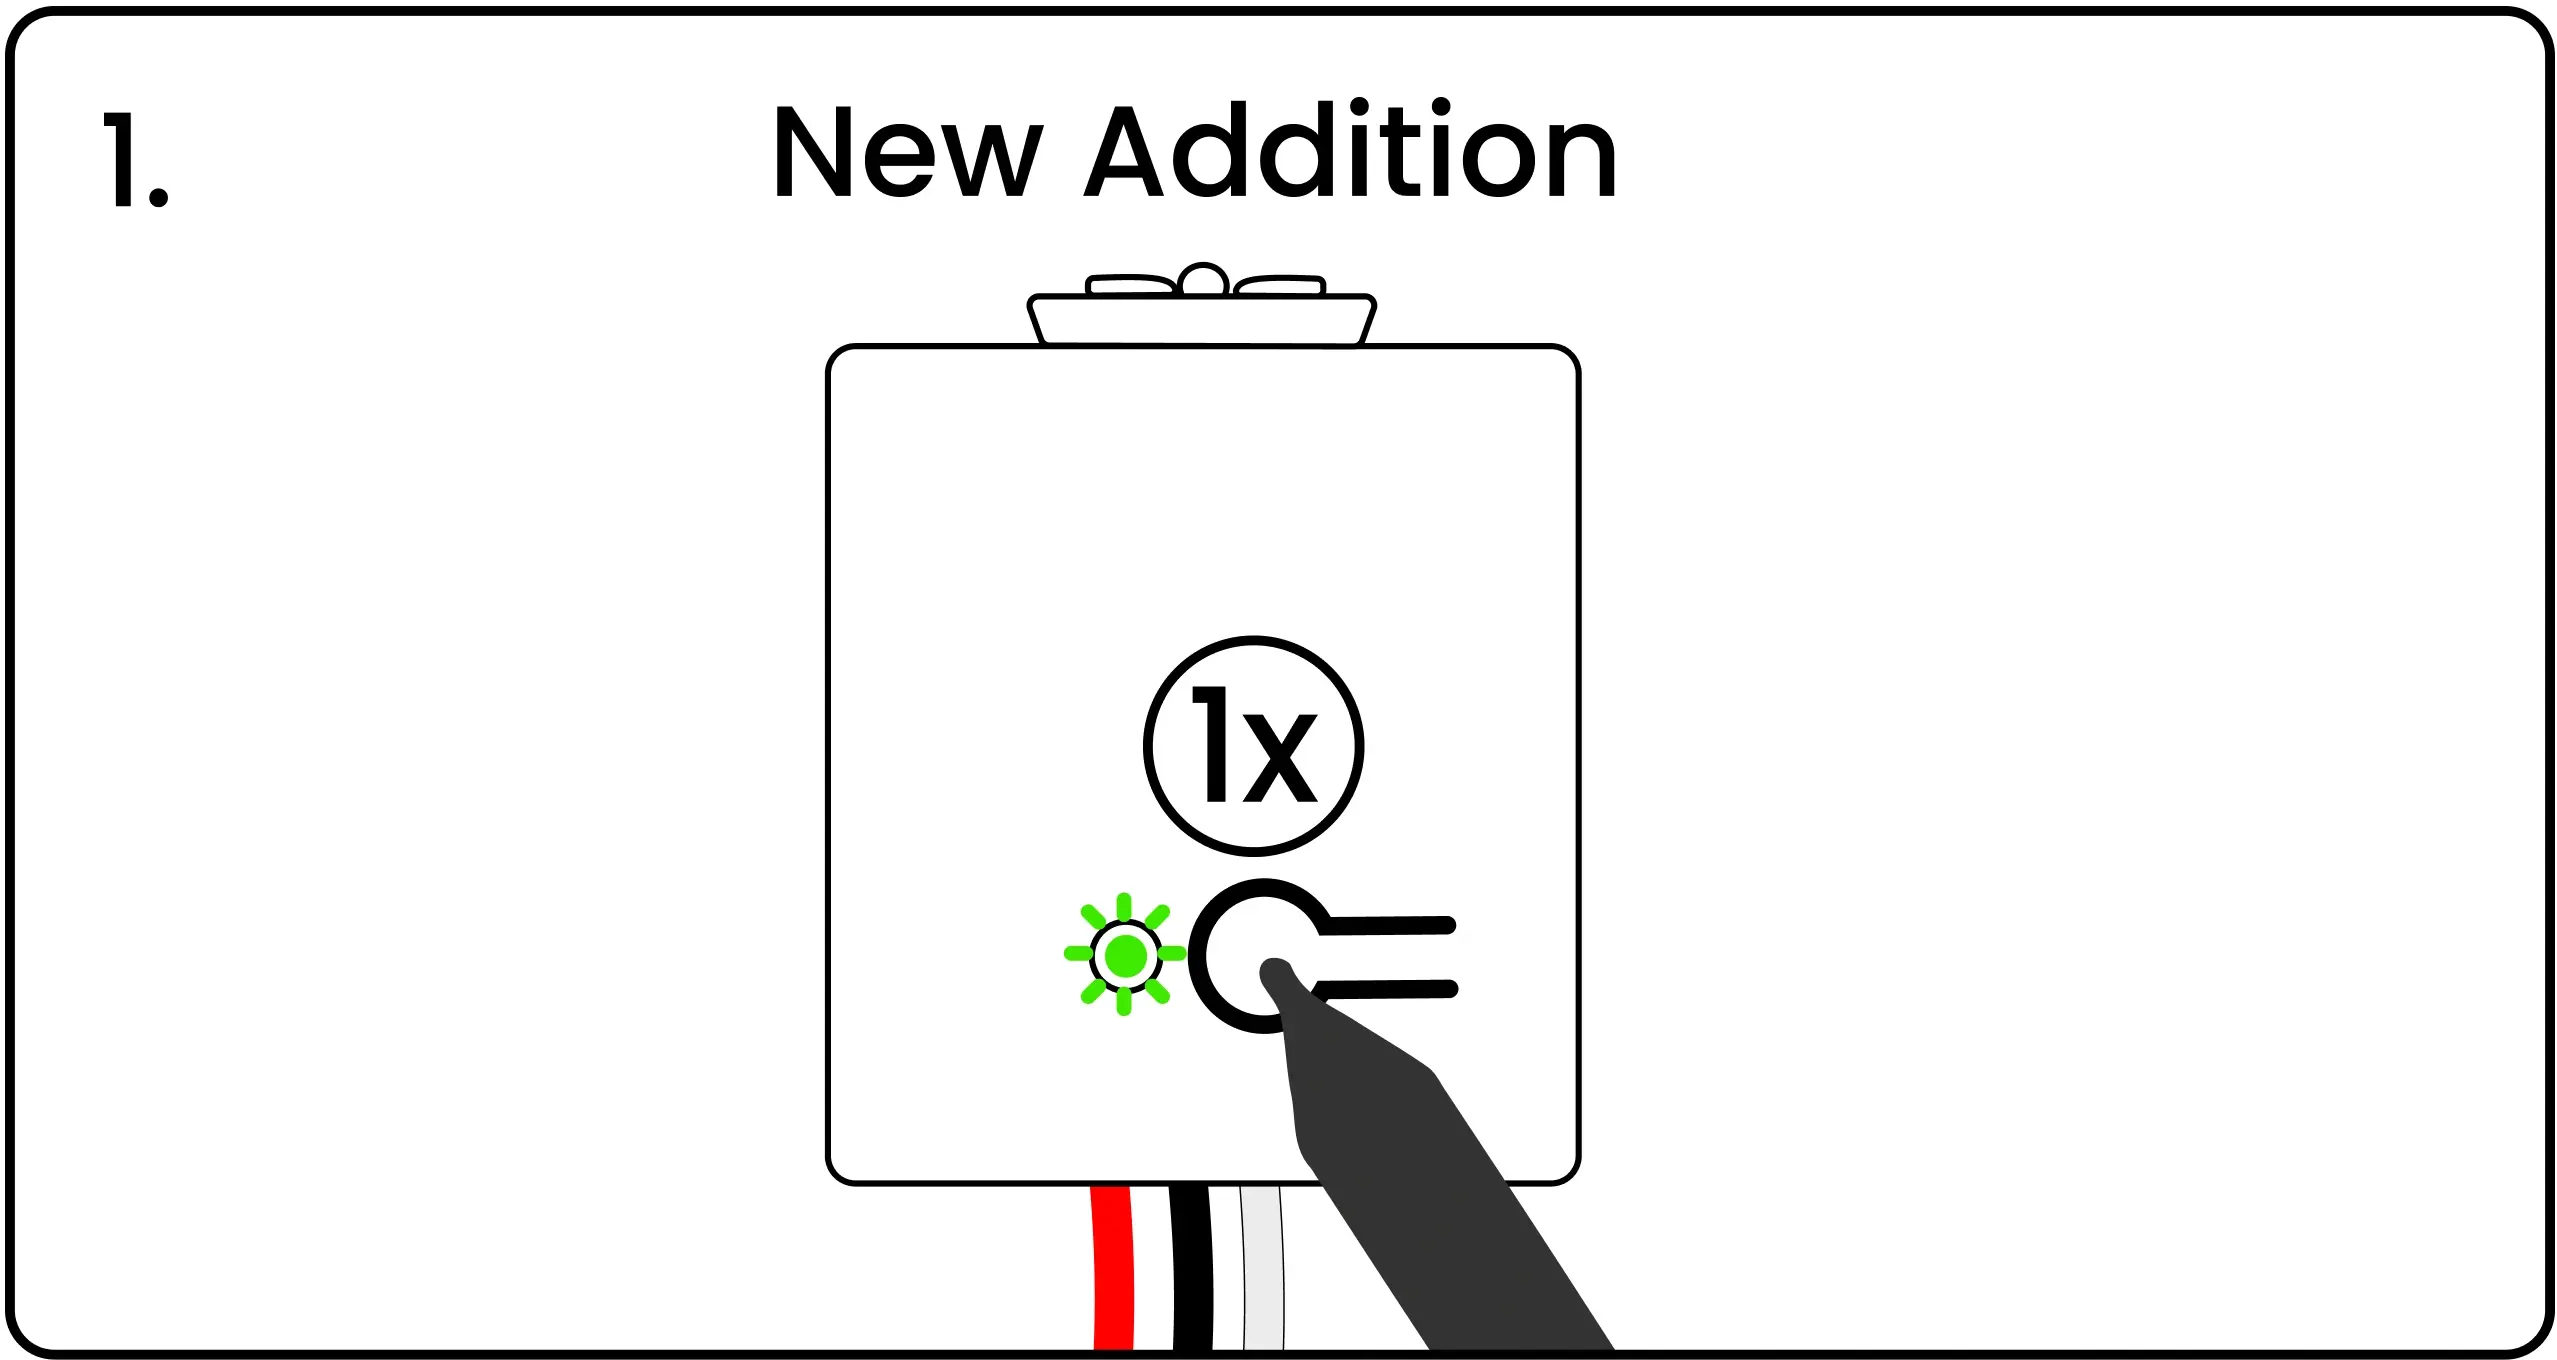
1. Energize the power controller by connecting to power or by using the Levven CTKL2 'Plug N Pair' wiring kit. Using a pen, press and release the power controller’s pairing button. This power controller’s LED will blink green to indicate it is waiting for a pairing signal.
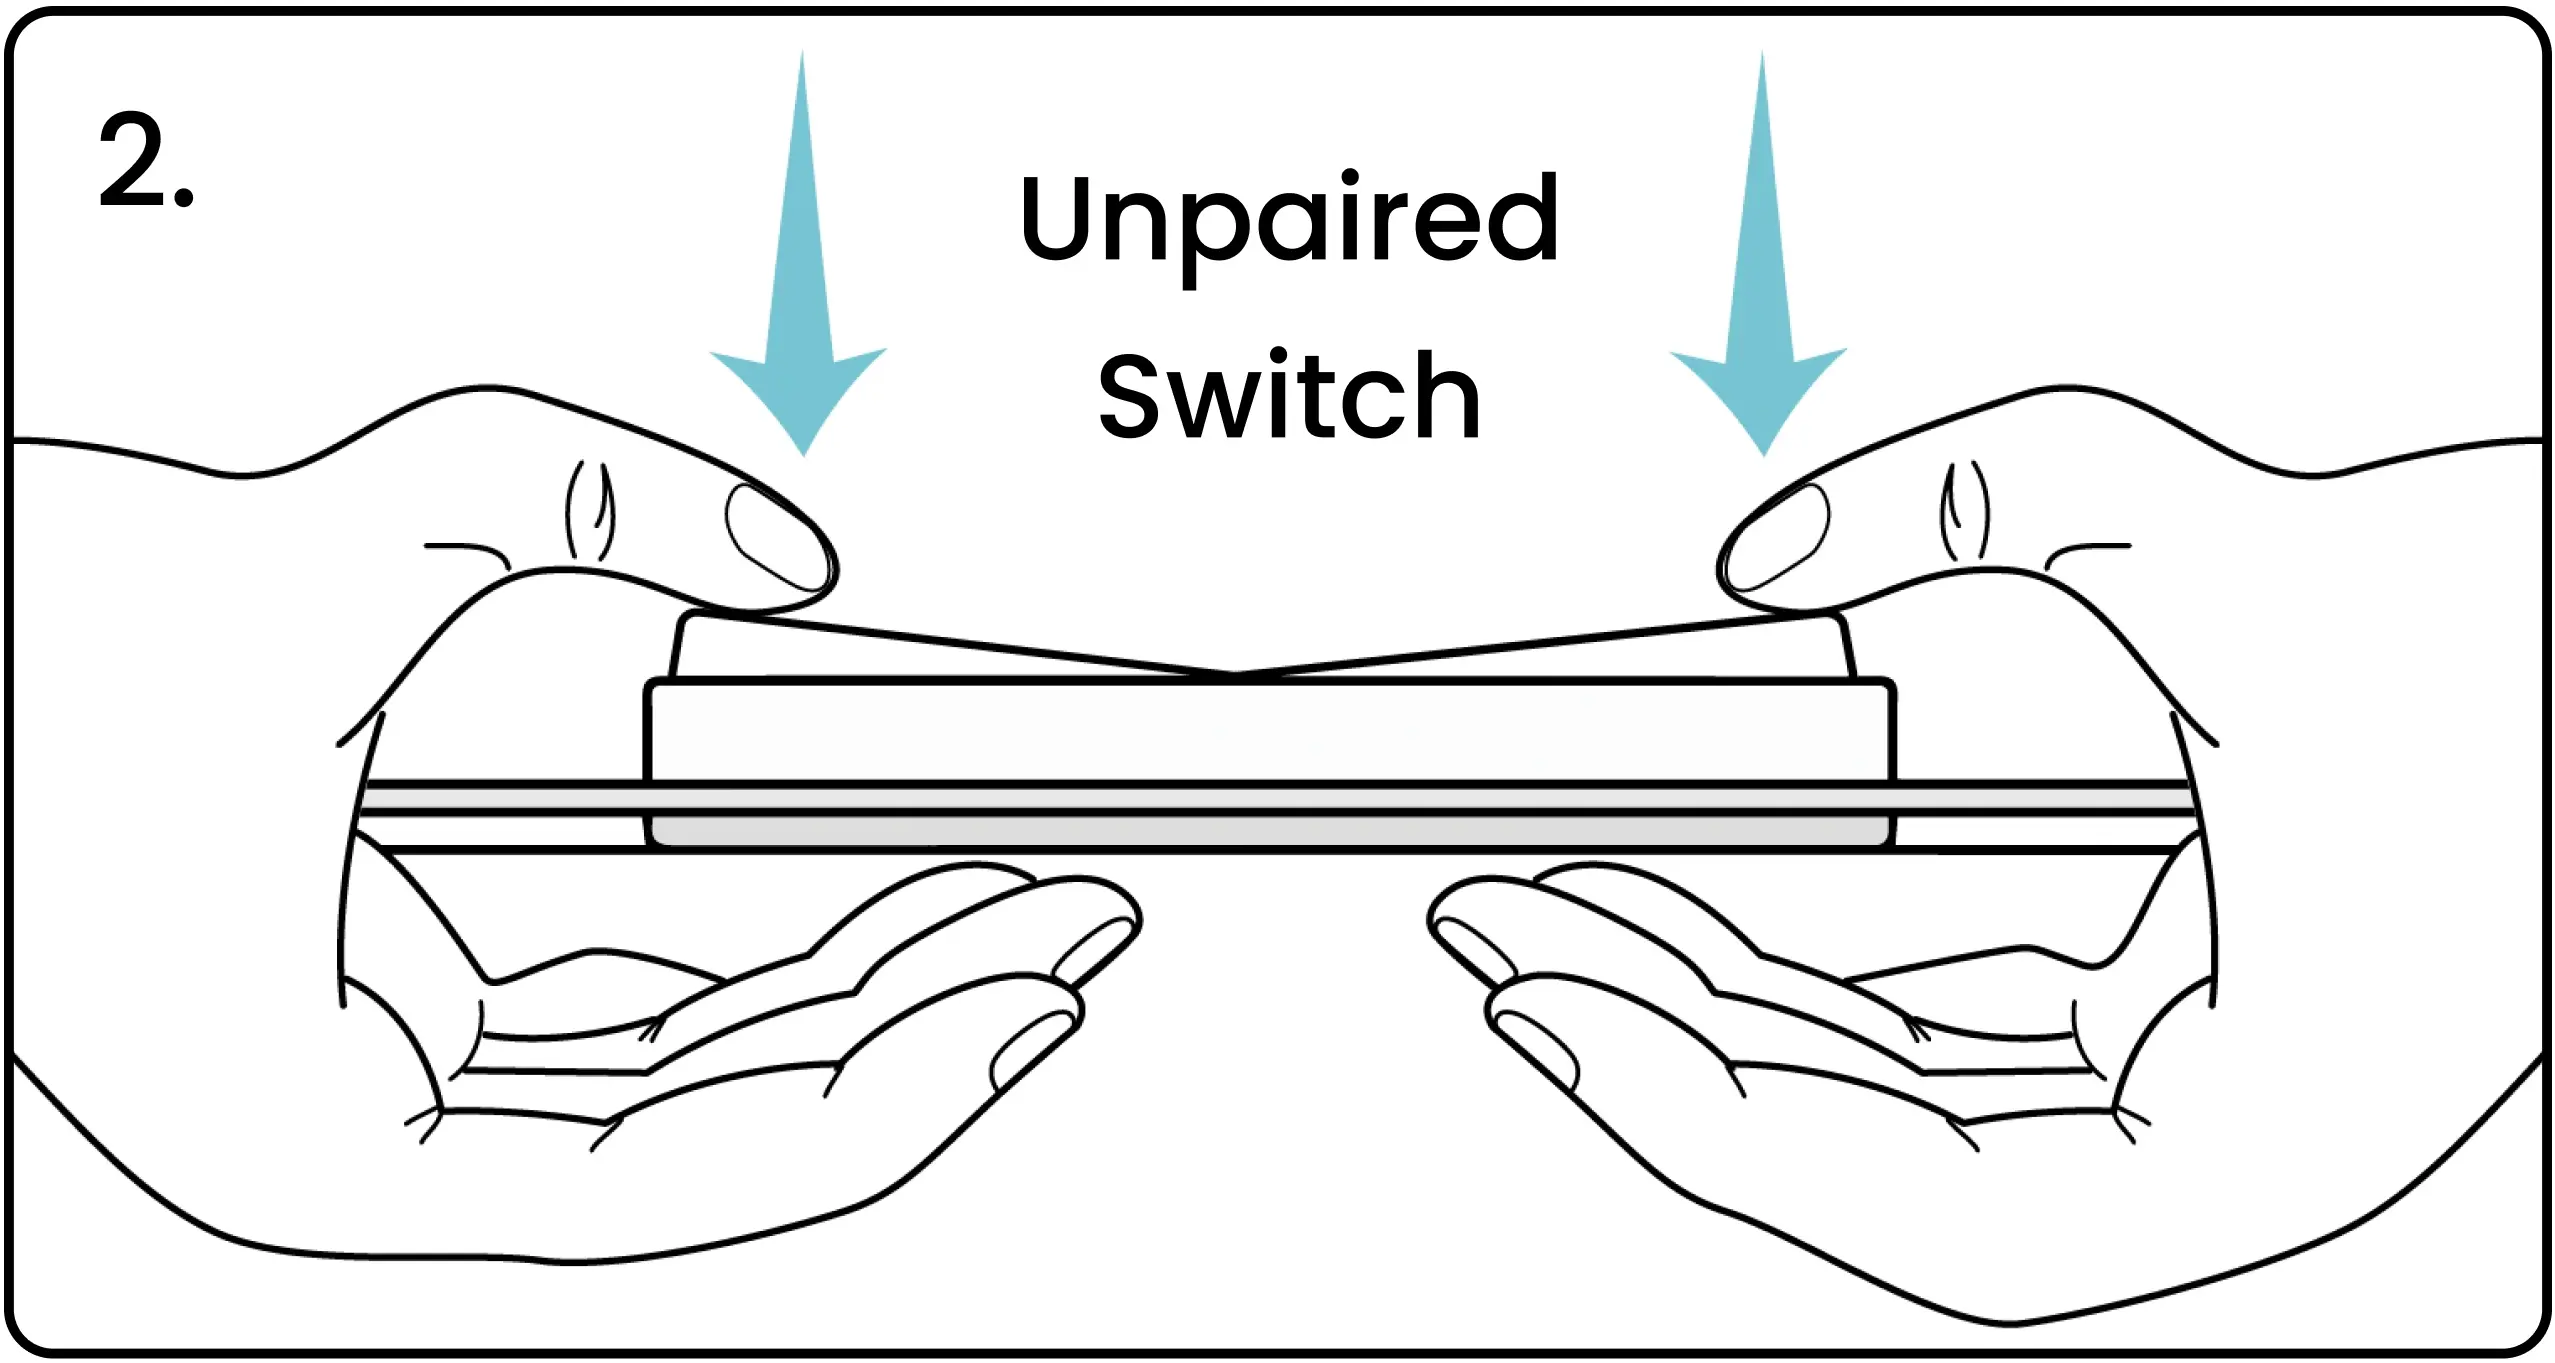
2. Squeeze and release both ends of the unpaired switch simultaneously to transmit a pairing signal.
3. The LED on the power controller will blink red and green to confirm the signal was received. If the LED does not blink red and green, squeeze the ends of the switch again to transmit a pairing signal.

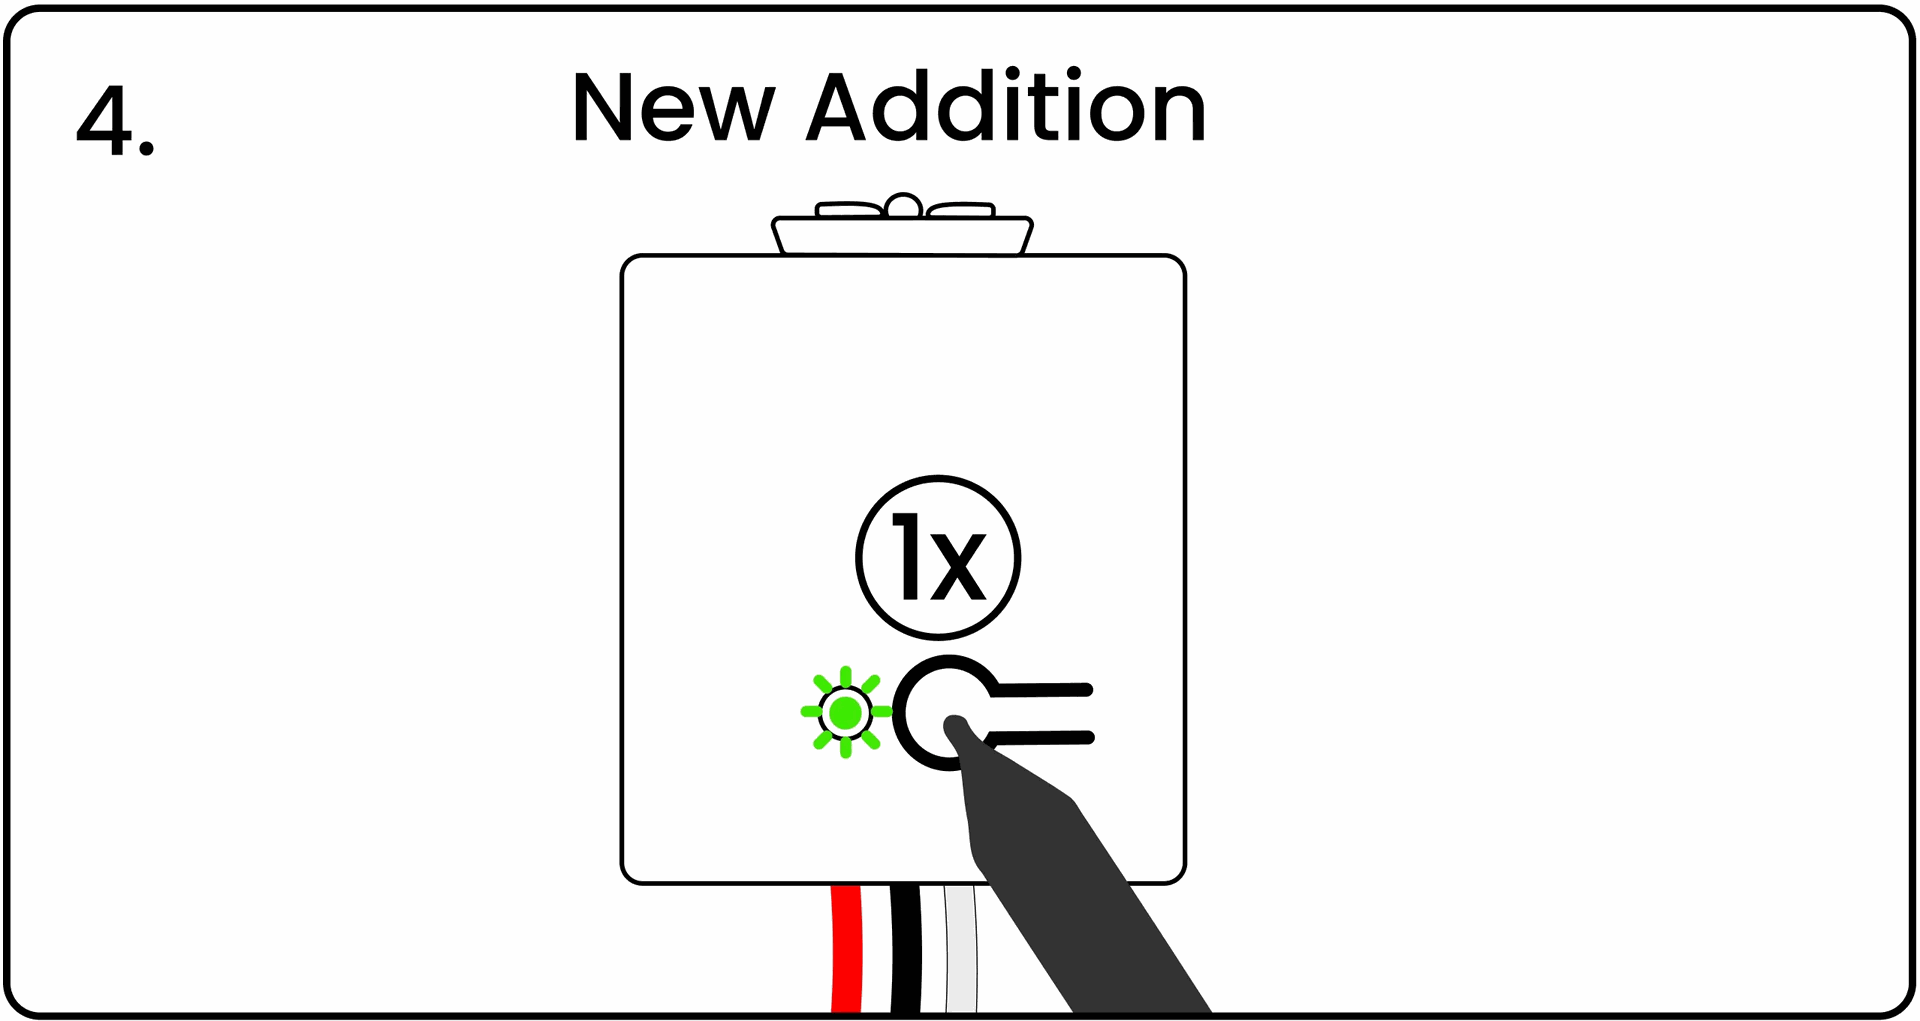
4. When the LED is blinking red/green, press and release the pairing button on the power controller to confirm the pairing. The LED will flash green to show the pairing completed successfully.
Pairing Switches
Pairing a Switch to a Power Controller
Pair a switch to a power controller so signals from that switch cause the power controller to turn on, off, or dim.
1. Energize the power controller by connecting to power or by using the Levven CTKL2 'Plug N Pair' wiring kit. Using a pen, press and release the power controller’s pairing button. This power controller’s LED will blink green to indicate it is waiting for a pairing signal.
2. Squeeze and release both ends of the unpaired switch simultaneously to transmit a pairing signal.
3. The LED on the power controller will blink red and green to confirm the signal was received. If the LED does not blink red and green, squeeze the ends of the switch again to transmit a pairing signal.
4. When the LED is blinking red/green, press and release the pairing button on the power controller to confirm the pairing. The LED will flash green to show the pairing completed successfully.

Reset Unused Power Controllers
1. To factory reset a power controller, energize the power controller, then press and hold the pairing button for 10 seconds.

2. The LED will blink red after 5 seconds. Keep holding until the 10-second mark, when the LED will blink red once again, confirming the power controller has been successfully reset to factory settings.