Instalación y cableado de un controlador de potencia GPDT15
LEA ANTES DE INSTALAR
- Instale y/o utilice Levven de acuerdo con los códigos y las normativas eléctricas locales.
- Los controladores de potencia Levven deben instalarse en cajas de conexiones eléctricas de tamaño adecuado para cumplir con el código eléctrico de su zona. Recomendamos usar cajas de conexiones de plástico para un rendimiento óptimo. Si se utiliza una caja metálica, asegúrese de que la antena del controlador de potencia sobresalga de la caja de conexiones.
- Si tiene dudas sobre cualquier parte de estas instrucciones, consulte a un electricista calificado.
Herramientas y materiales
Necesitará
- Destornillador Phillips para acceder a la caja eléctrica
- Escalera o banco escalonado para alcanzar la luminaria del techo
- Conectores de cables (Wire Nuts / Marettes) para unir los cables
- Probador de circuitos (opcional)
- Pelacables (opcional)
Pasos de cableado
- Apaga la energía en el disyuntor.
- Retira la tapa o el accesorio para acceder a la caja eléctrica.
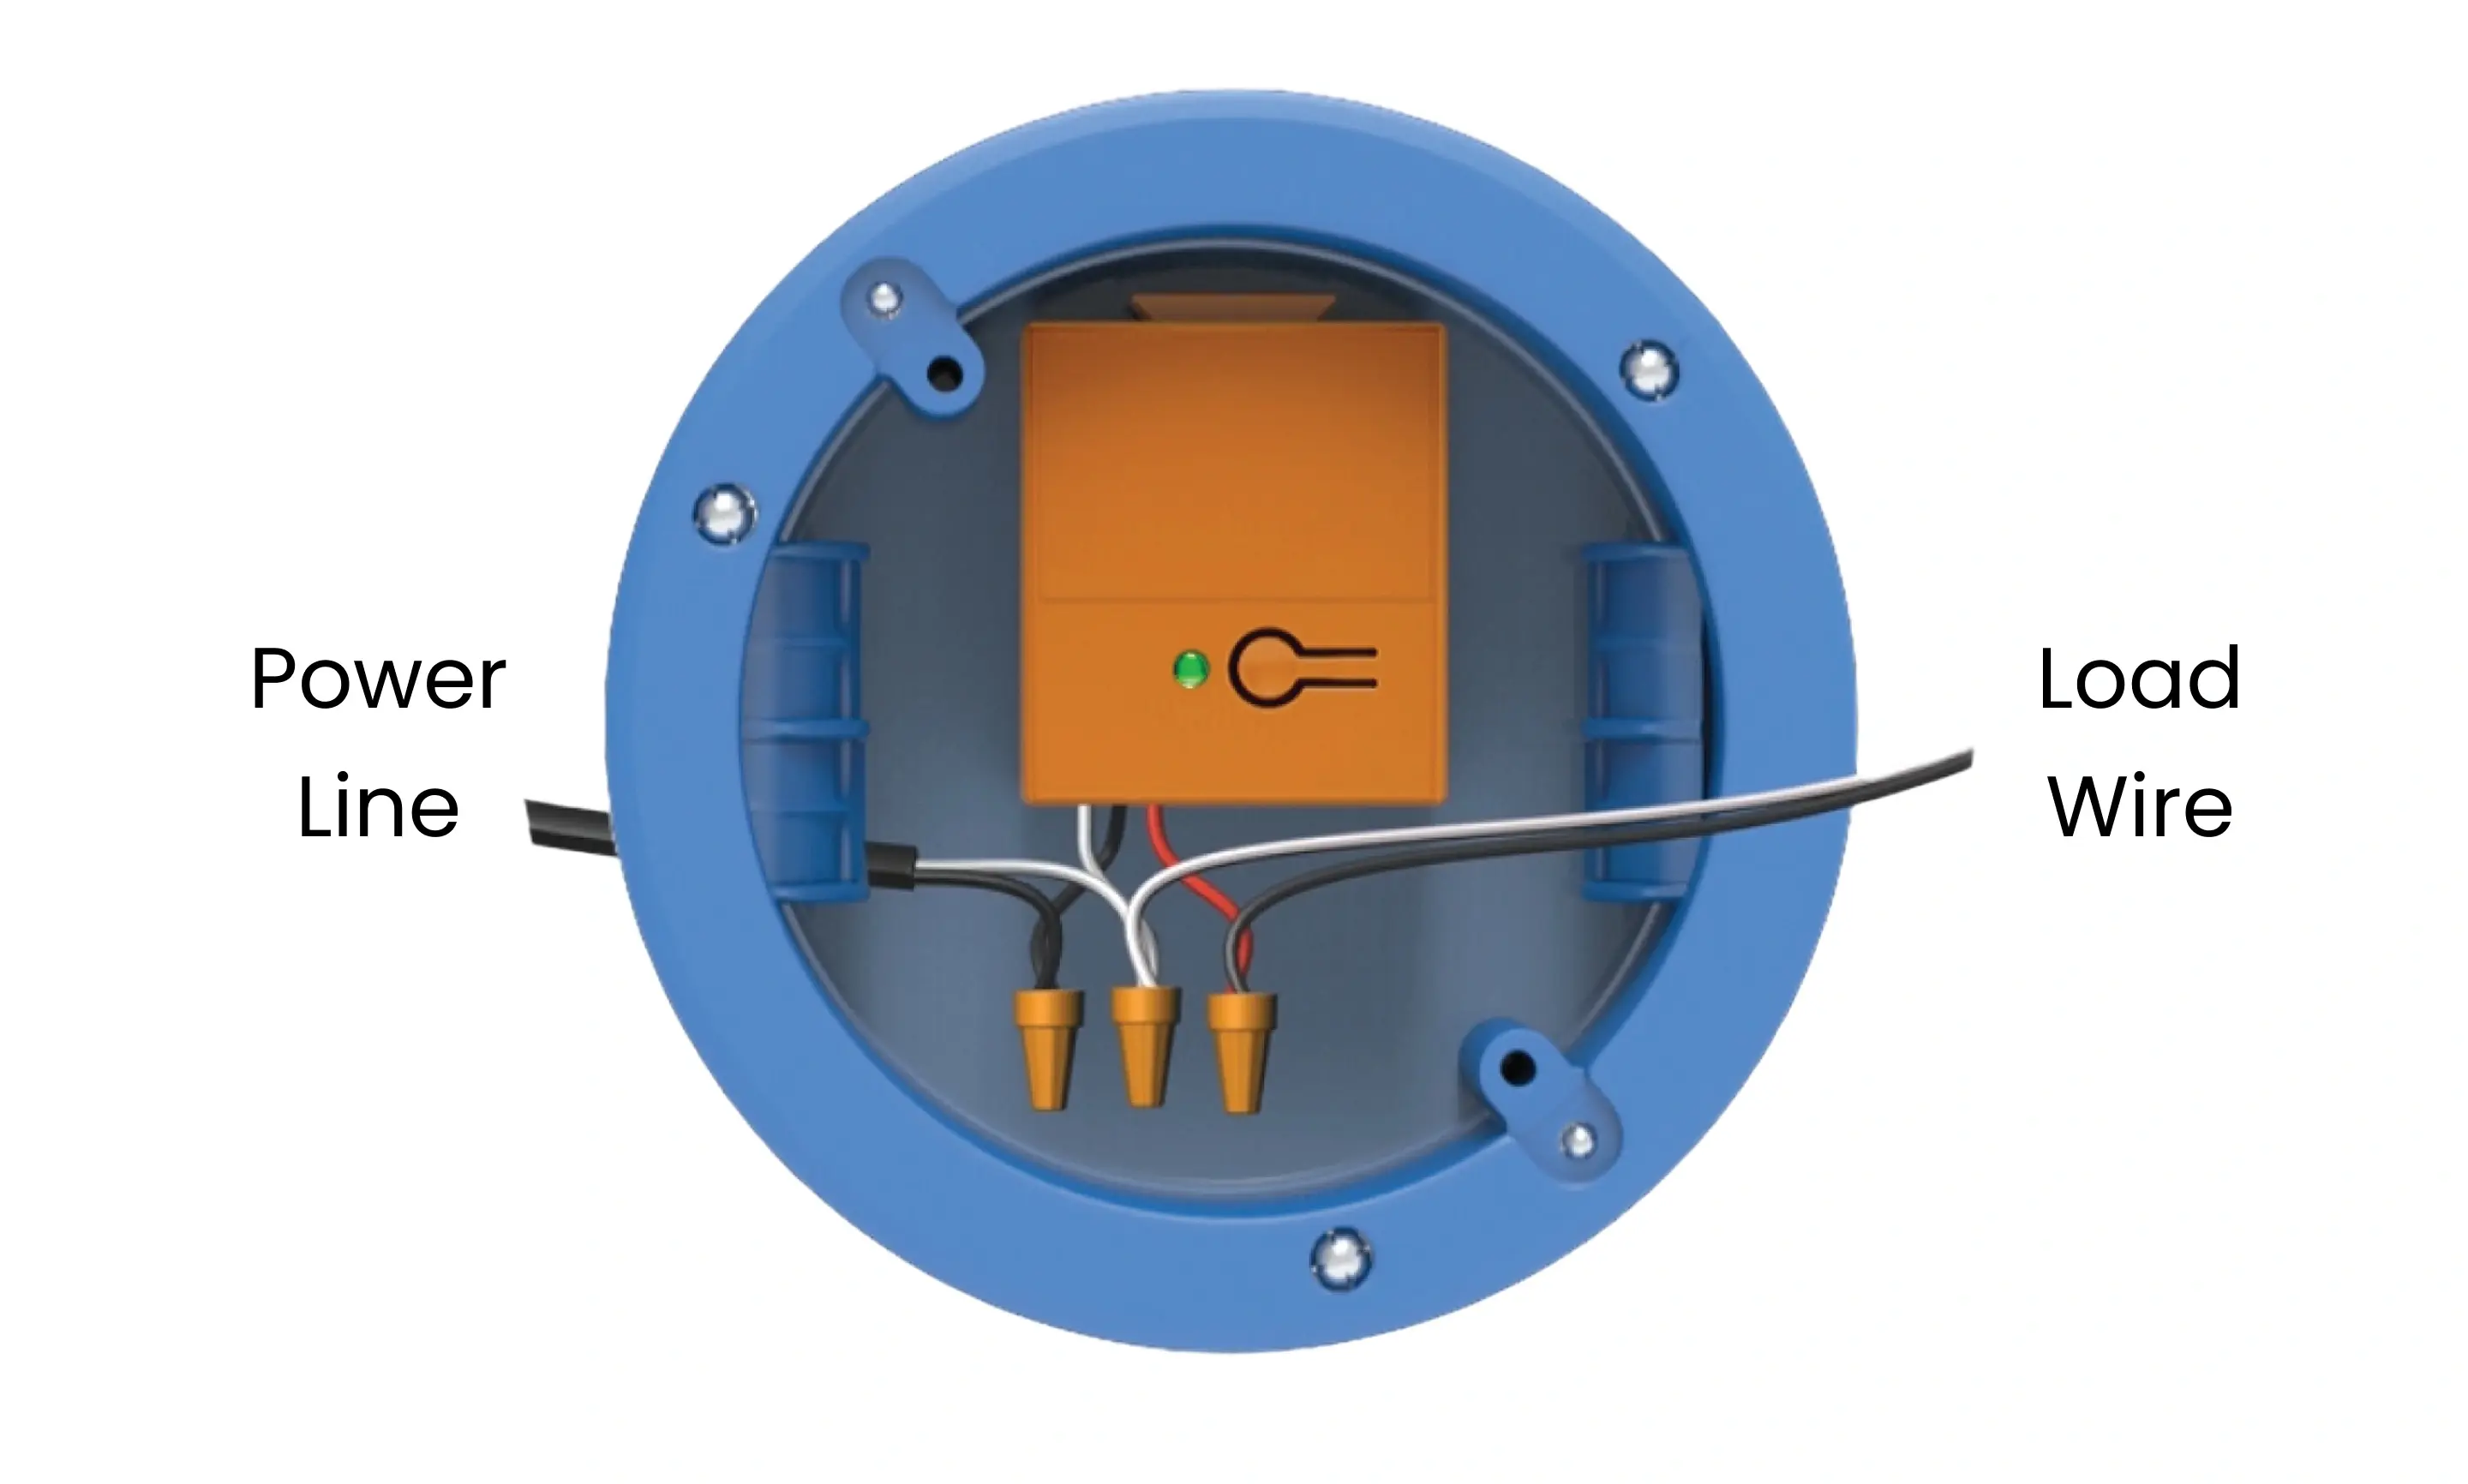
- Conecta los cables:
- Conecta el cable de alimentación NEGRO al cable NEGRO del controlador.
- Conecte el cable del controlador de potencia ROJO al cable de carga NEGRO.
- Conecta todos los cables BLANCOS (alimentación, carga y controlador).
Los cables deben verse como en el diagrama a continuación:
Cuando hayas terminado las conexiones de forma segura, vuelve a encender la energía en el disyuntor.
Ha cableado exitosamente el controlador Levven CP1-4.
Continúa group multiple power controllers, o emparejando interruptores con tu controlador.
¿Está instalando más de un controlador de energía?
Cree un 'Grupo del Hogar' para los controladores
Los controladores deben estar en el mismo grupo para funcionar juntos.
- Los controladores solo se comunicarán con otros dispositivos en el mismo grupo.
- Ignoran las señales de dispositivos que no están en el mismo grupo.
Un interruptor solo puede controlar controladores que estén en el mismo grupo.
Cuando agregas un Levven Q Gateway a tu hogar, solo podrá ver y controlar los dispositivos en su mismo grupo.
Cómo agregar un controlador a un grupo
- Presiona y suelta el botón en el primer controlador. Su LED parpadeará en VERDE.
- Presiona y suelta el botón en el nuevo controlador. Su LED parpadeará en VERDE o en ROJO y VERDE.
- El LED de ambos controladores parpadeará en ROJO y VERDE para intercambiar la información del grupo.
- Presiona y suelta el botón del primer controlador para confirmar el agrupamiento. Ambos LEDs parpadearán en VERDE tres veces para indicar éxito.
- El proceso de agrupamiento se agotará después de 60 segundos, y es posible que necesites comenzar el proceso de nuevo.
Repite este proceso para agregar todos los controladores al mismo grupo.
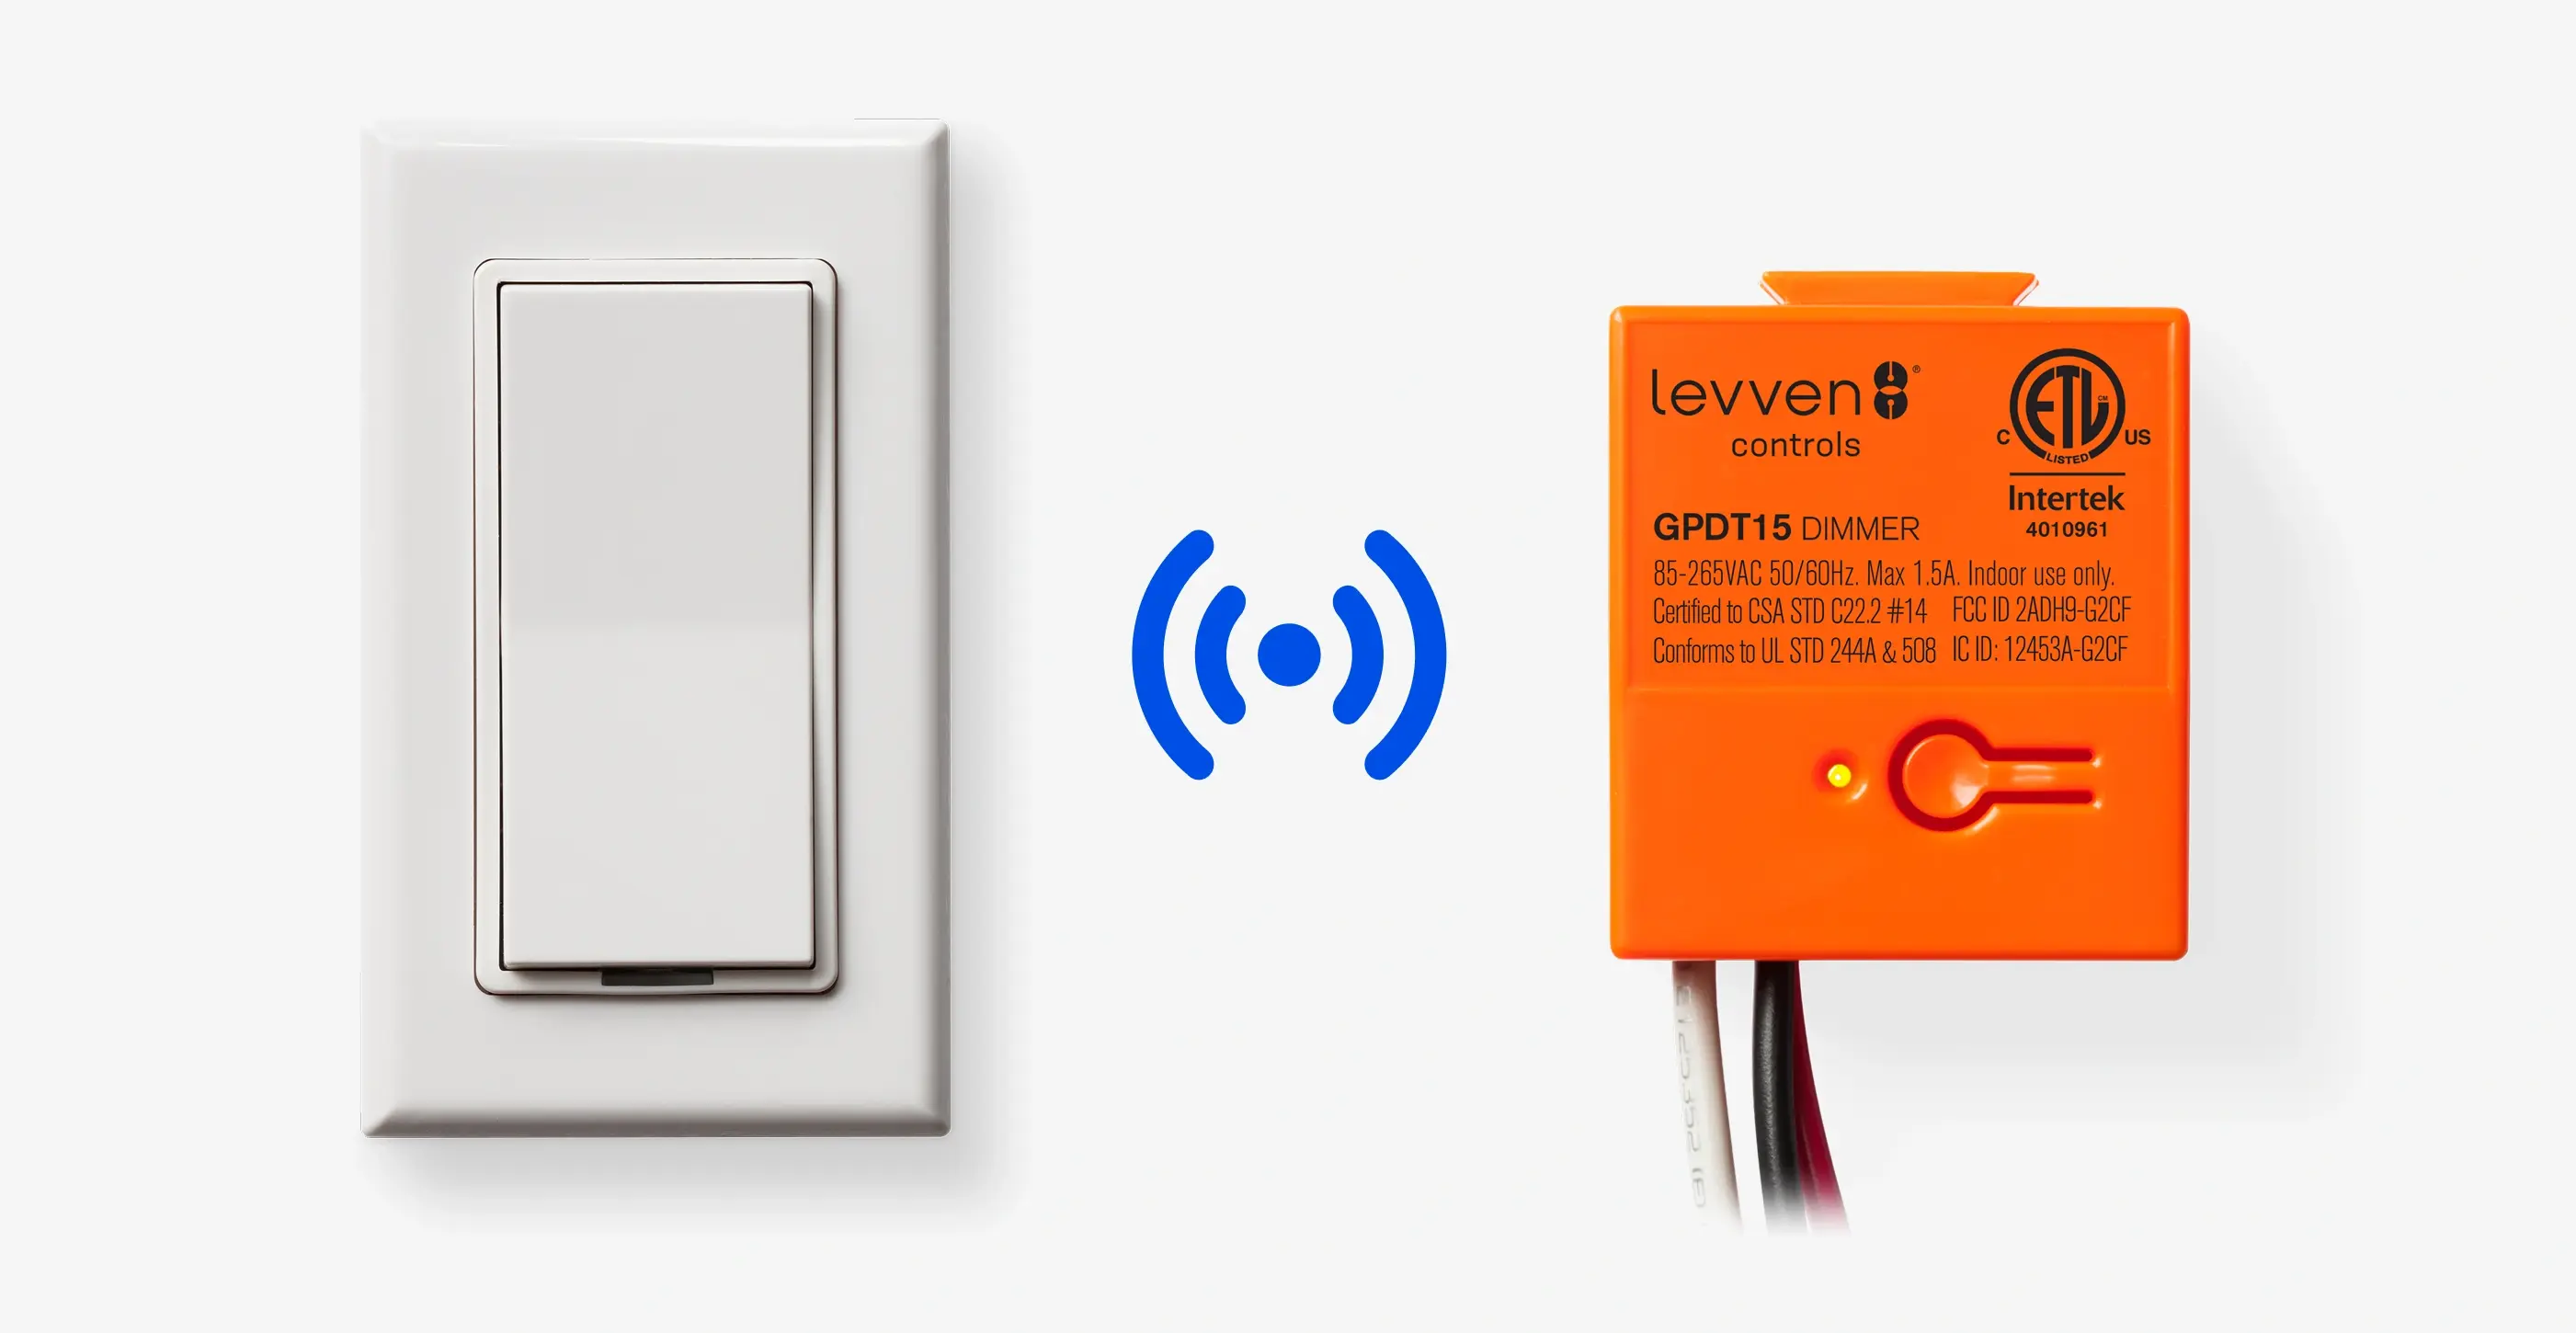
Vincular un interruptor a un controlador de potencia
Los interruptores envían comandos de encendido/apagado al controlador. Puedes emparejar hasta 10 interruptores con un controlador.
¿Cuántos interruptores se pueden emparejar?
Hasta 10 interruptores diferentes pueden emparejarse con un controlador de energía GPDT15.
- Esto es útil para interruptores de varias vías.
- Por ejemplo, puedes tener un interruptor en la parte inferior de las escaleras y otro en la parte superior. Ambos interruptores pueden controlar la misma luz de la escalera al emparejarlos con el mismo controlador.
Emparejar manualmente un interruptor con un controlador
- Presiona y suelta el botón del controlador. Su LED parpadeará en VERDE.
- Presiona ambos extremos del interruptor basculante al mismo tiempo y luego suéltalos.
- El LED del controlador parpadeará en ROJO y VERDE cuando reciba la señal del interruptor.
- Si el LED no parpadea en rojo/verde, presione y suelte nuevamente ambos extremos del balancín del interruptor.
- El proceso de emparejamiento se agotará después de 60 segundos, y es posible que necesites comenzar el proceso de nuevo.
- Presiona y suelta el botón del controlador nuevamente para confirmar. Su LED parpadeará en VERDE tres veces para indicar éxito.
- Repite el proceso para emparejar interruptores adicionales con este controlador.
Regulación de luces con un interruptor
Para aumentar el brillo:
- Mantén presionado el botón de encendido/subir.
- Suelta el botón cuando alcances el nivel de brillo deseado.
Para disminuir el brillo:
- Mantén presionado el botón de apagado/bajar.
- Suelta el botón cuando alcances el nivel de brillo deseado.
Si estás usando la aplicación Levven Controls:
- Disminuye el brillo deslizando hacia la izquierda sobre el recuadro del controlador en la pantalla de dispositivos.
- Aumenta el brillo deslizando hacia la derecha sobre el recuadro del controlador en la pantalla de dispositivos.
Configuración del nivel de brillo mínimo/máximo
Establece el nivel máximo de brillo del atenuador
- Usa el interruptor para aumentar el brillo hasta el nivel máximo deseado.
- Si la luz parpadea, atenúa hasta que el parpadeo se detenga.
- Haz doble clic en el botón del controlador GPDT15 (presiona el botón dos veces rápidamente).
- El LED del controlador parpadeará en VERDE para indicar éxito.
Establece el nivel mínimo de brillo del atenuador
- Usa el interruptor para reducir el brillo hasta el nivel mínimo deseado.
- Si la luz parpadea, aumenta el brillo hasta que el parpadeo se detenga.
- Haz doble clic en el botón del controlador GPDT15 (presiona el botón dos veces rápidamente).
- El LED del controlador parpadeará en VERDE para indicar éxito.
Restablece los niveles mínimo/máximo de brillo del atenuador a los ajustes de fábrica.
- Haz triple clic en el botón del controlador GPDT15 (presiona el botón tres veces rápidamente).
- El LED del controlador parpadeará en VERDE para indicar éxito.
Luces de disco LED compatibles
Algunas luces de disco LED no son compatibles con los atenuadores electrónicos. Parpadean al atenuarse, o no se atenúan en absoluto.
LUCES DE DISCO LED COMPATIBLES
Levven ha probado y confirmado que las luces de disco LED que se enumeran a continuación son compatibles con el controlador de atenuación Levven GPDT15 (versión de firmware 1.4.16):
Manufacturer: | Model Number: |
ASD | ASD-LDS-6D1540-WH |
BAZZ | SLDSKB4W |
DAWN RAY | DR400RW |
HALCO | 89093 |
HALO | HLB4069FS1EMWR |
LITHONIA | WF4LED3K |
NICOR | DLE6 Select |
NICOR | DLF201203KWH |
NICOR | DLF301203KWH |
NICOR | DLR56-3008 |
NICOR | RSD611203KWH |
NORA | NLOPAC-R650930A |
NORA | NLOPAC-R6509T24 |
ORTECH | 2180 |
ORTECH | DISC4 |
ORTECH | SLIM6-3CCT |
TOPAZ | SDL6 15W WH D CTS-46 |
LUCES DE DISCO LED NO COMPATIBLES
Levven ha probado y confirmado que las luces de disco LED que se enumeran a continuación no son compatibles con el controlador de atenuación Levven GPDT15:
Manufacturer: | Model Number: |
LIGHTLINE | SLIM LED MULTI 8W/120V 4" |
NICOR | DSK4 Select |
ORTECH | SLIM4BP |
STANDARD | 63653 6" Disk |
STANDARD | 63644 4" Disk |
Opcional: Configuración en la aplicación Levven Controls
Agregar un nuevo controlador es fácil con la aplicación Levven Controls. Para usar la aplicación y agregar controladores a su grupo del hogar, necesitará un Levven Q Gateway.
Si necesita configurar su Levven Q Gateway, vaya aquí para comenzar:: Soporte para Q Gateway
Si su Levven Q Gateway ya está configurado y está utilizando la aplicación Levven Controls, vaya aquí:Administración de dispositivos.