Documentation
Installing and Wiring a GPC20 Power Controller
READ BEFORE INSTALLING:
- Install and/or use Levven in accordance with local electrical codes and regulations.
- Levven power controllers are to be mounted in a suitable-sized electrical junction boxes to satisfy your area's electrical code. We recommend using plastic junction boxes for optimal performance. If a metal box is being used, ensure the power controller antenna is sticking out of the junction box.
- If you are unsure about any part of these instructions, consult a qualified electrician.
Tools and Materials
You will need:
- Screwdriver to access the electrical box
- Ladder or Stepstool to reach ceiling fixture
- Wire Nuts / Marrettes to connect wires
- Circuit Tester (optional)
- Wire Strippers (optional)
Wiring Steps
- Turn off power at the circuit breaker.
- Remove the cover or fixture to access the electrical box.
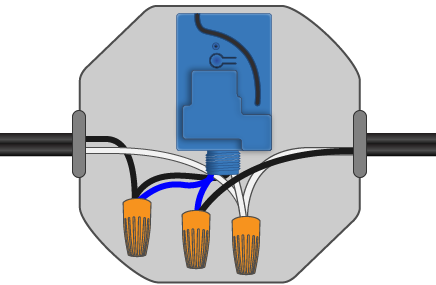
- Connect wires:
- Connect BLACK power wire to BLACK power controller wire and one of the BLUE dry contact wires..
- Connect second BLUE power controller wire to BLACK load wire.
- Connect all WHITE wires (power, load, and power controller).
The wires should look like the diagram below:
When your connections are safely completed, turn the power back on at the circuit breaker.
You have successfully wired the Levven GPC20 power controller.
Continue to group multiple power controllers, or pair switches to your power controller.
Installing More Than One Power Controller?
Create a 'Home Group' for Power Controllers
Power controllers must be in the same group to function together.
- Power controllers will only communicate with other devices in the same group.
- They ignore signals from devices that are not in the same group.
A switch can only control power controllers that are in the same group.
When you add a Levven Q Gateway to your home, it will only see and control devices in its group.
How to Add a Power Controller to a Group
- Press and release the button on the first power controller. Its LED will blink GREEN.
- Press and release the button on the new power controller. Its LED will blink GREEN or RED and GREEN.
- The LED on both power controllers will blink RED and GREEN to exchange group info.
- Press and release the first power controller's button to confirm the grouping. Both LEDs will flash GREEN three times to signal success.
- The grouping process will time out after 60 seconds, and you may need to start the process over again.
Repeat this process to add all of the power controllers into the same group.
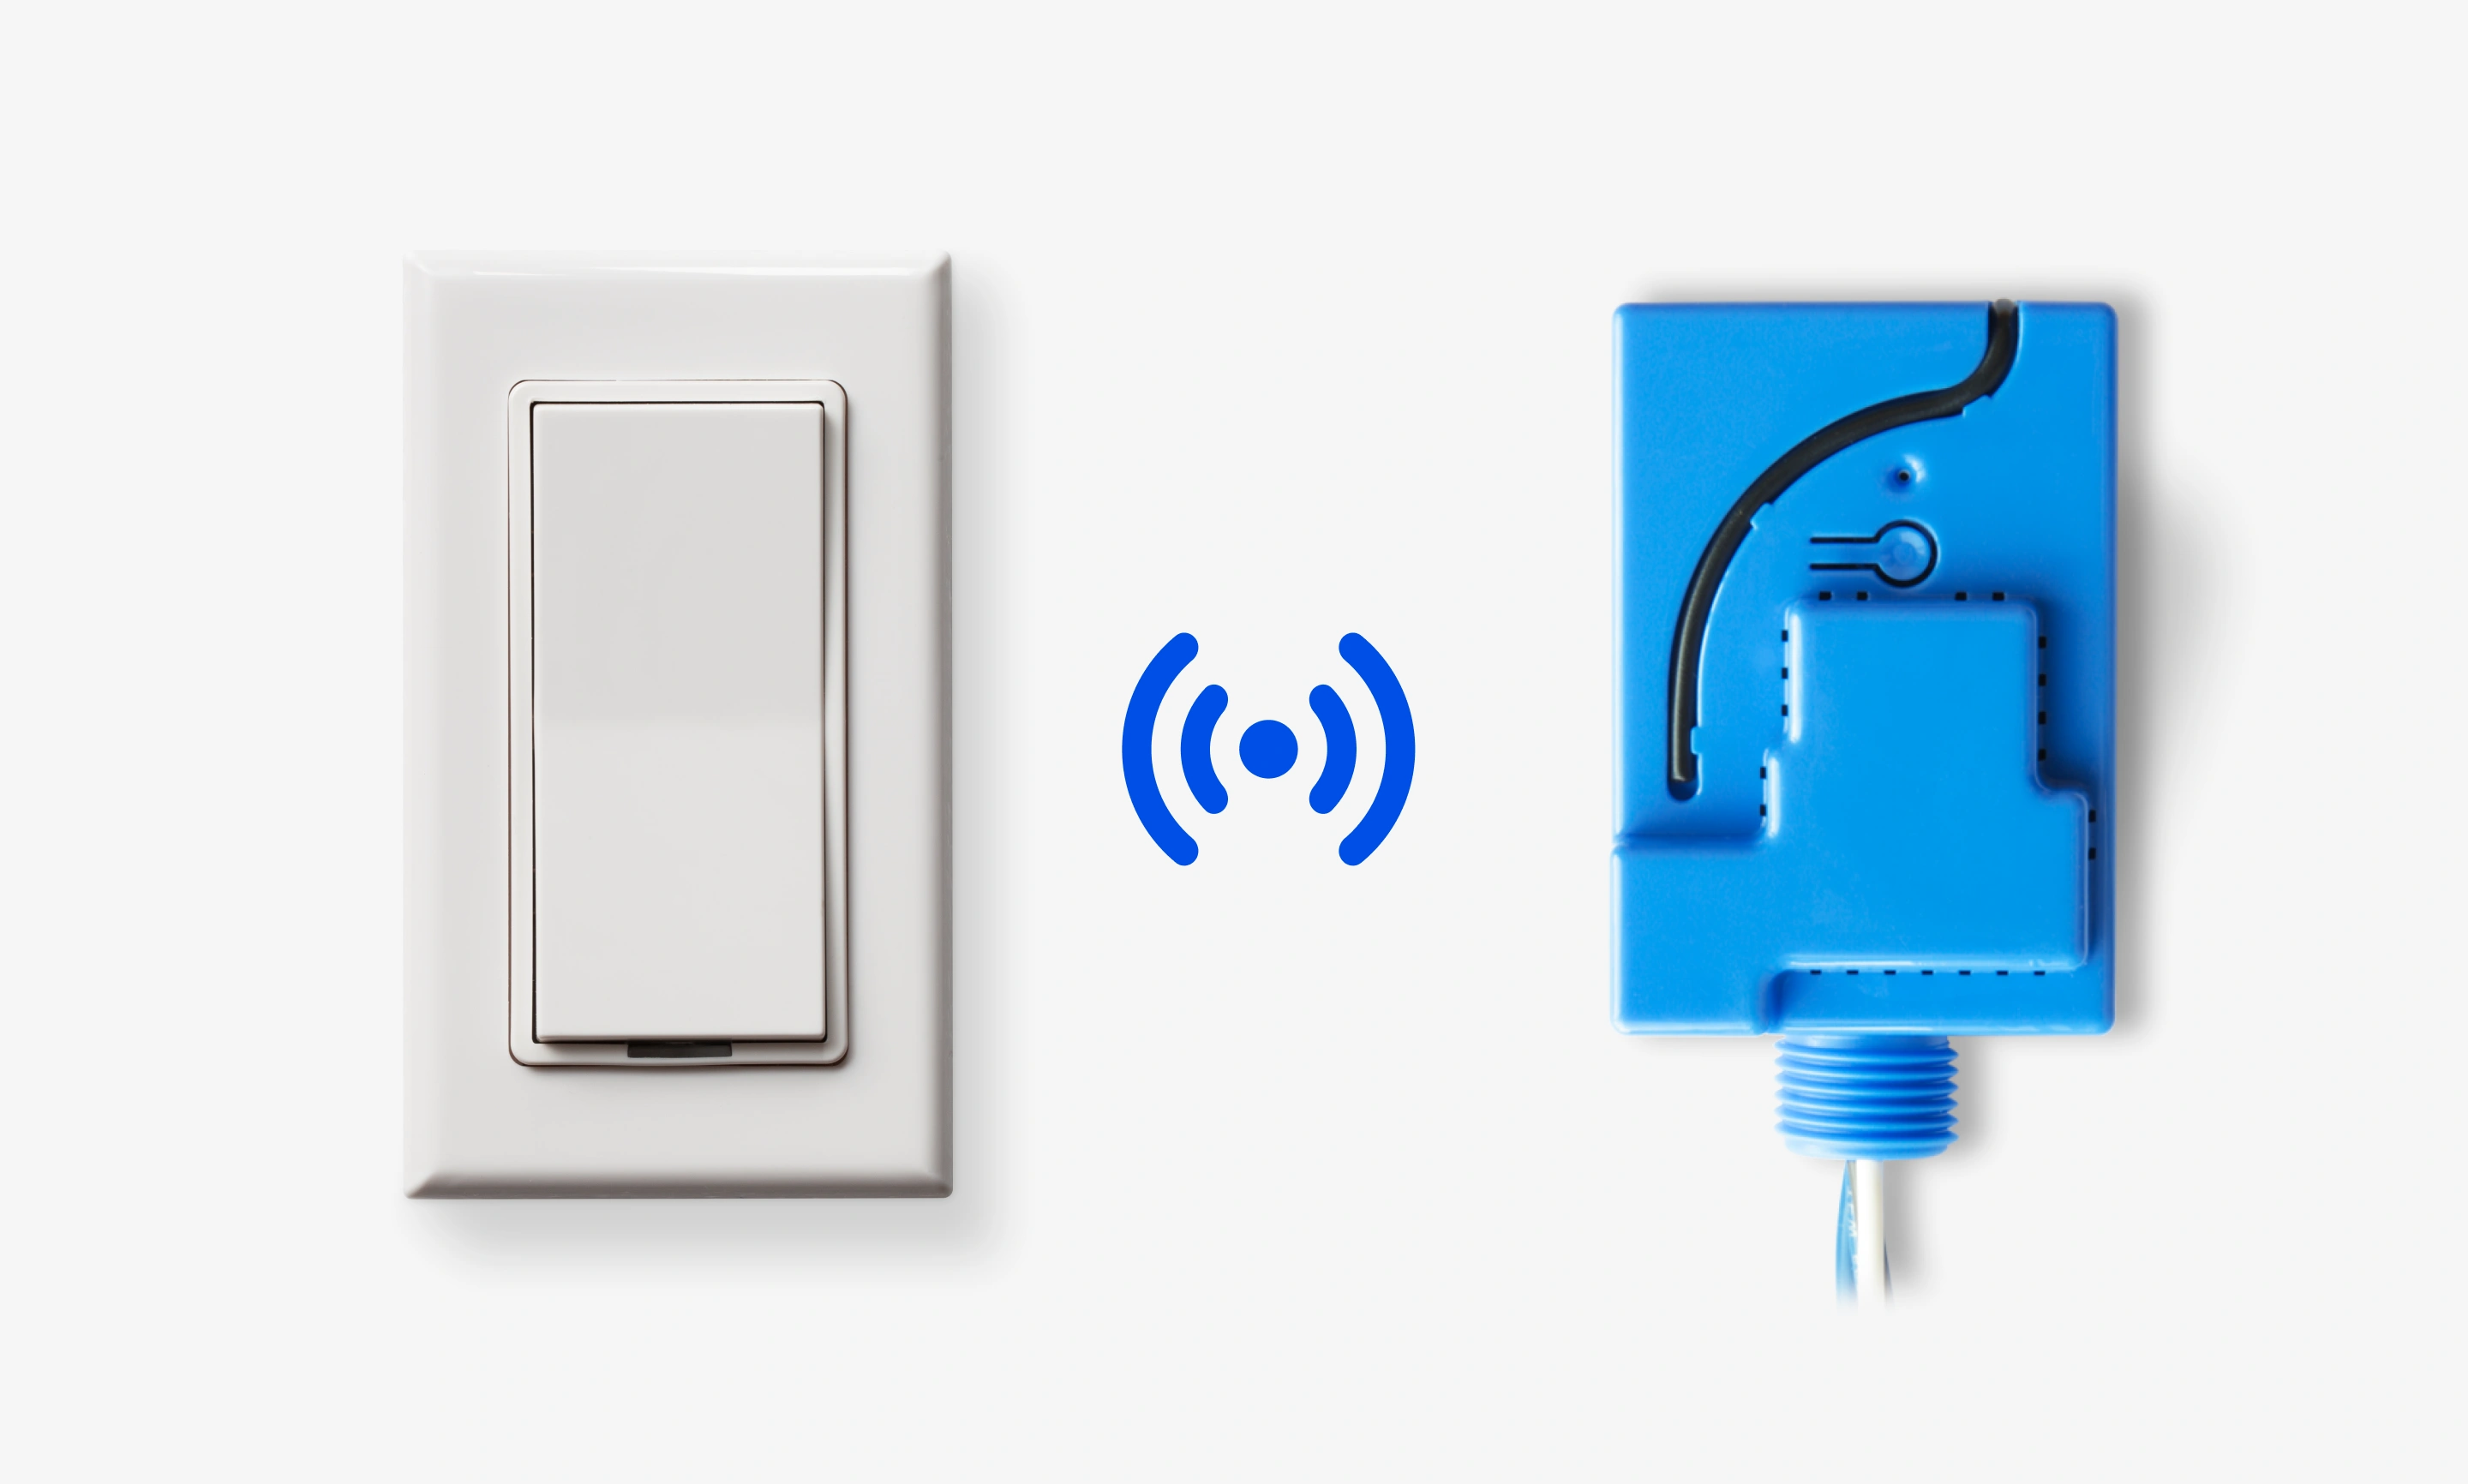
Pair a Switch to a Power Controller
Switches send on/off commands to the power controller. You can pair up to 10 switches to one power controller.
How Many Switches Can be Paired?
Up to 10 different switches can be paired to one GPC20 power controller.
- This is useful for multi-way switches.
- For example, you can have one switch at the bottom of the stairs and one at the top. Both switches can control the same stairway light by pairing the switches to the same power controller.
Manually Pair a Switch to a Power Controller
- Press and release the power controller's button. Its LED will blink GREEN.
- Press both ends of the switch rocker at the same time, then release.
- The power controller's LED will blink RED and GREEN when it receives the signal from the switch.
- If the LED does not blink RED and GREEN, press and release both ends of the switch rocker again.
- The pairing process will time out after 60 seconds, and you may need to start the process over again.
- Press and release the power controller's button again to confirm. Its LED will flash GREEN three times to signal success.
- Repeat to pair additional switches to this power controller.
Optional: Setup in Levven Controls App
Adding a new power controller is easy with the Levven Controls App. To use the app to add power controllers to your home group, you will need a Levven Q Gateway.
If you need to setup your Q Gateway, head here to get started: Q Gateway Support.
If your Q Gateway is setup and you are using the Levven Controls app, head here: Device Management.