Resumen de instalación de switches
Esta página proporciona una guía sencilla para instalar los switches de Levven. Describe los pasos básicos para montar, conectar y preparar los switches para emparejarlos con un controlador. Siga las instrucciones y los diagramas o videos para completar la instalación.
Interpretación de planos eléctricos
Para más información, haga clic en el botón de abajo para aprender a leer los planos que tienen marcas o notas de Levven.
Cómo montar los switches de Levven en la pared
Después de pintar las paredes, se pueden instalar los interruptores donde el comprador los necesite. Los interruptores pueden instalarse en cualquier superficie: pladur, ladrillo, vidrio, hormigón, etc.
Mida desde el suelo para la altura correcta del interruptor
Levven recomienda utilizar la plantilla de instalación de interruptores SWI-JIG para acelerar su trabajo.
Instrucciones de instalación para switches multi-gang:
Paso 1: Unir los switches
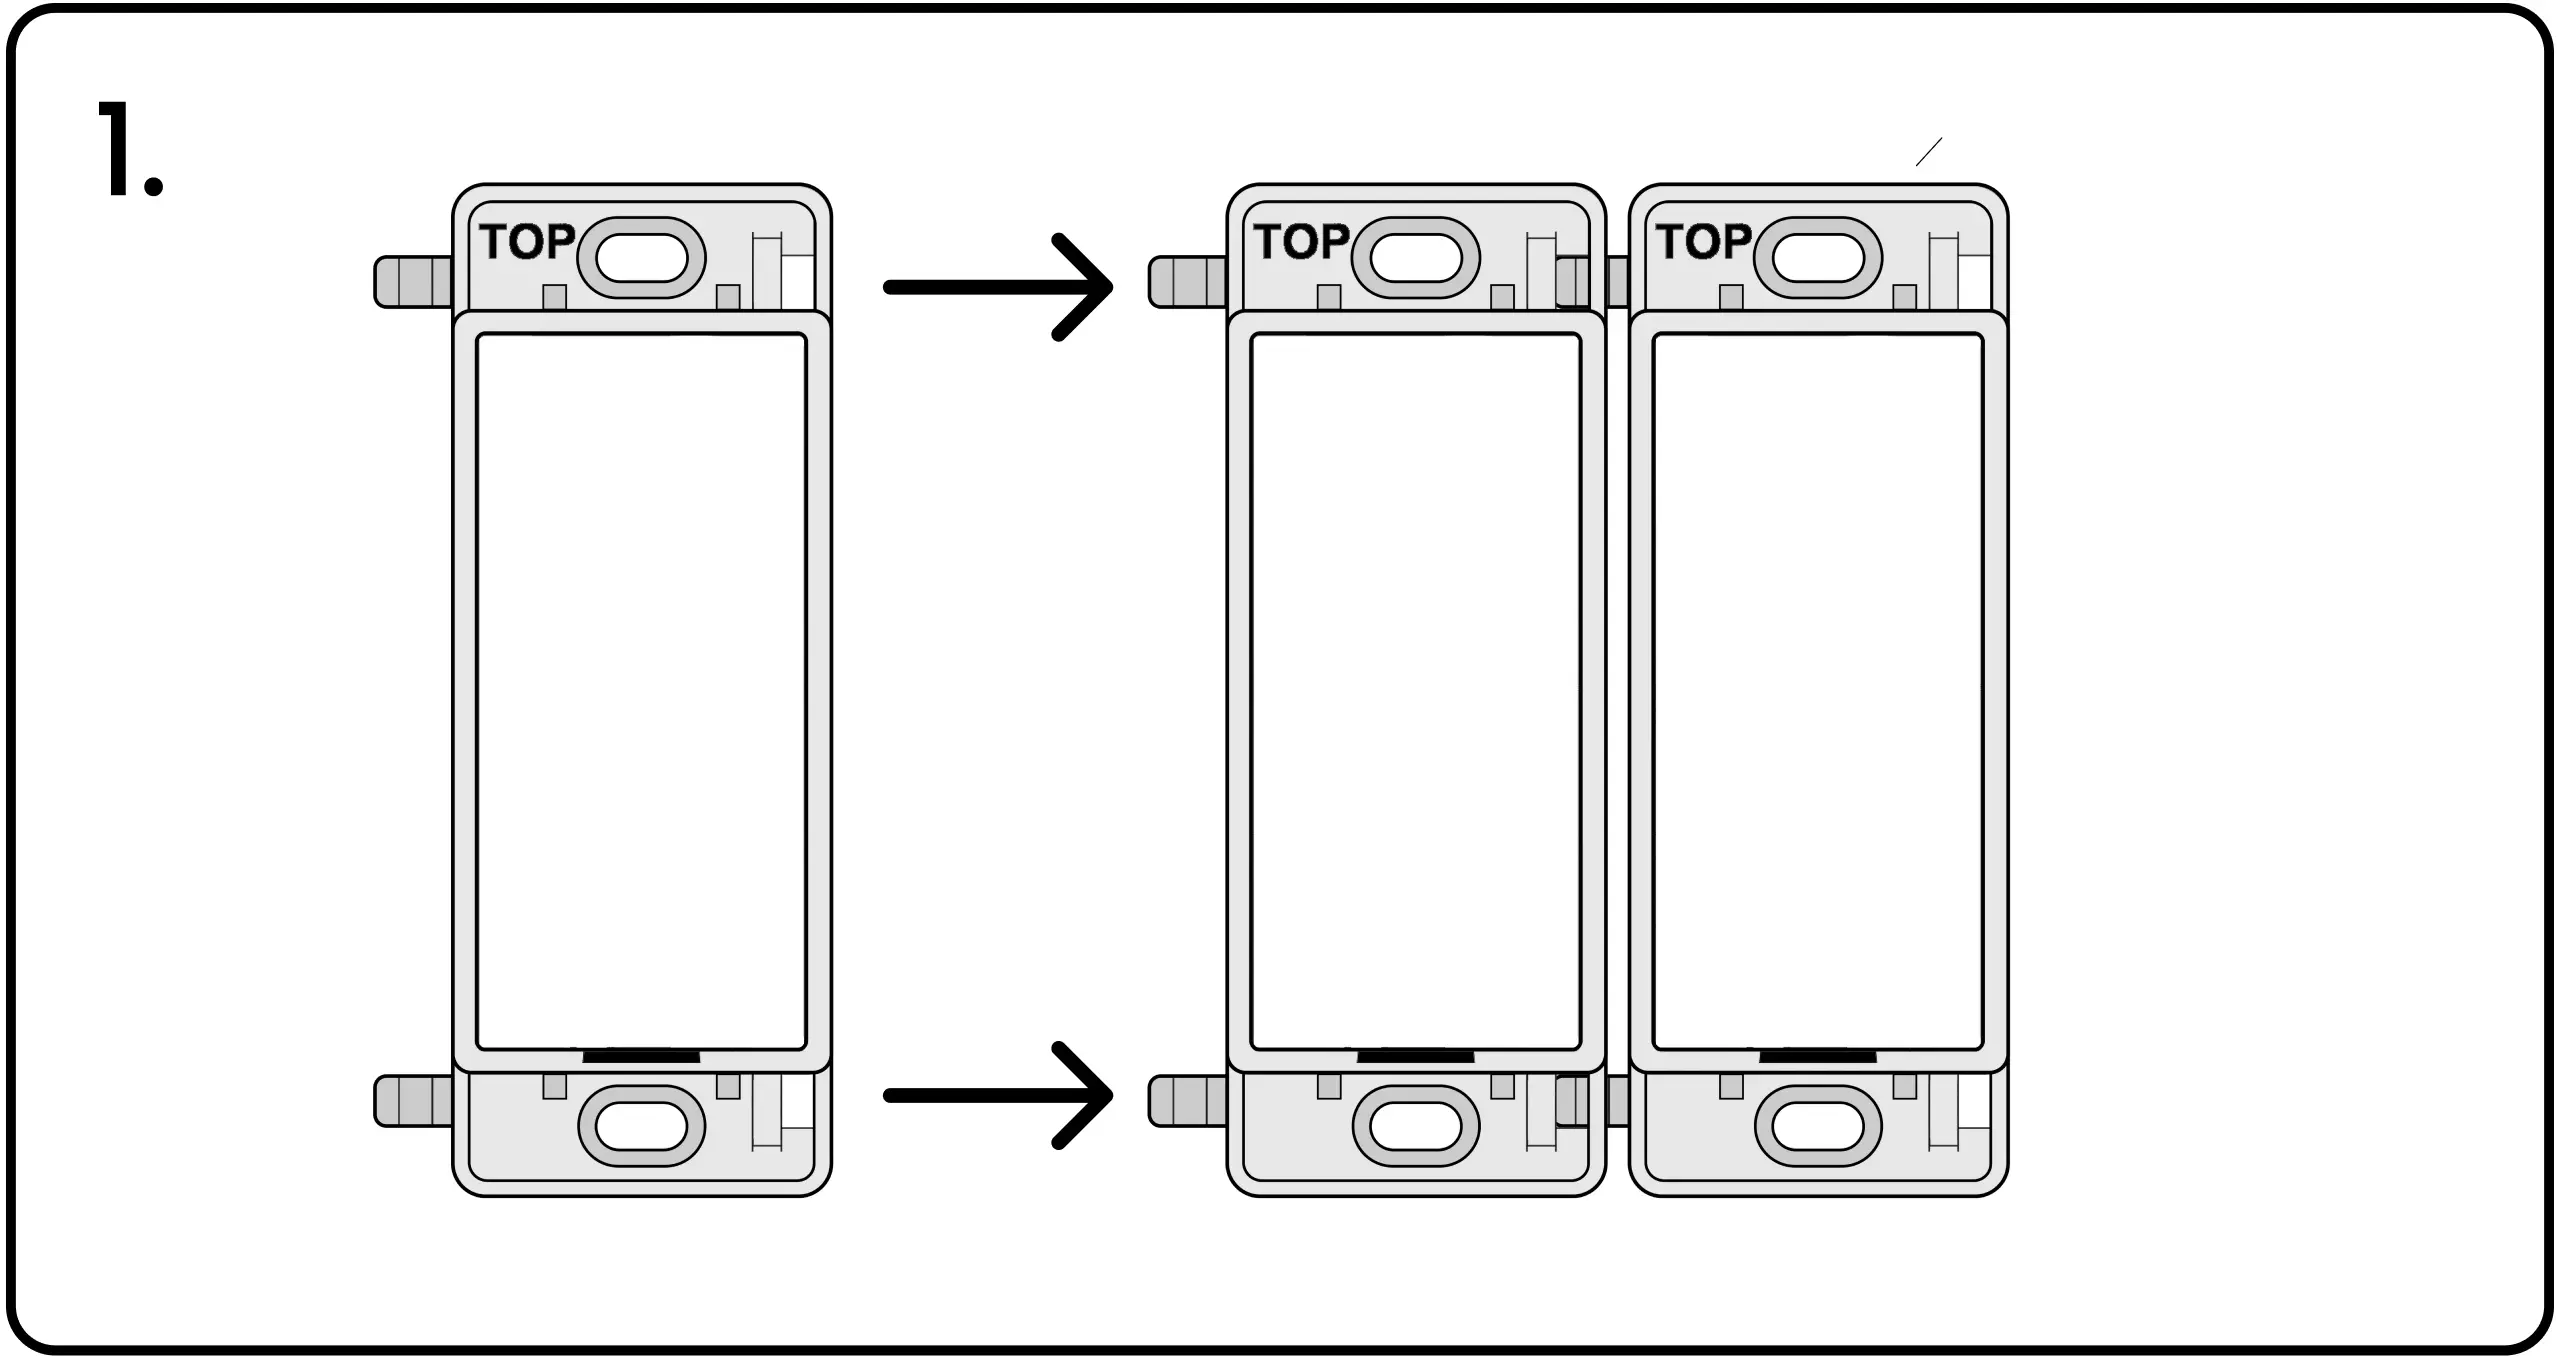
Cree conjuntos de switches uniéndolos como se muestra (2, 3 o 4 paneles).
Paso 2: Insertar los tornillos de drywall
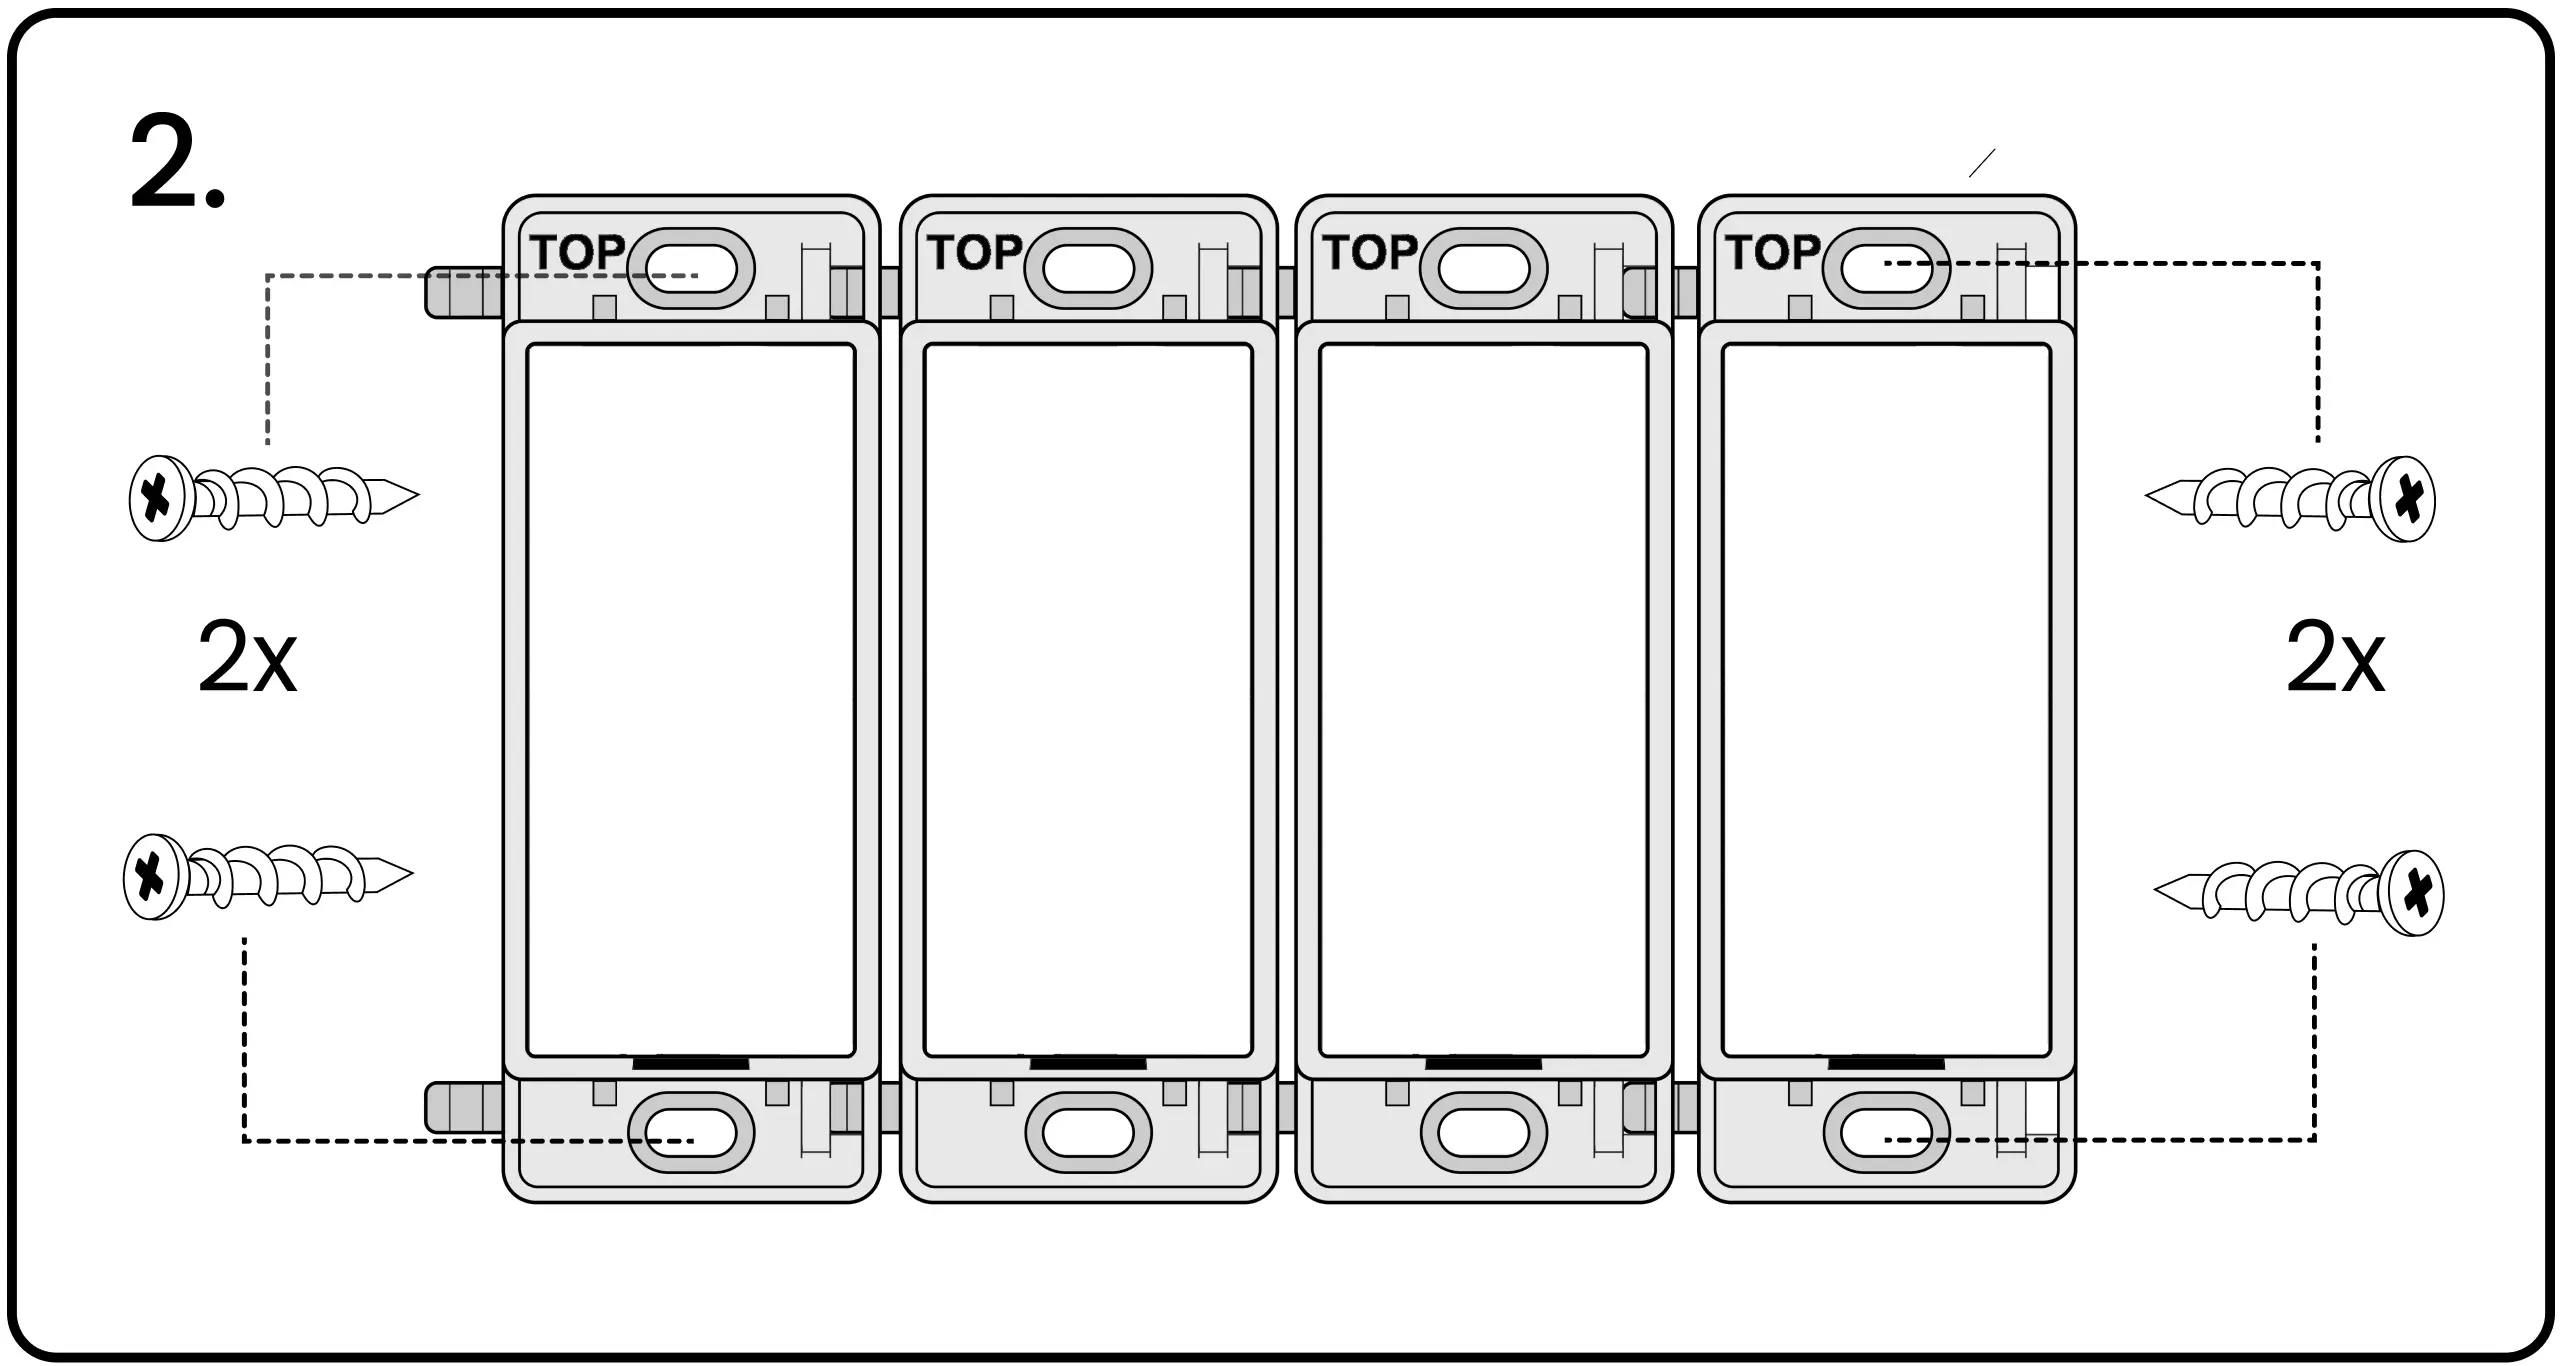
Los switches se montan con tornillos de anclaje para drywall. Los switches de una sola boca usan dos tornillos (uno arriba y uno abajo). Los switches multi-gang usan cuatro tornillos (uno en cada esquina).
Paso 3: Atornillar los tornillos de drywall
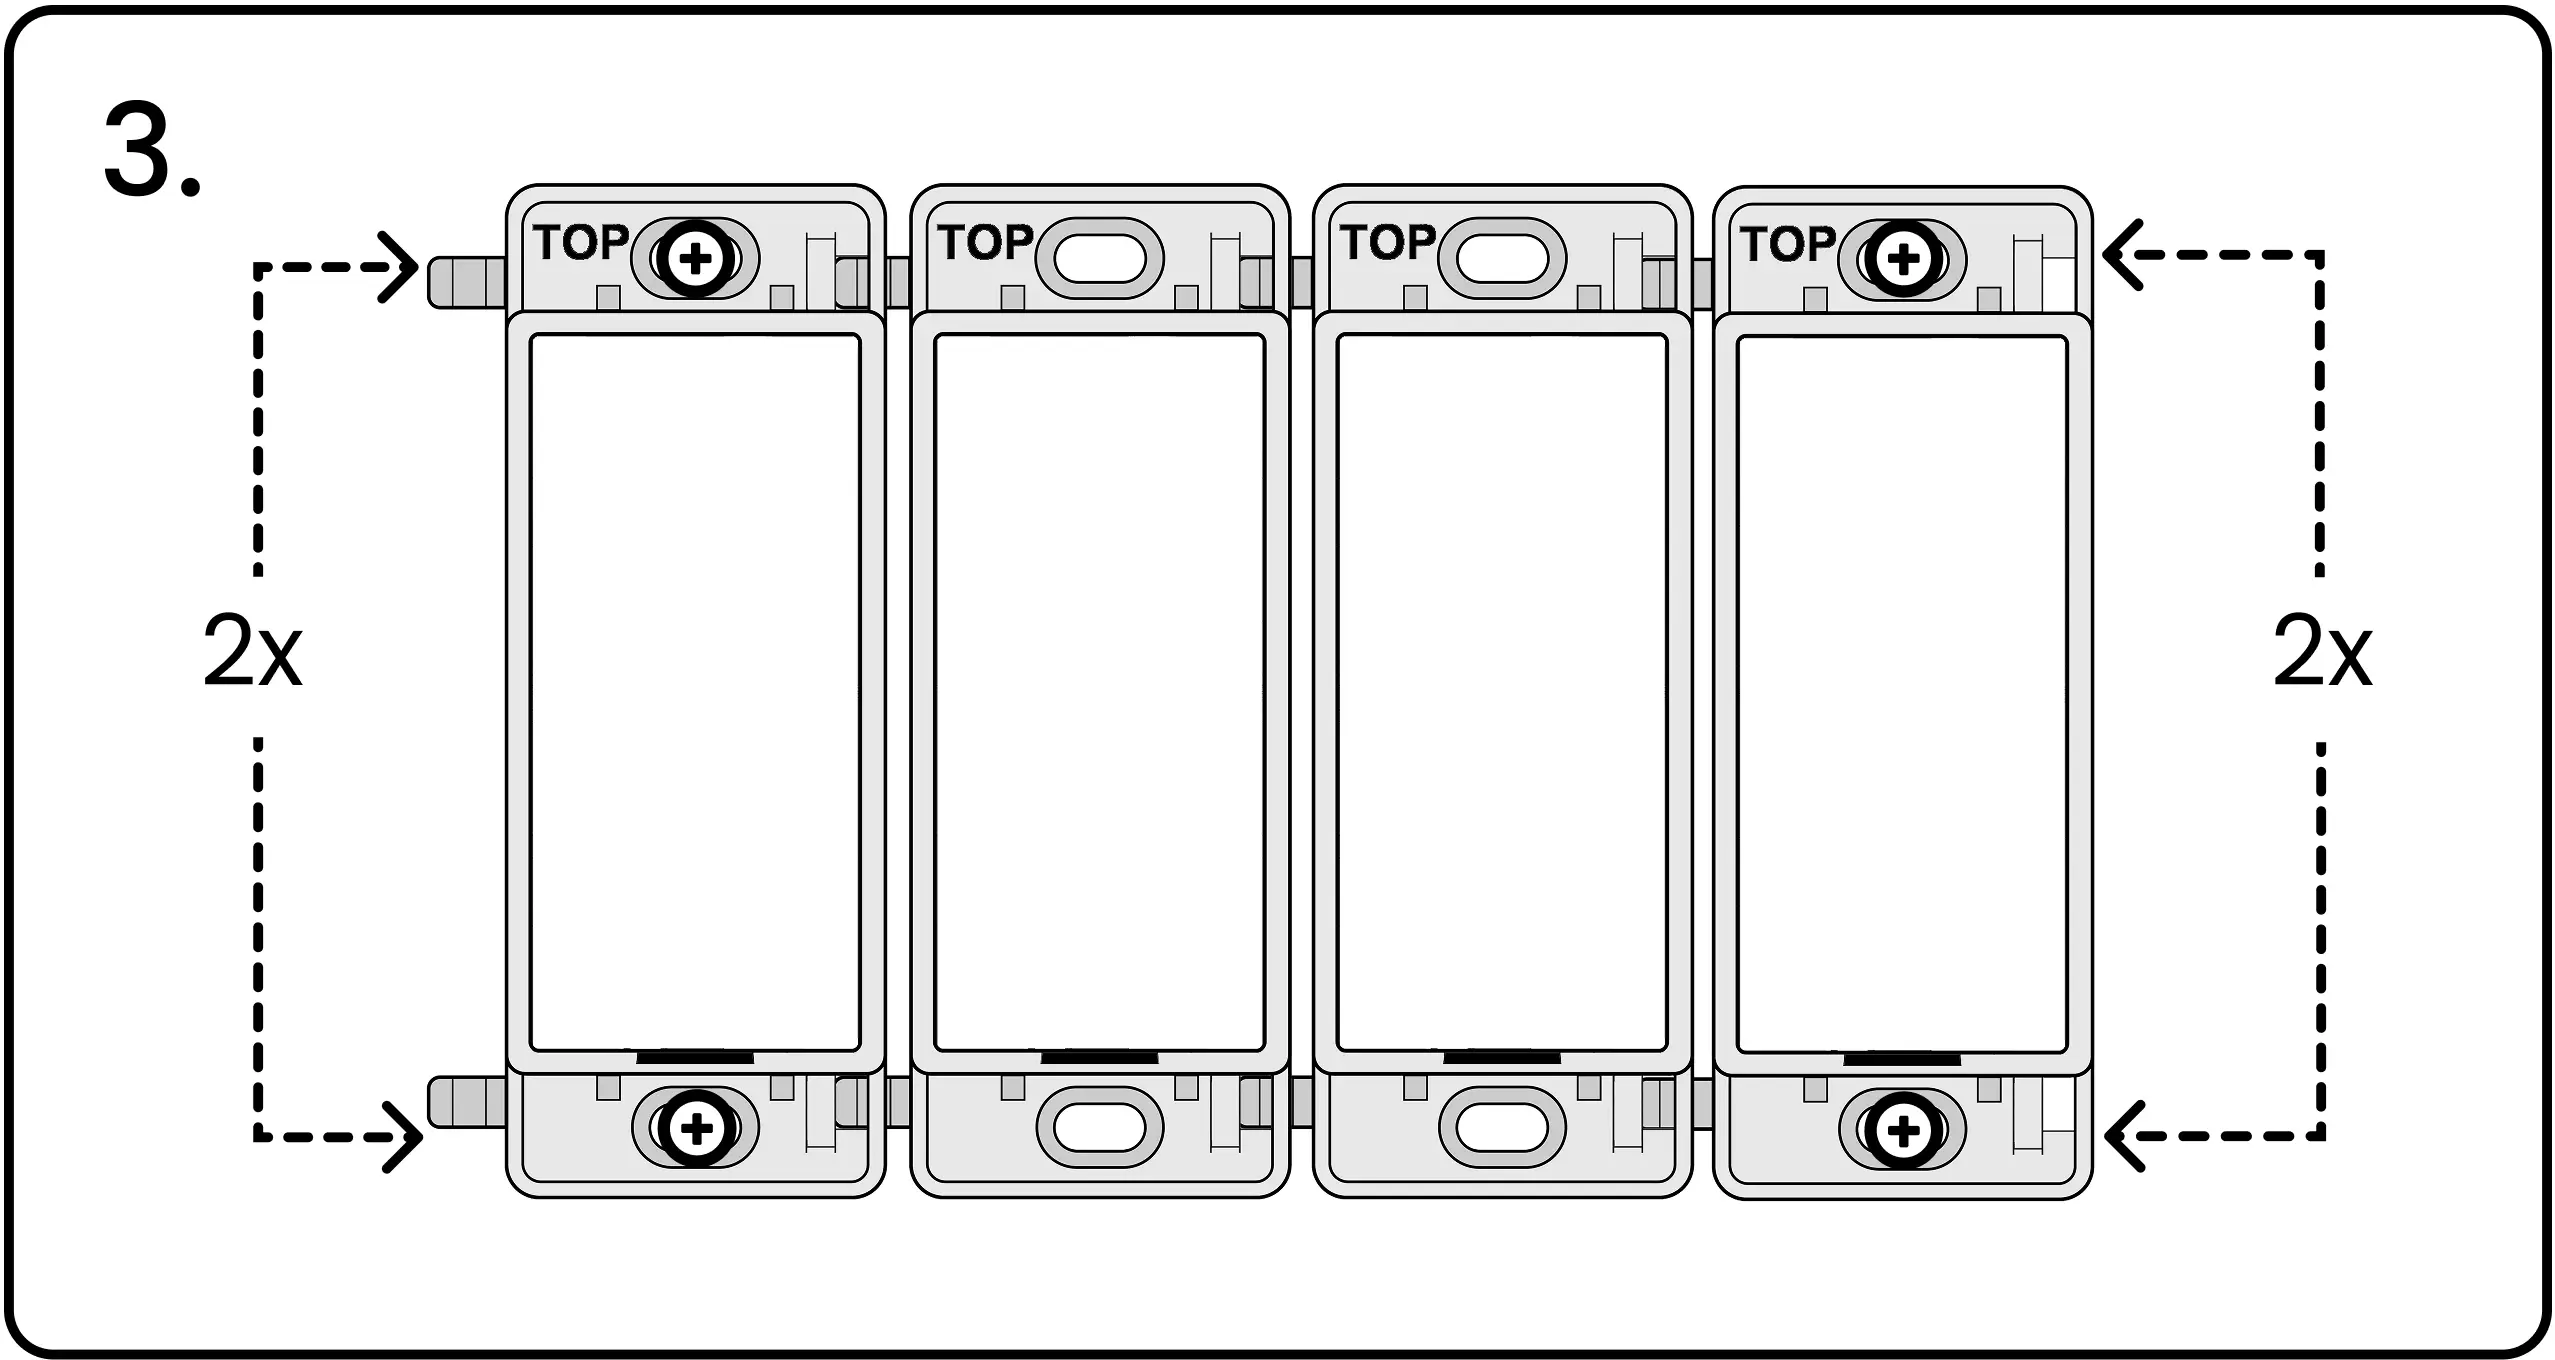
Con un desarmador, atornille suavemente los tornillos en el drywall. Las cuatro esquinas del switch deben quedar planas contra la pared — sin espacios ni holgura.
Paso 4: Colocar la placa sin tornillos
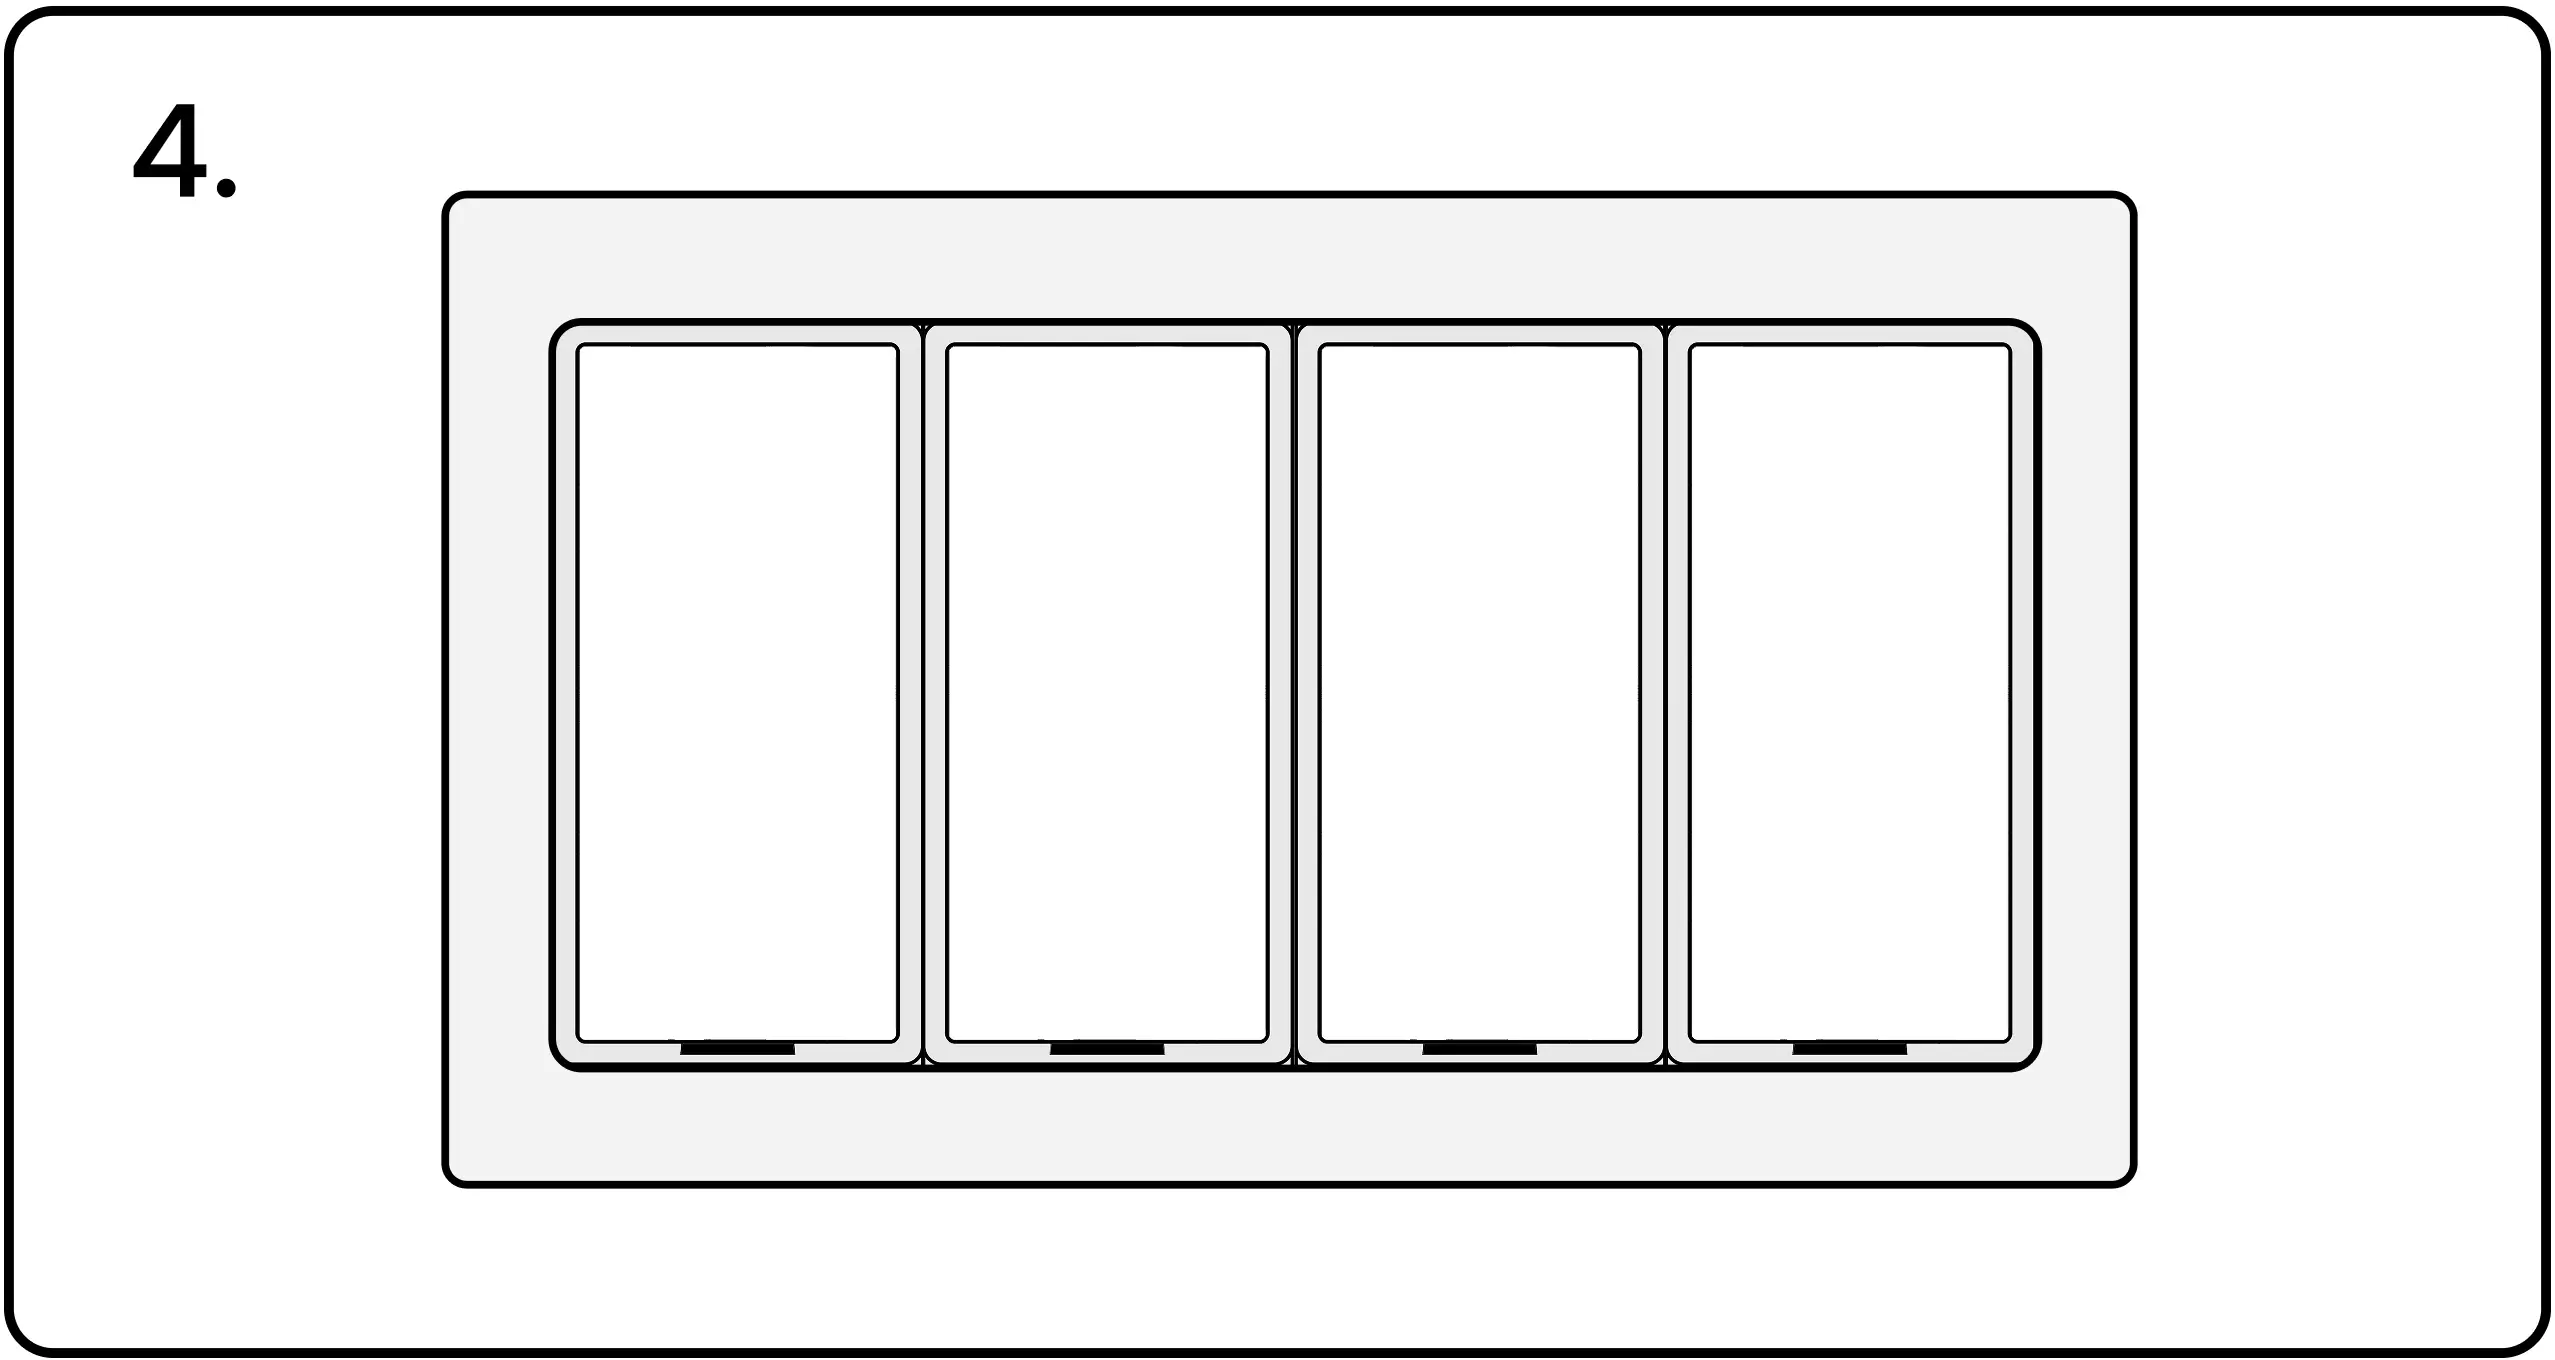
Termine la instalación colocando a presión una placa de pared Levven sin tornillos.
Órdenes de cambio del constructor
Si una orden de cambio requiere agregar más controladores a la instalación, no tome controladores ni switches de otro Quick Kit. Esos kits ya fueron configurados para otra instalación tomarlos genera más trabajo después.
Su comprador habrá solicitado unidades adicionales a Levven para cubrir posibles cambios. Asegúrese de que su camión tenga varias unidades de repuesto para manejar órdenes de cambio inesperadas.
Información adicional de instalación
Visite estas páginas para más información sobre cómo usar y configurar los controladores y switches:
Agregando Controladores a un Grupo Emparejando interruptores a un controlador Restableciendo un Controlador
Continúe con la instalación
Confirme que se hayan realizado los siguientes pasos:
Planos eléctricos Kit Rápido de Levven Instalación de controladores Placa de pared azul puerta de enlace Levven Q