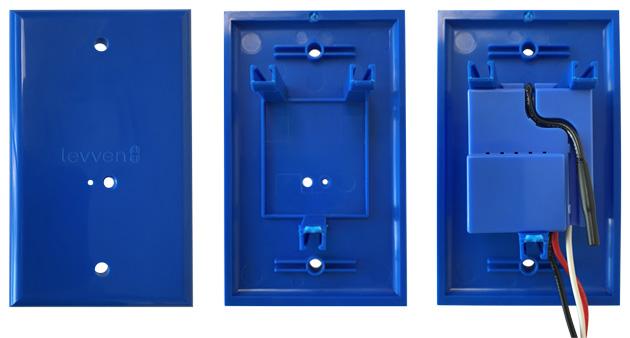
Blue Pairing Plate
At the trim stage of construction, the electrical installer installs a Levven GPC10 power controller in a Levven Blue Pairing Plate. The plate allows the homeowner to add devices to the home group.
The blue pairing plate holds one controller with a hole to access the controller's grouping/pairing button. The homeowner presses the easily accessible grouping/pairing button to make changes.
Location of Blue Pairing Plate
At rough-in, a single-gang box will have been installed and wired for the Blue Pairing Plate. This box should be in one of three locations:
- Beside the electrical panel (when the electrical panel is inside the home)
- In the garage (when the electrical panel is outside of the home)
- If there is no garage, locate the box inside the closet for the front or rear entry.
The controller that gets installed in this box will typically be wired to control a nearby light:
- Utility room light (if Blue Pairing Plate is beside the electrical panel)
- Garage light (if Blue Pairing Plate is installed in garage)
- Closet or foyer light (if Blue Pairing Plate is installed in closet or entryway)
Connecting Controller in Blue Pairing Plate
Connect the controller's power, load, and neutral wires in the device box.
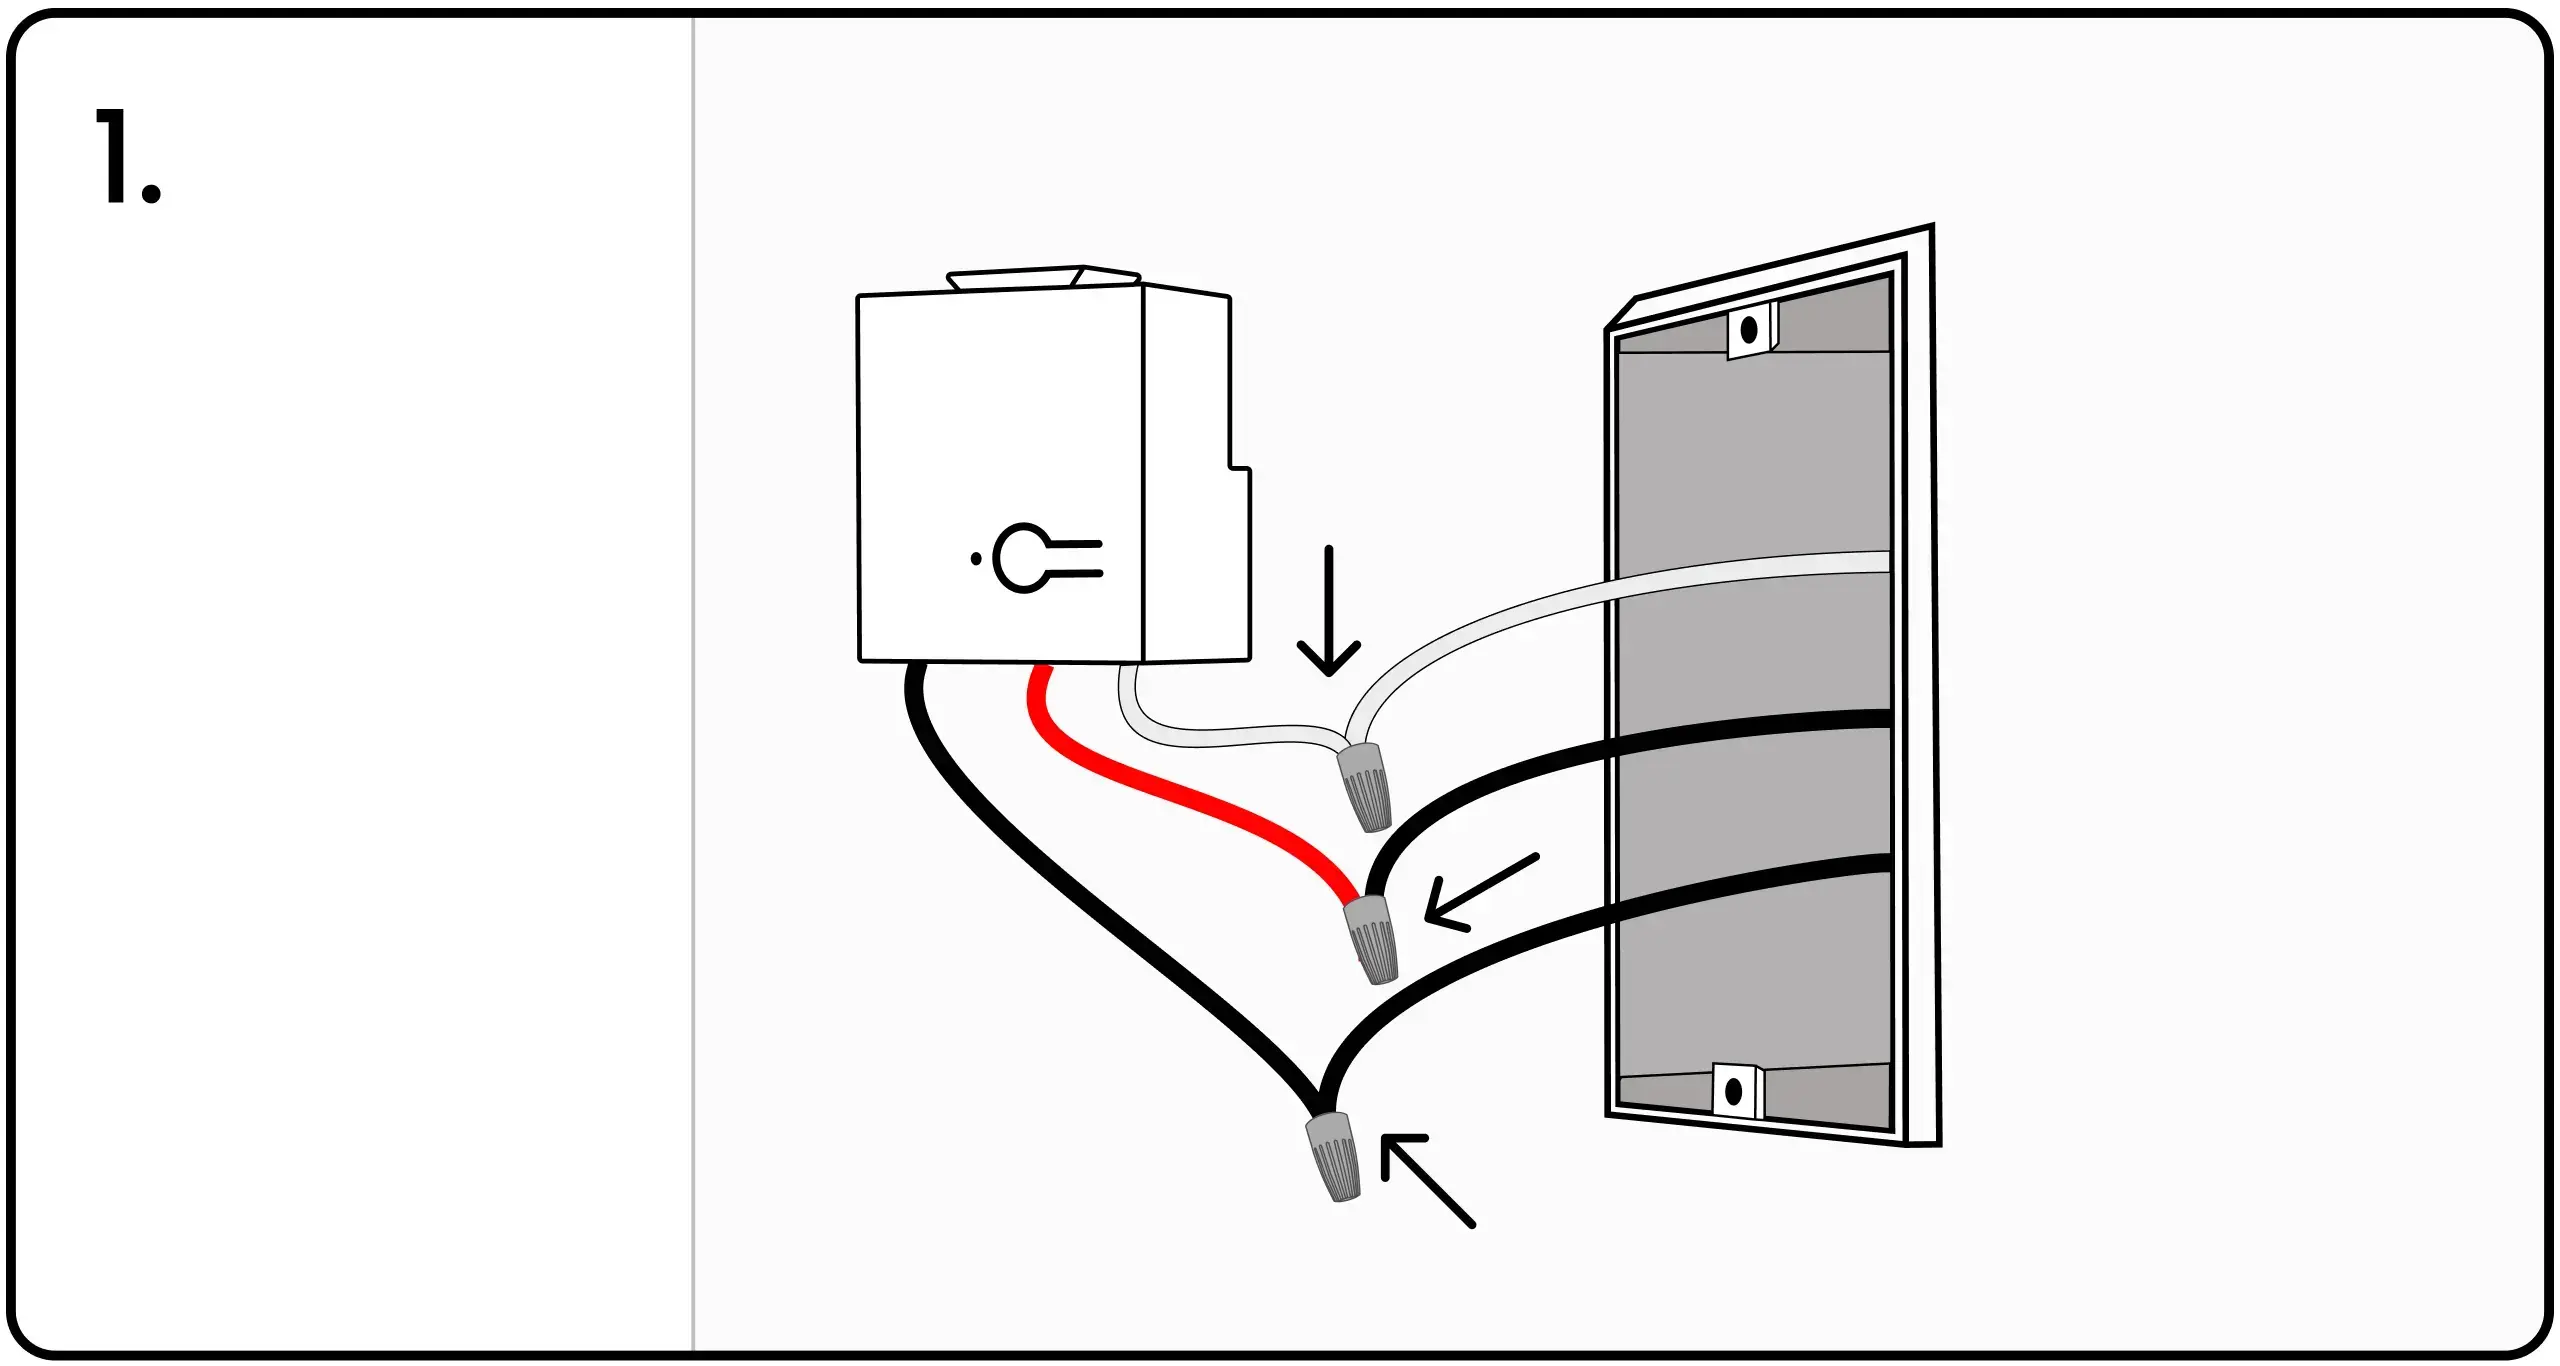
- Connect the black power wire to the controller's black wire.
- Connect the black load wire to the controller's red wire.
- Connect all three neutral white wires together.
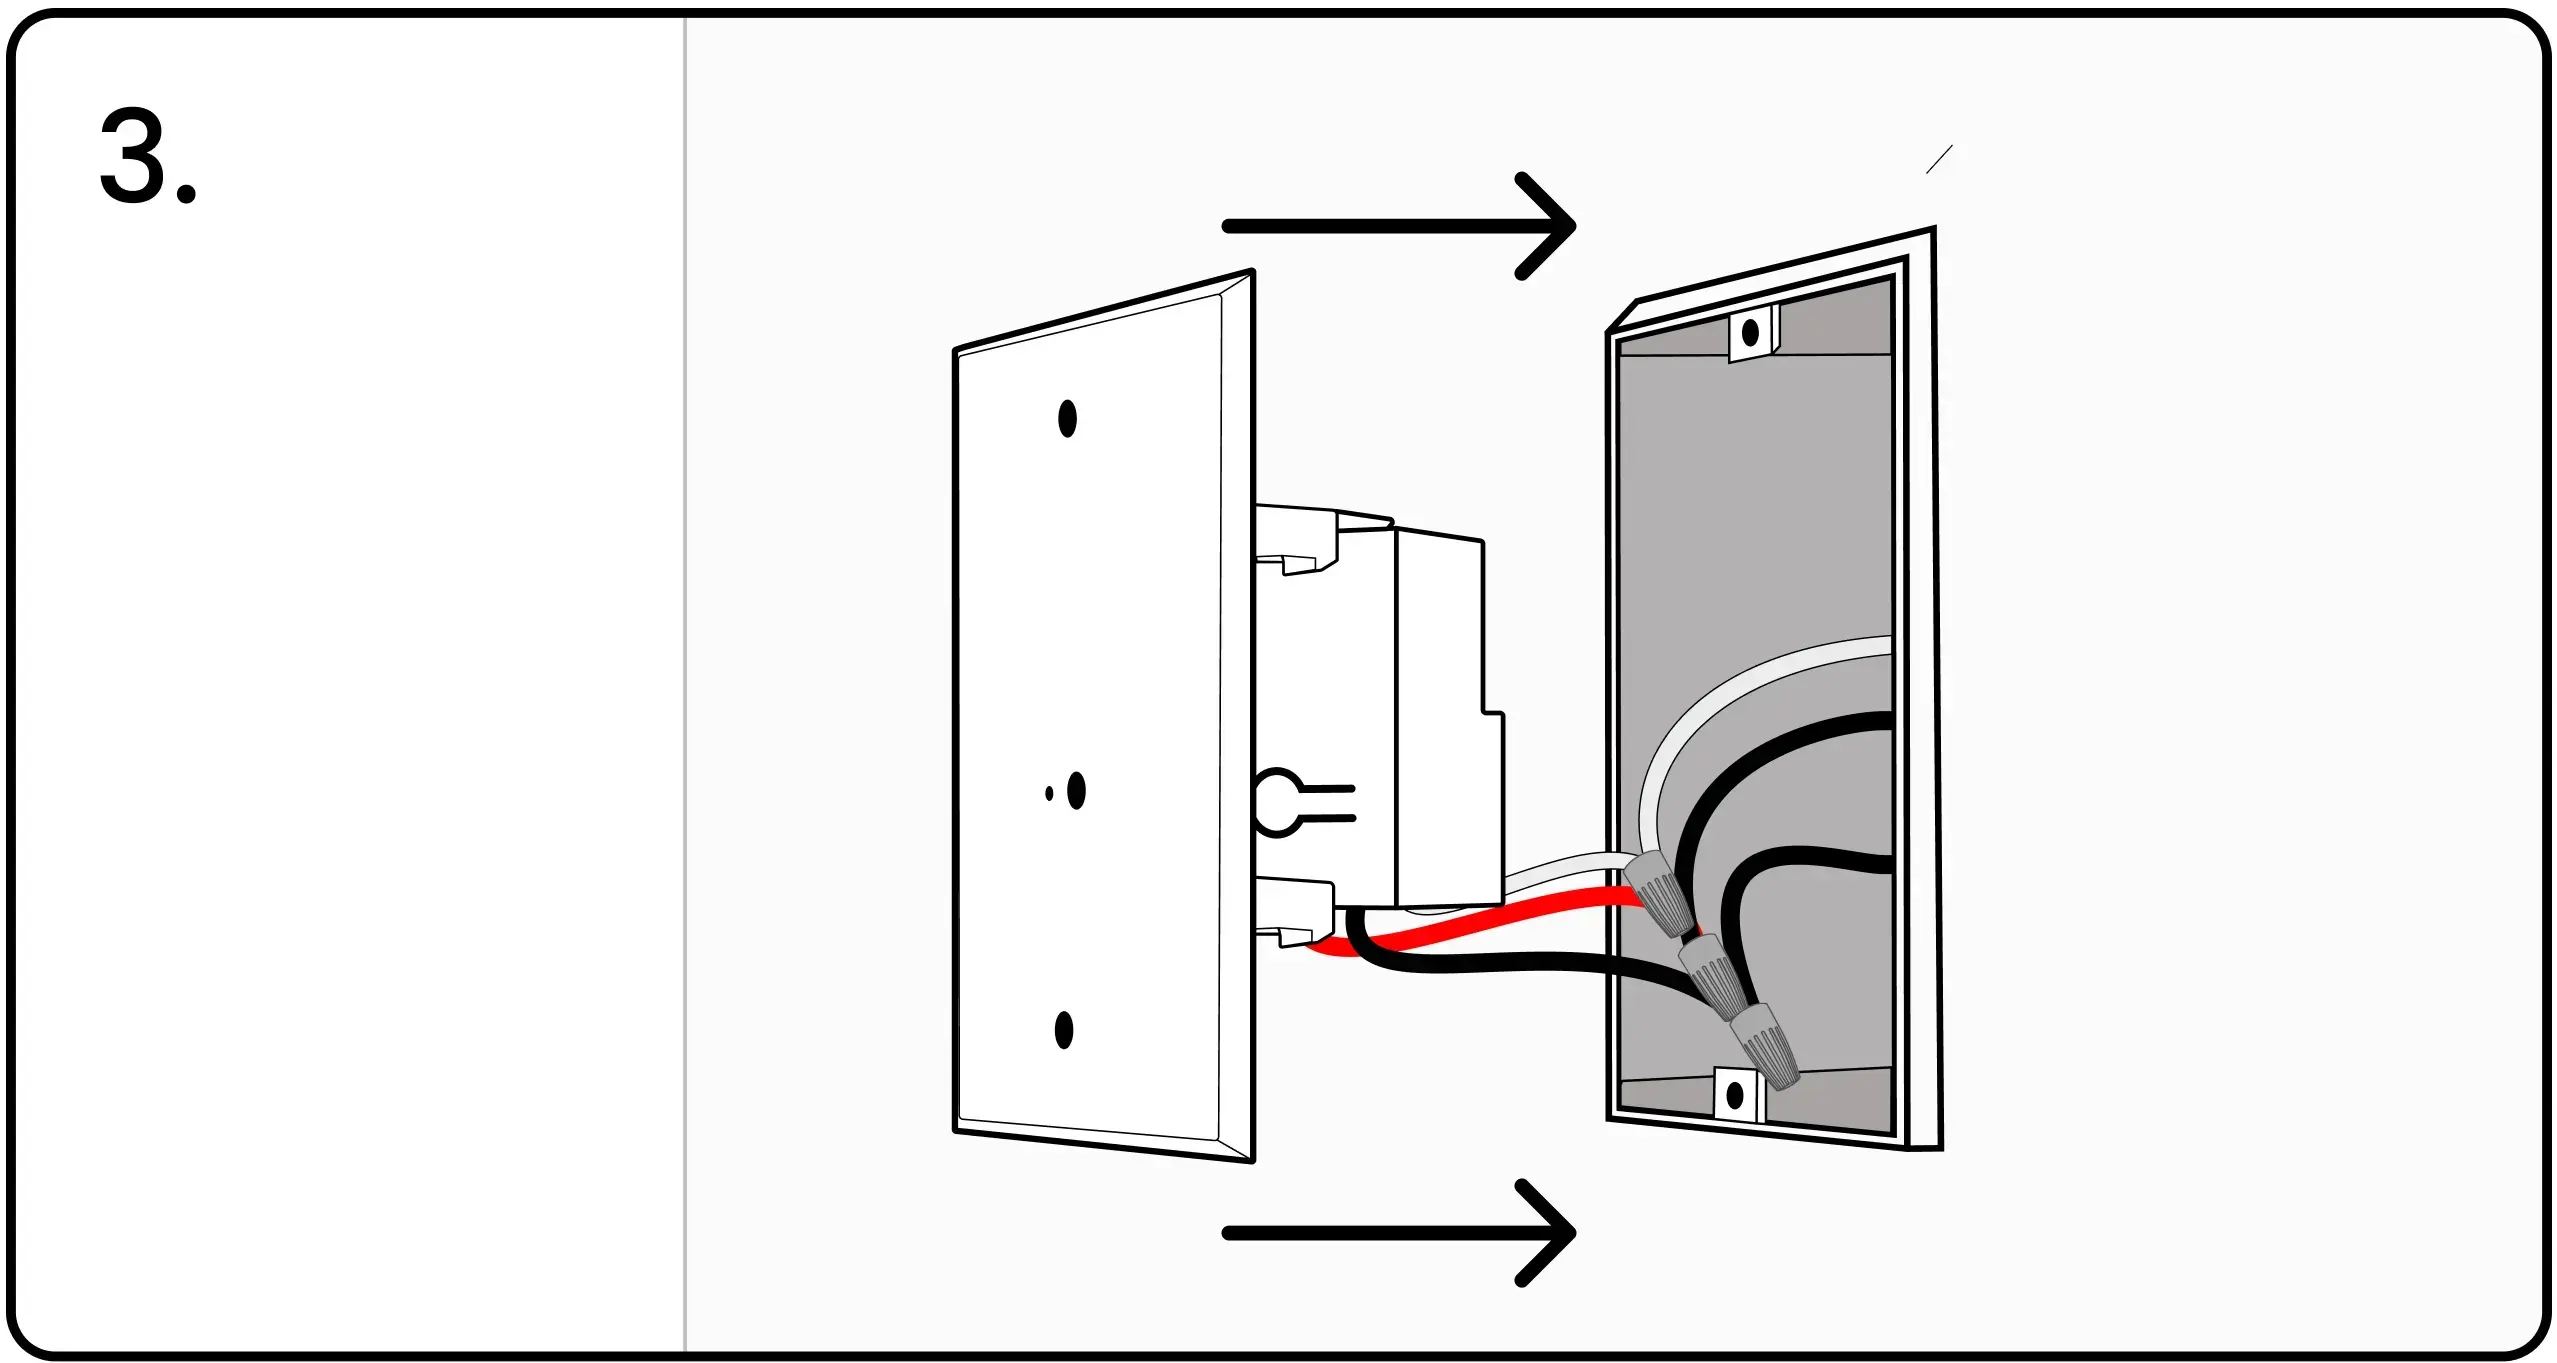
Align the controller's button and LED with the holes in the Blue Pairing Plate.
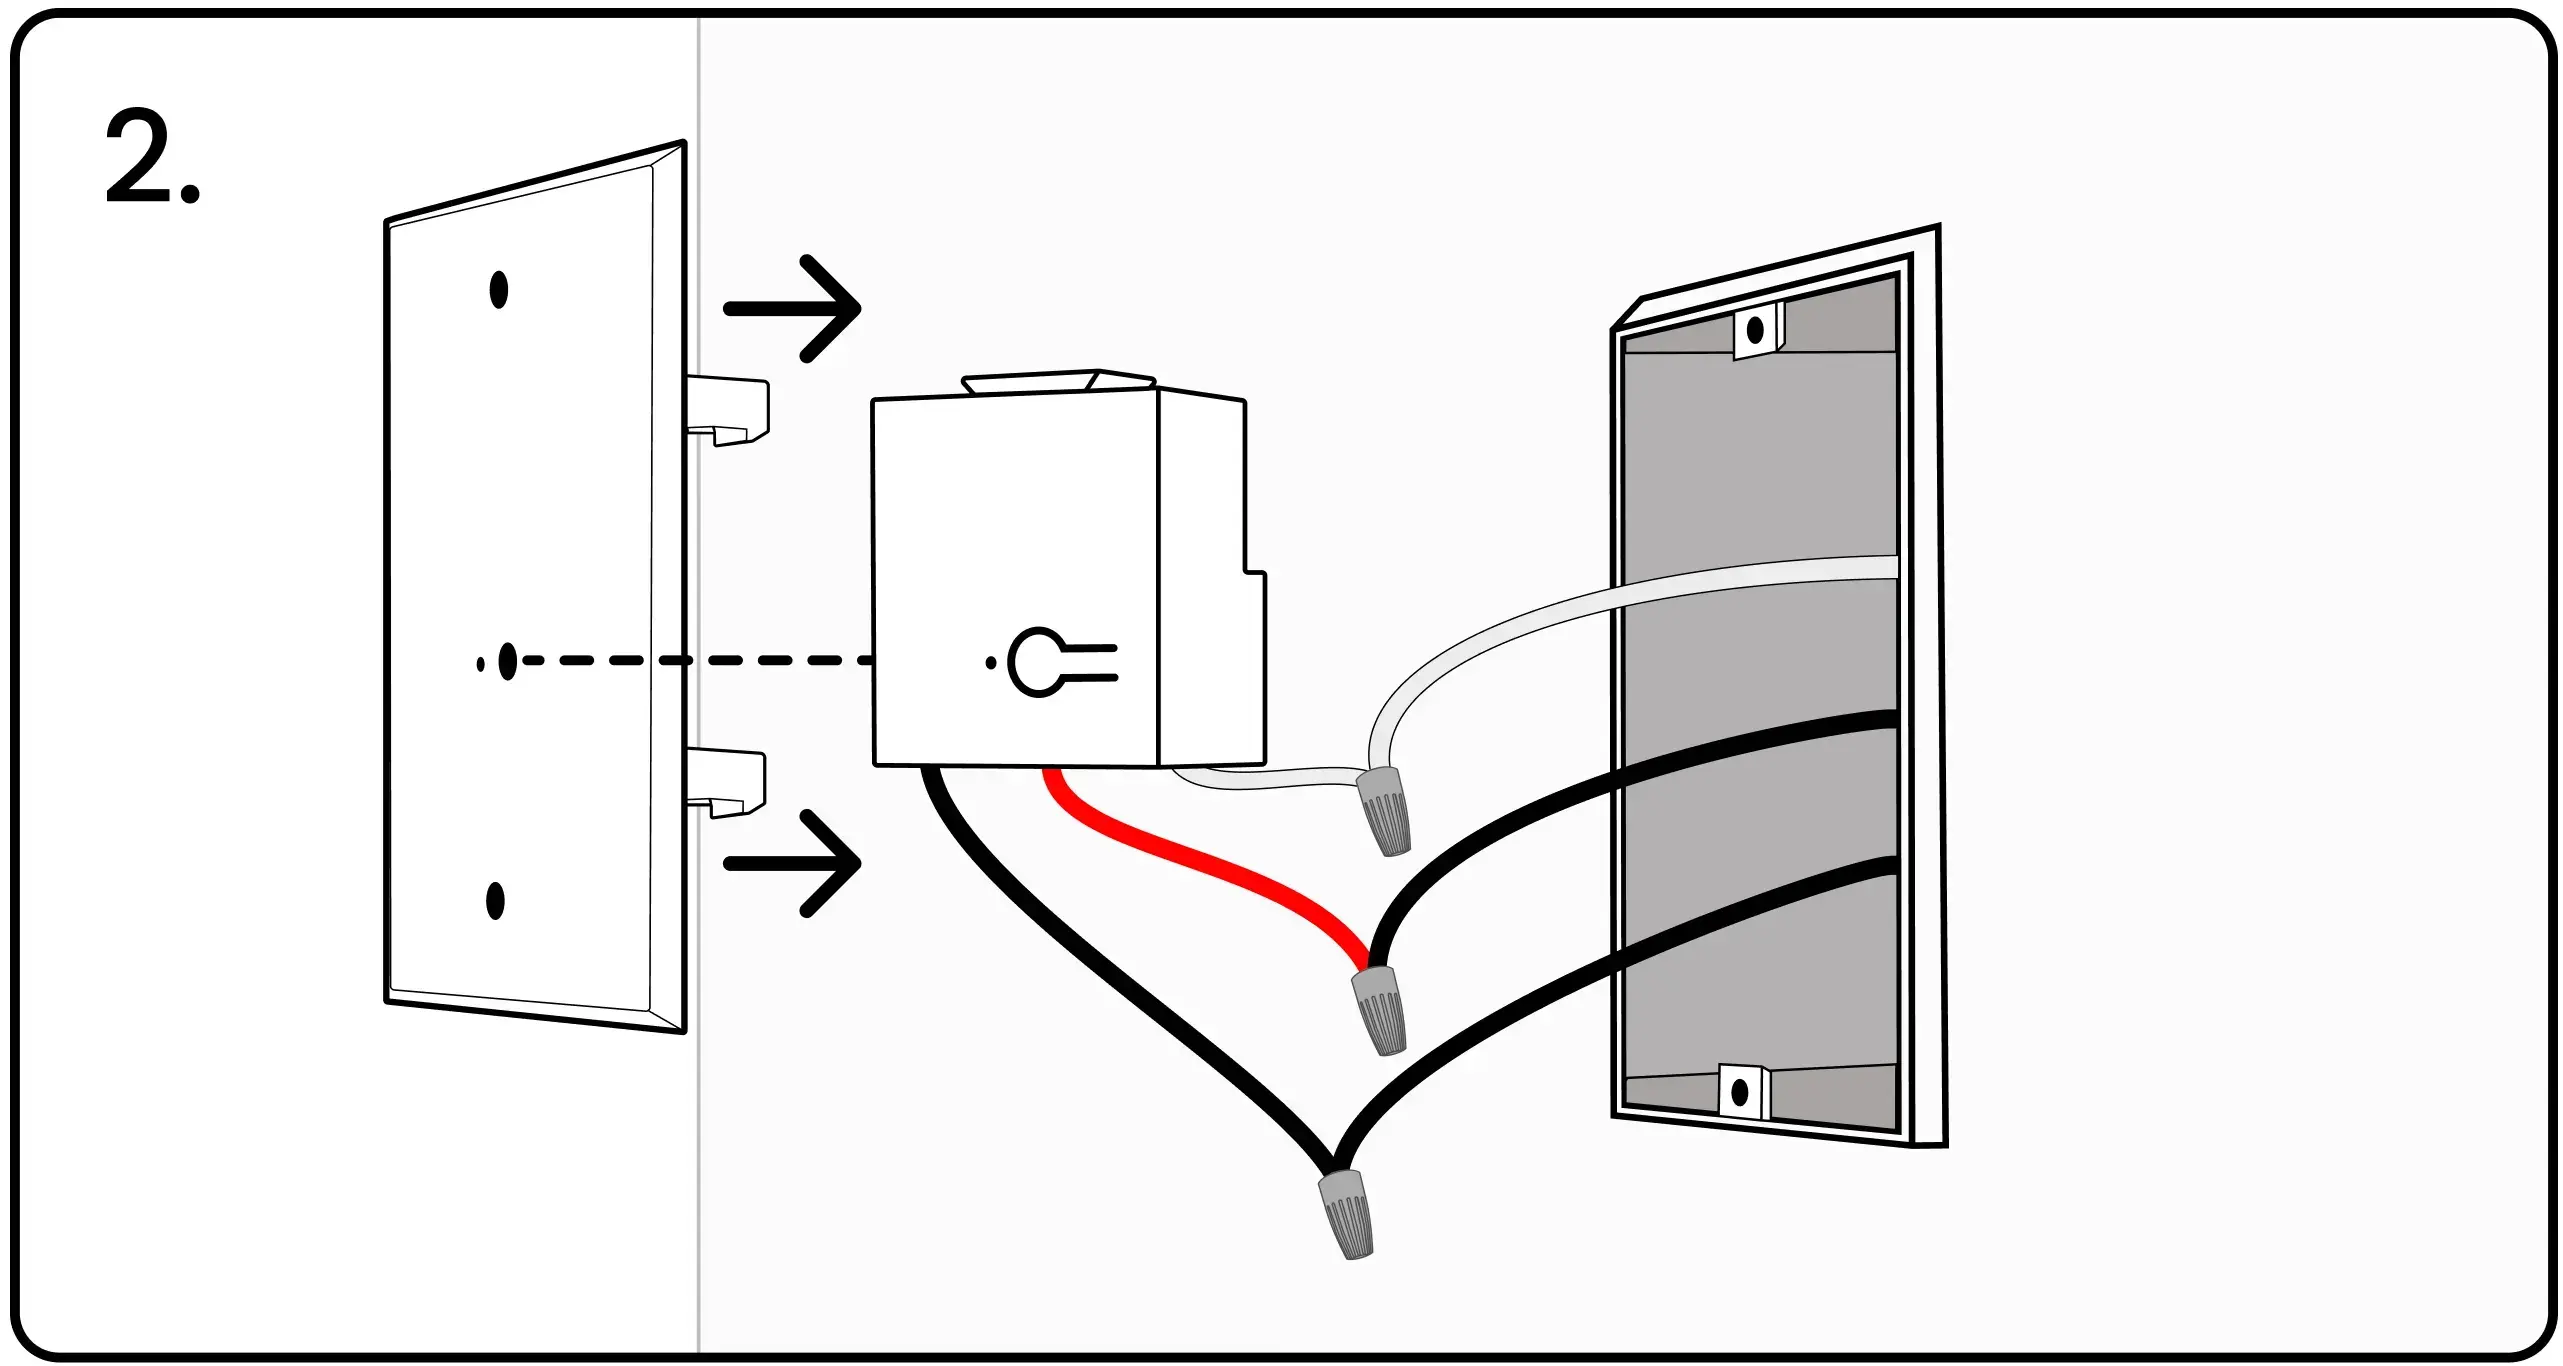
Snap the controller into the Blue Pairing Plate clasp.
Using the Blue Pairing Plate
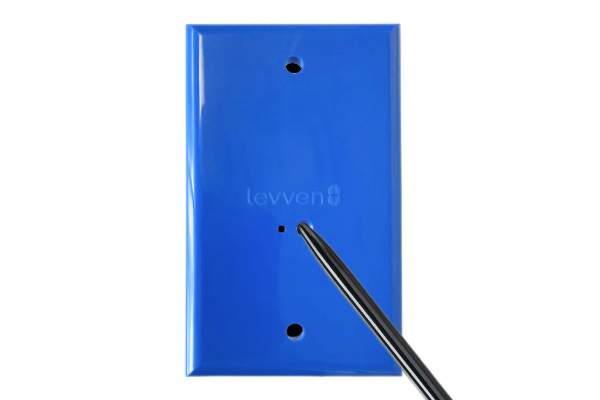
- Using a pen or paperclip, press the power controller's group/pair button through the right-side hole on the front of the blue pairing plate.
- The LED on the power controller is visible through the small hole in the front of the blue pairing plate. A solid green or red light will signify that the power controller is powered on.
- Follow the pairing procedure to pair new devices.
Continue the Installation
Confirm these are done:
Electrical Plans Levven Quick Kit Installing Controllers Installing Switches Levven Q Gateway