Levven Quick Kit
To streamline the electrical trim installation, the switches, controllers, and the Levven Q Gateway in a Levven Quick Kit are grouped and paired according to the specific plans of one particular installation.
The grouped and paired switches and controllers are organized and stowed into a Quick Kit.
Switches and Power Controllers Paired Together
Switches are paired to power controllers in the configurations specified by your purchaser on their PO to Levven:
- single-pole (one switch, one controller)
- 3-way (two switches, one controller)
- 4-way (three switches, one controller)
When you open the Quick Kit at the job site, you can easily distribute the various switches and controllers around the house according to the builder's electrical plan.
Paired switches and power controllers share a compartment in the Quick Kit box. You can identify single-pole and multi-way switches by how they are stowed in the Quick Kit. Controllers and switches which are paired will be located in the same compartment.
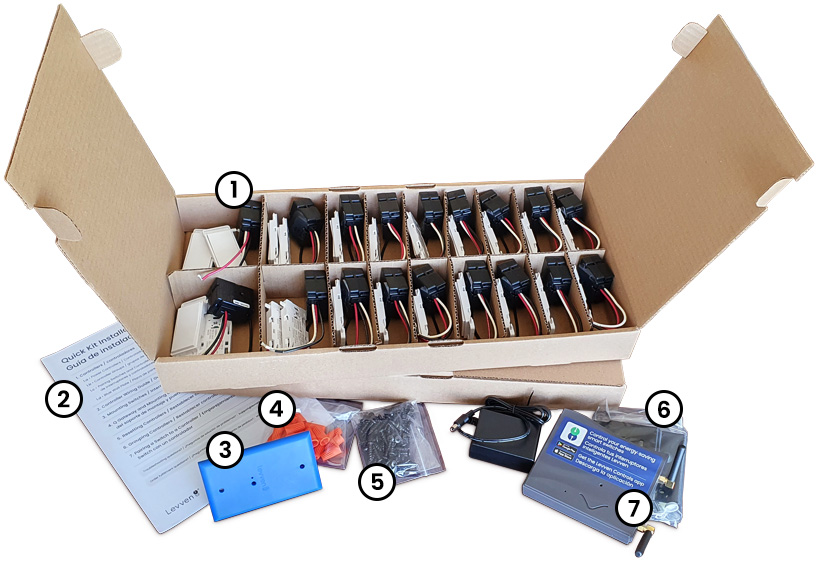
Levven Quick Kits include:
- Switches and Controllers paired together (single-pole, 3-way, 4-way, etc.)
- Installation Reference Booklet
- Blue Pairing Plate
- Wire Nuts
- Drywall Screws for Switches
- Mounting Bracket for Levven Q Gateway and Security Screw, Post, and Screw Cap
- Levven Q Gateway, Power Supply, and Ethernet Cable
Warning on Additional Controllers
If a Quick Kit has fewer controllers than are needed for your installation, take additional controllers from your shelf stock / spare parts inventory.
Do not take controllers from another kit to make up the difference! Those Quick Kits have already been configured for other installations.
Adding Extra Controllers
If the installation requires more controllers than what the Quick Kit included, add more controllers to your installation's "home group".
Energize Both Controllers
Adding an extra controller to the group requires a controller from the Quick Kit. The controllers in the kit are already grouped together. Energize one of these controllers by connecting to power or by using the Levven CTKL2 'Plug N Pair' wiring kit.
Press Button on Controller from Group
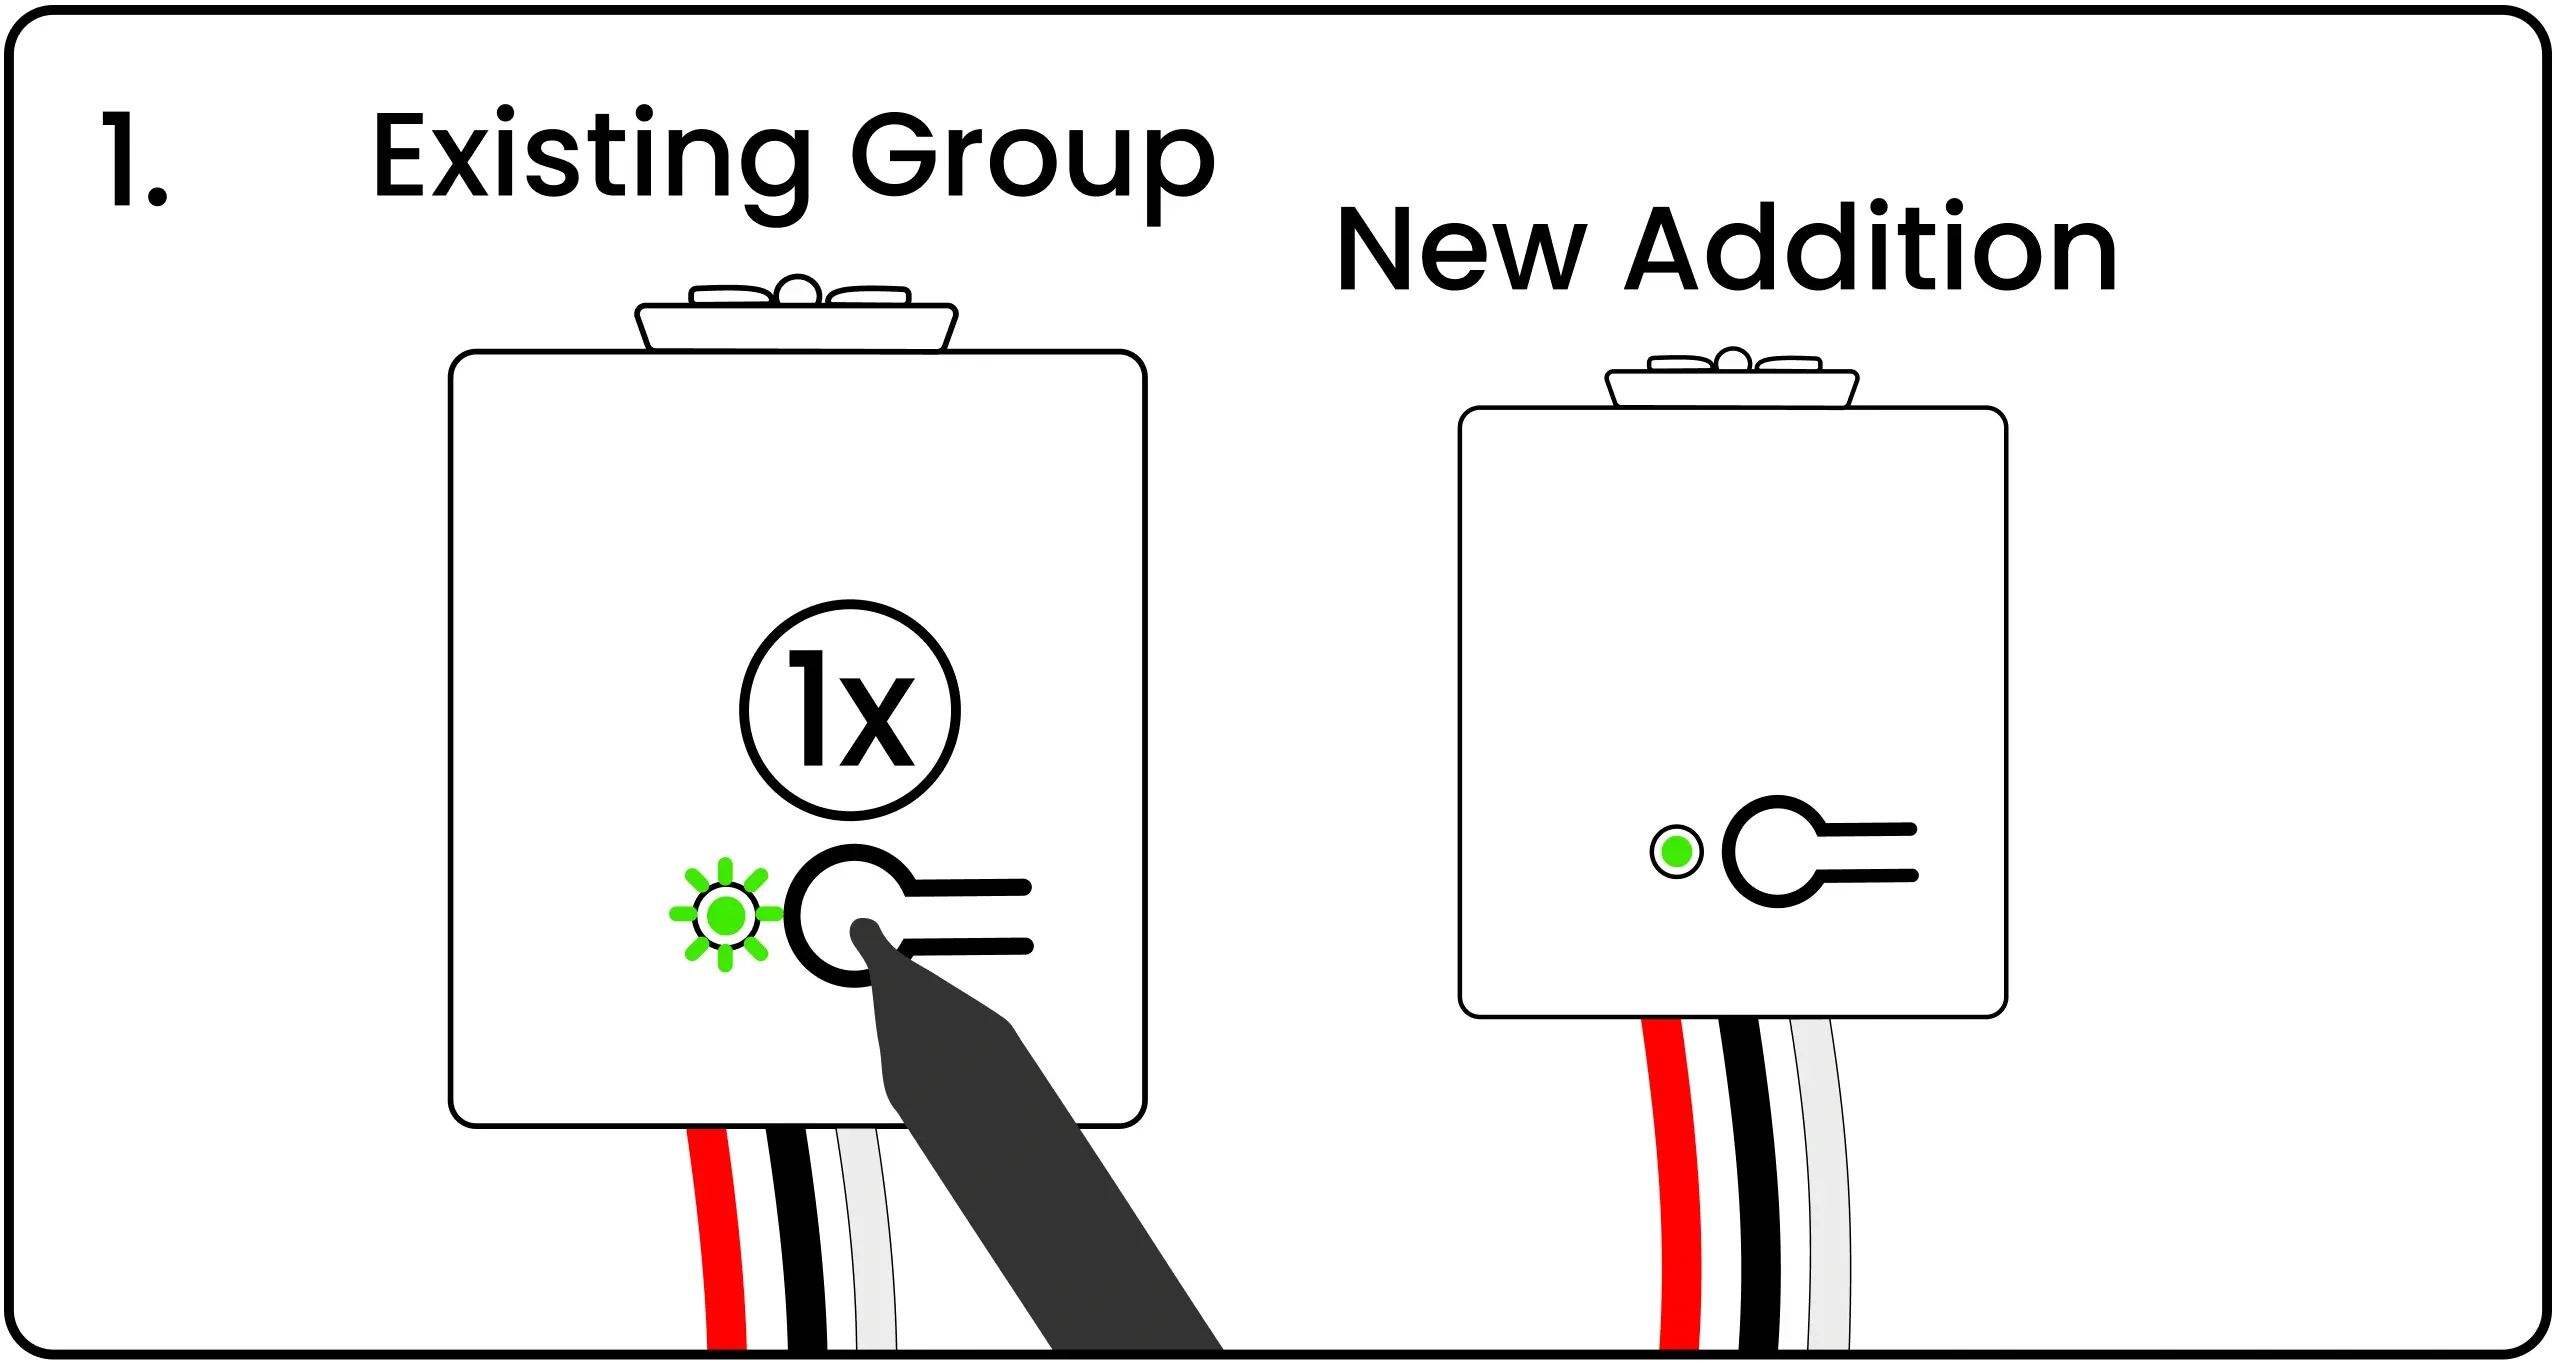
Using your finger or a pen, press and release the "Existing Group" controller's pairing button once. This initiates the grouping process. The controller’s LED will blink green.
Press Button on New Controller
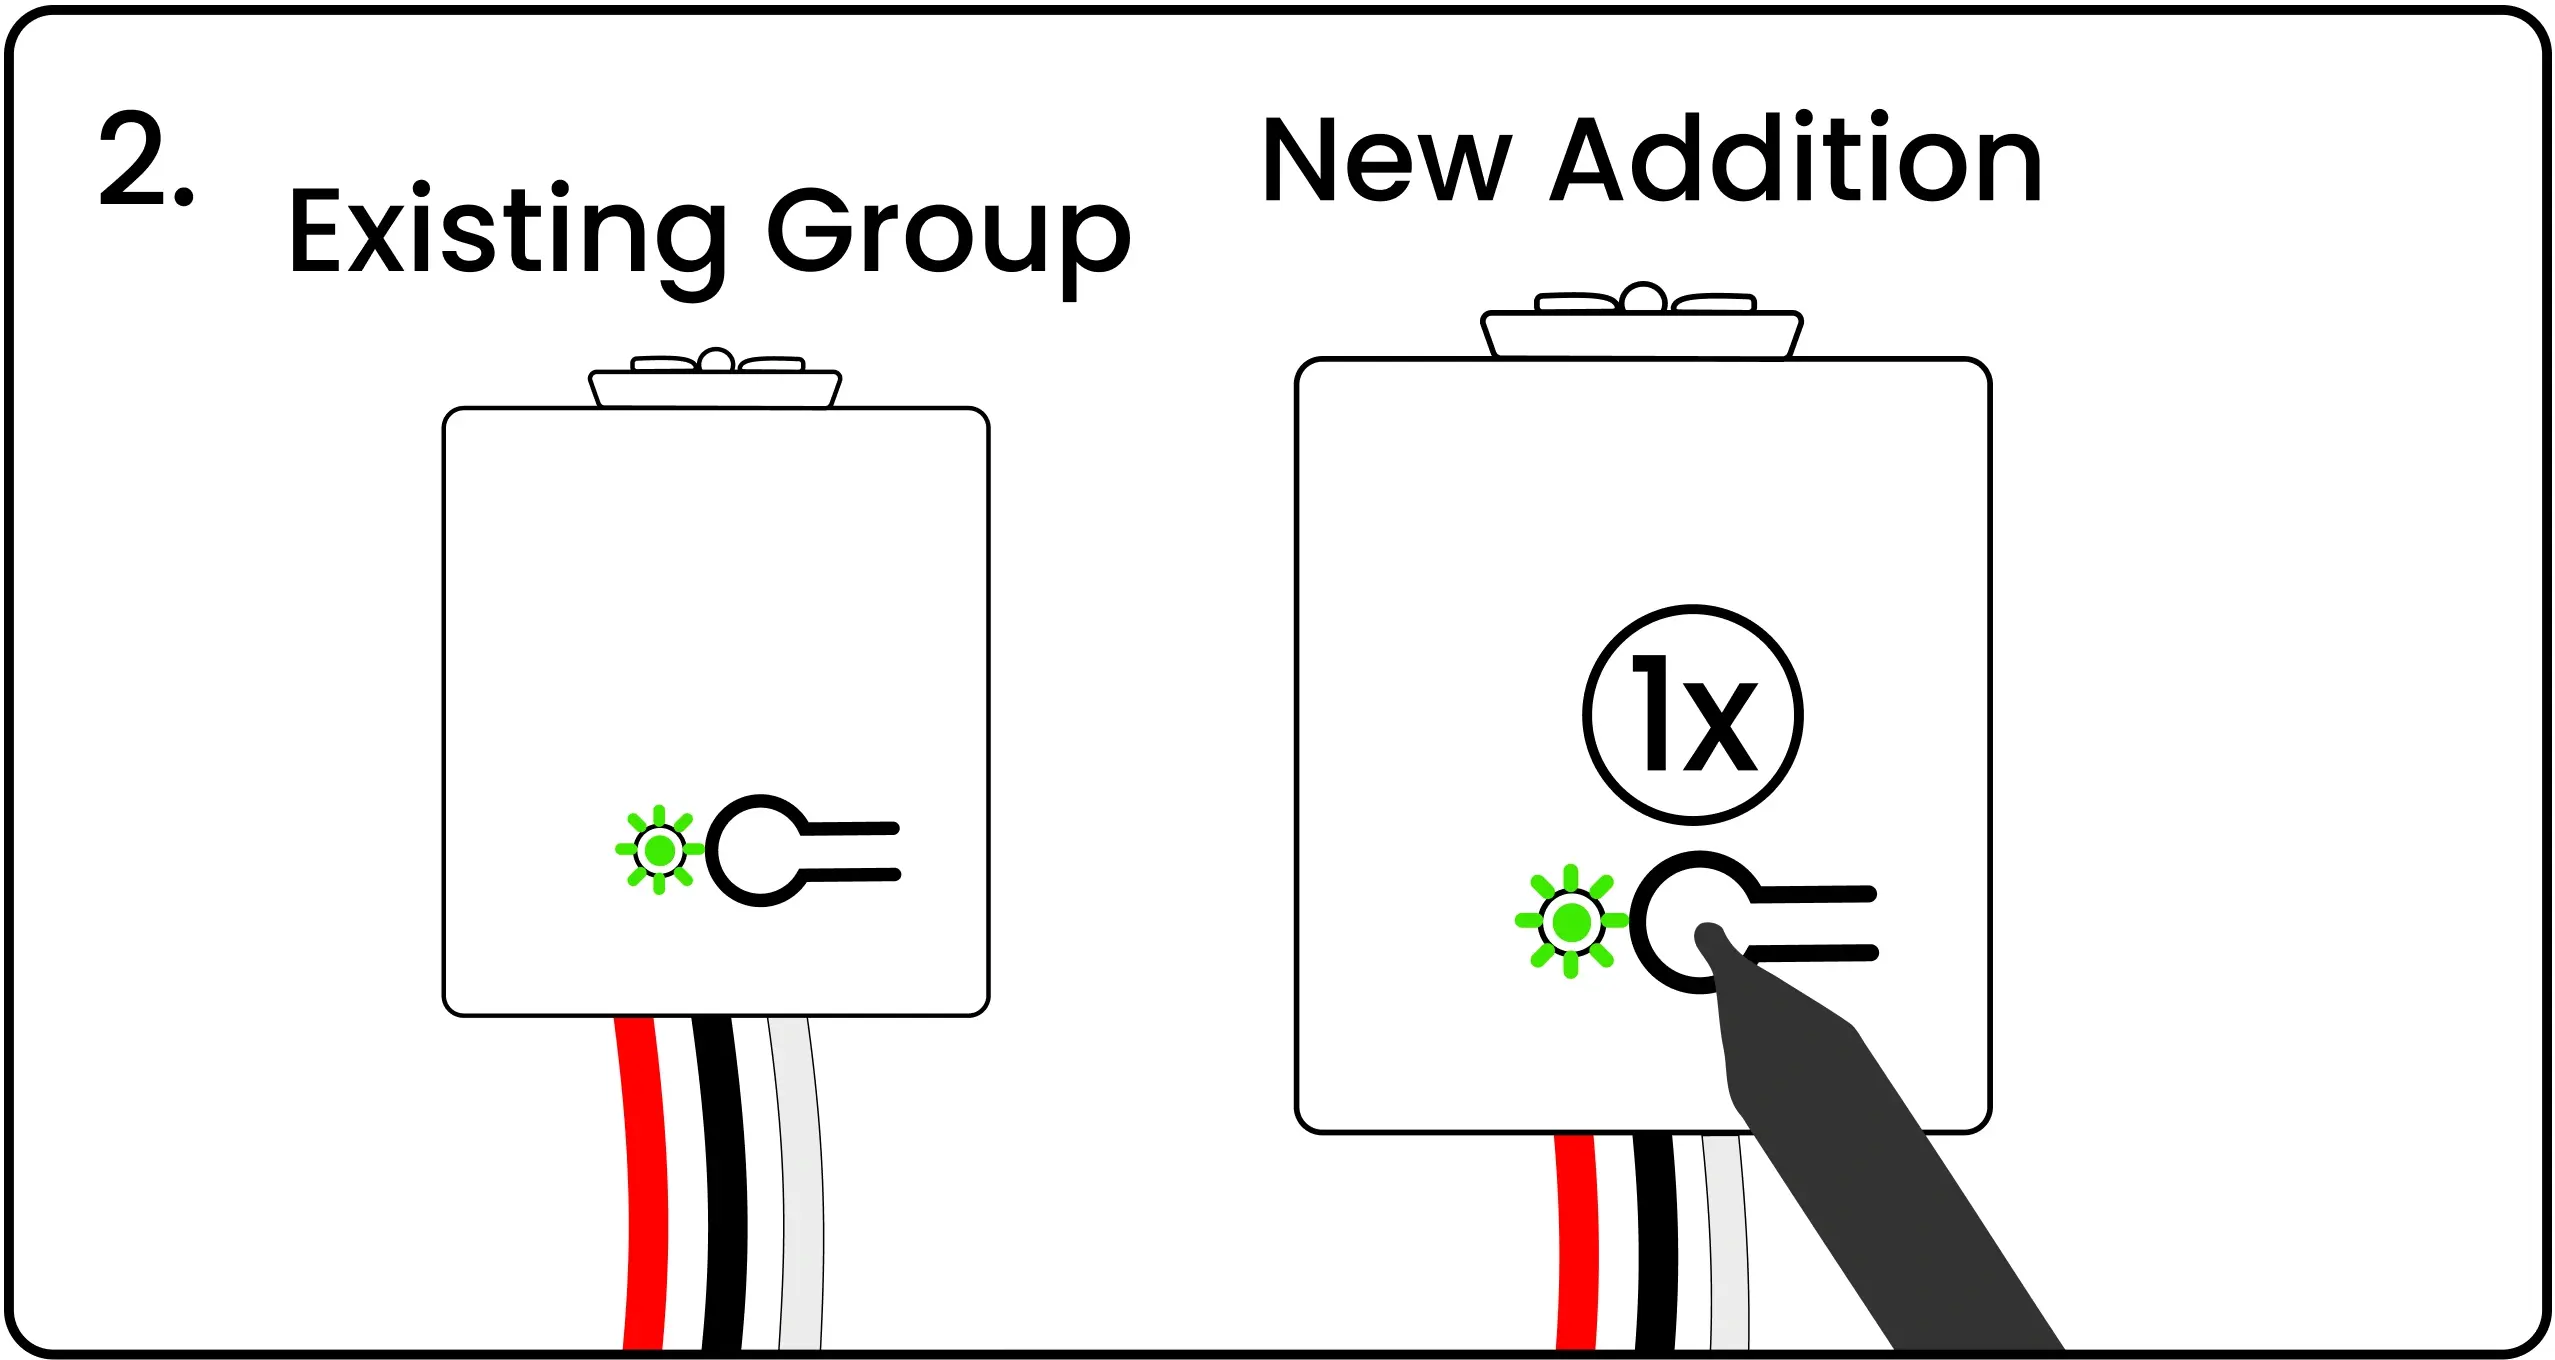
Press and release the pairing button on the "New Addition" controller being added to the group. This controller’s LED will blink green.
Both LEDs Blinking Red/Green
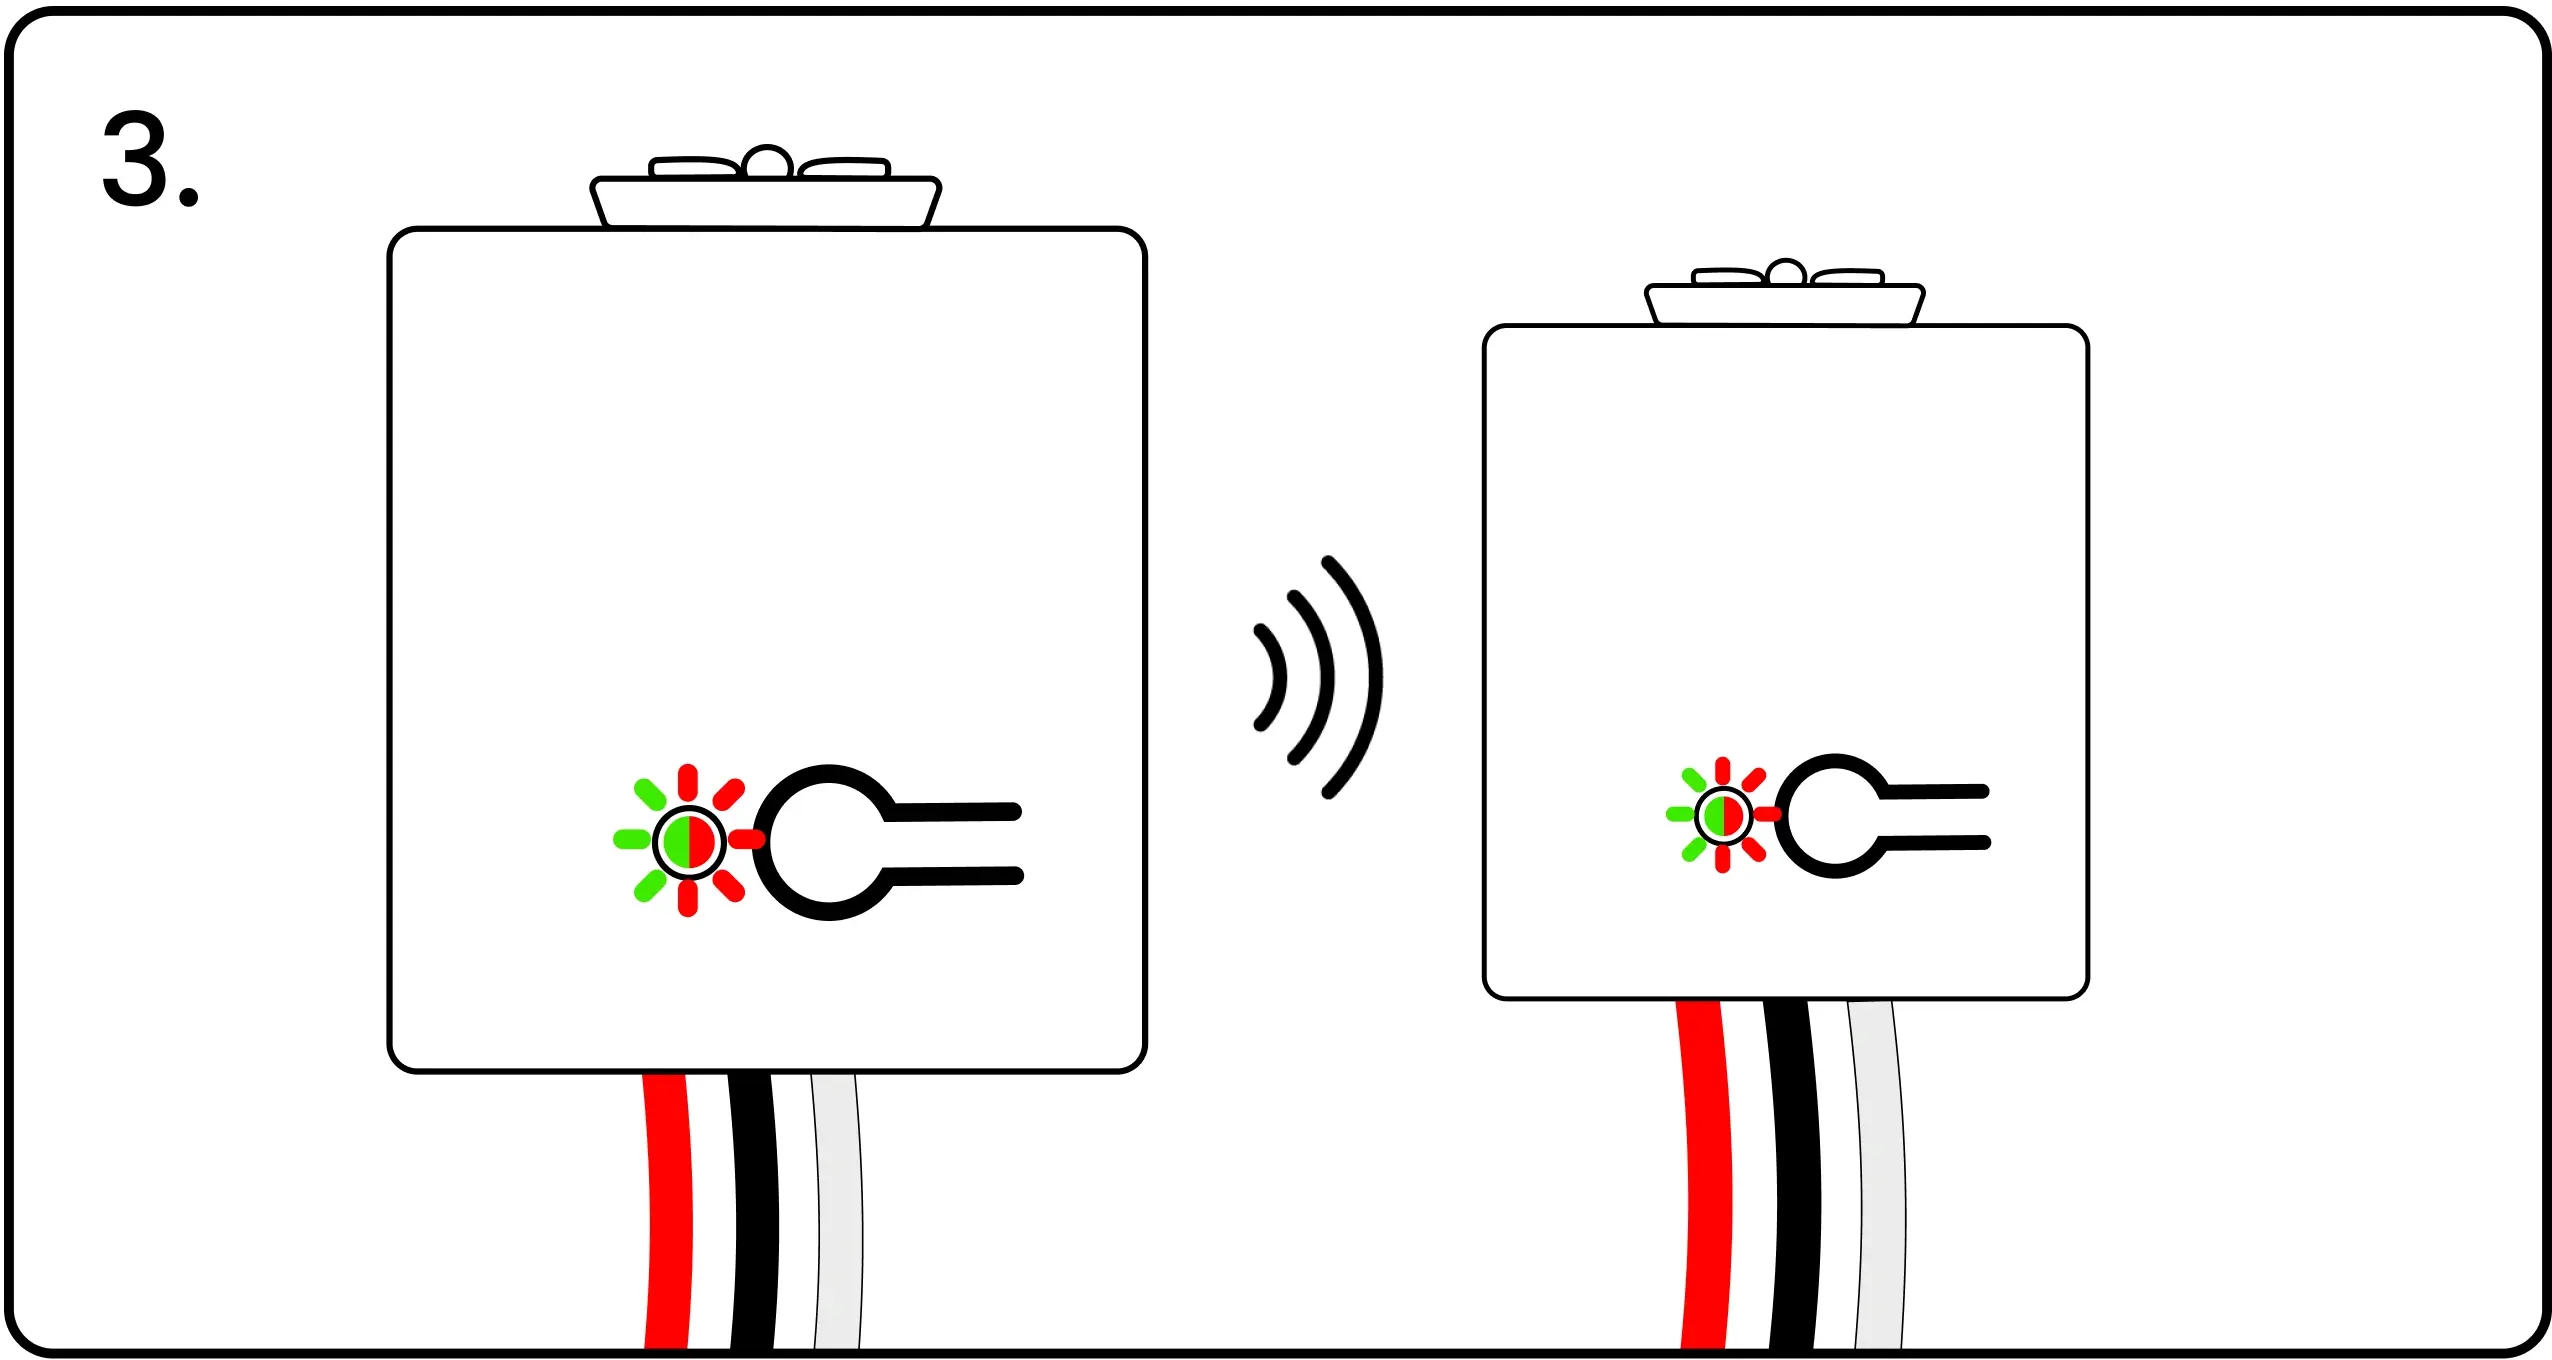
The LED on both controllers will start blinking red and green to confirm their group/pairing signals have been successfully exchanged.
Press First Controller Button to Confirm
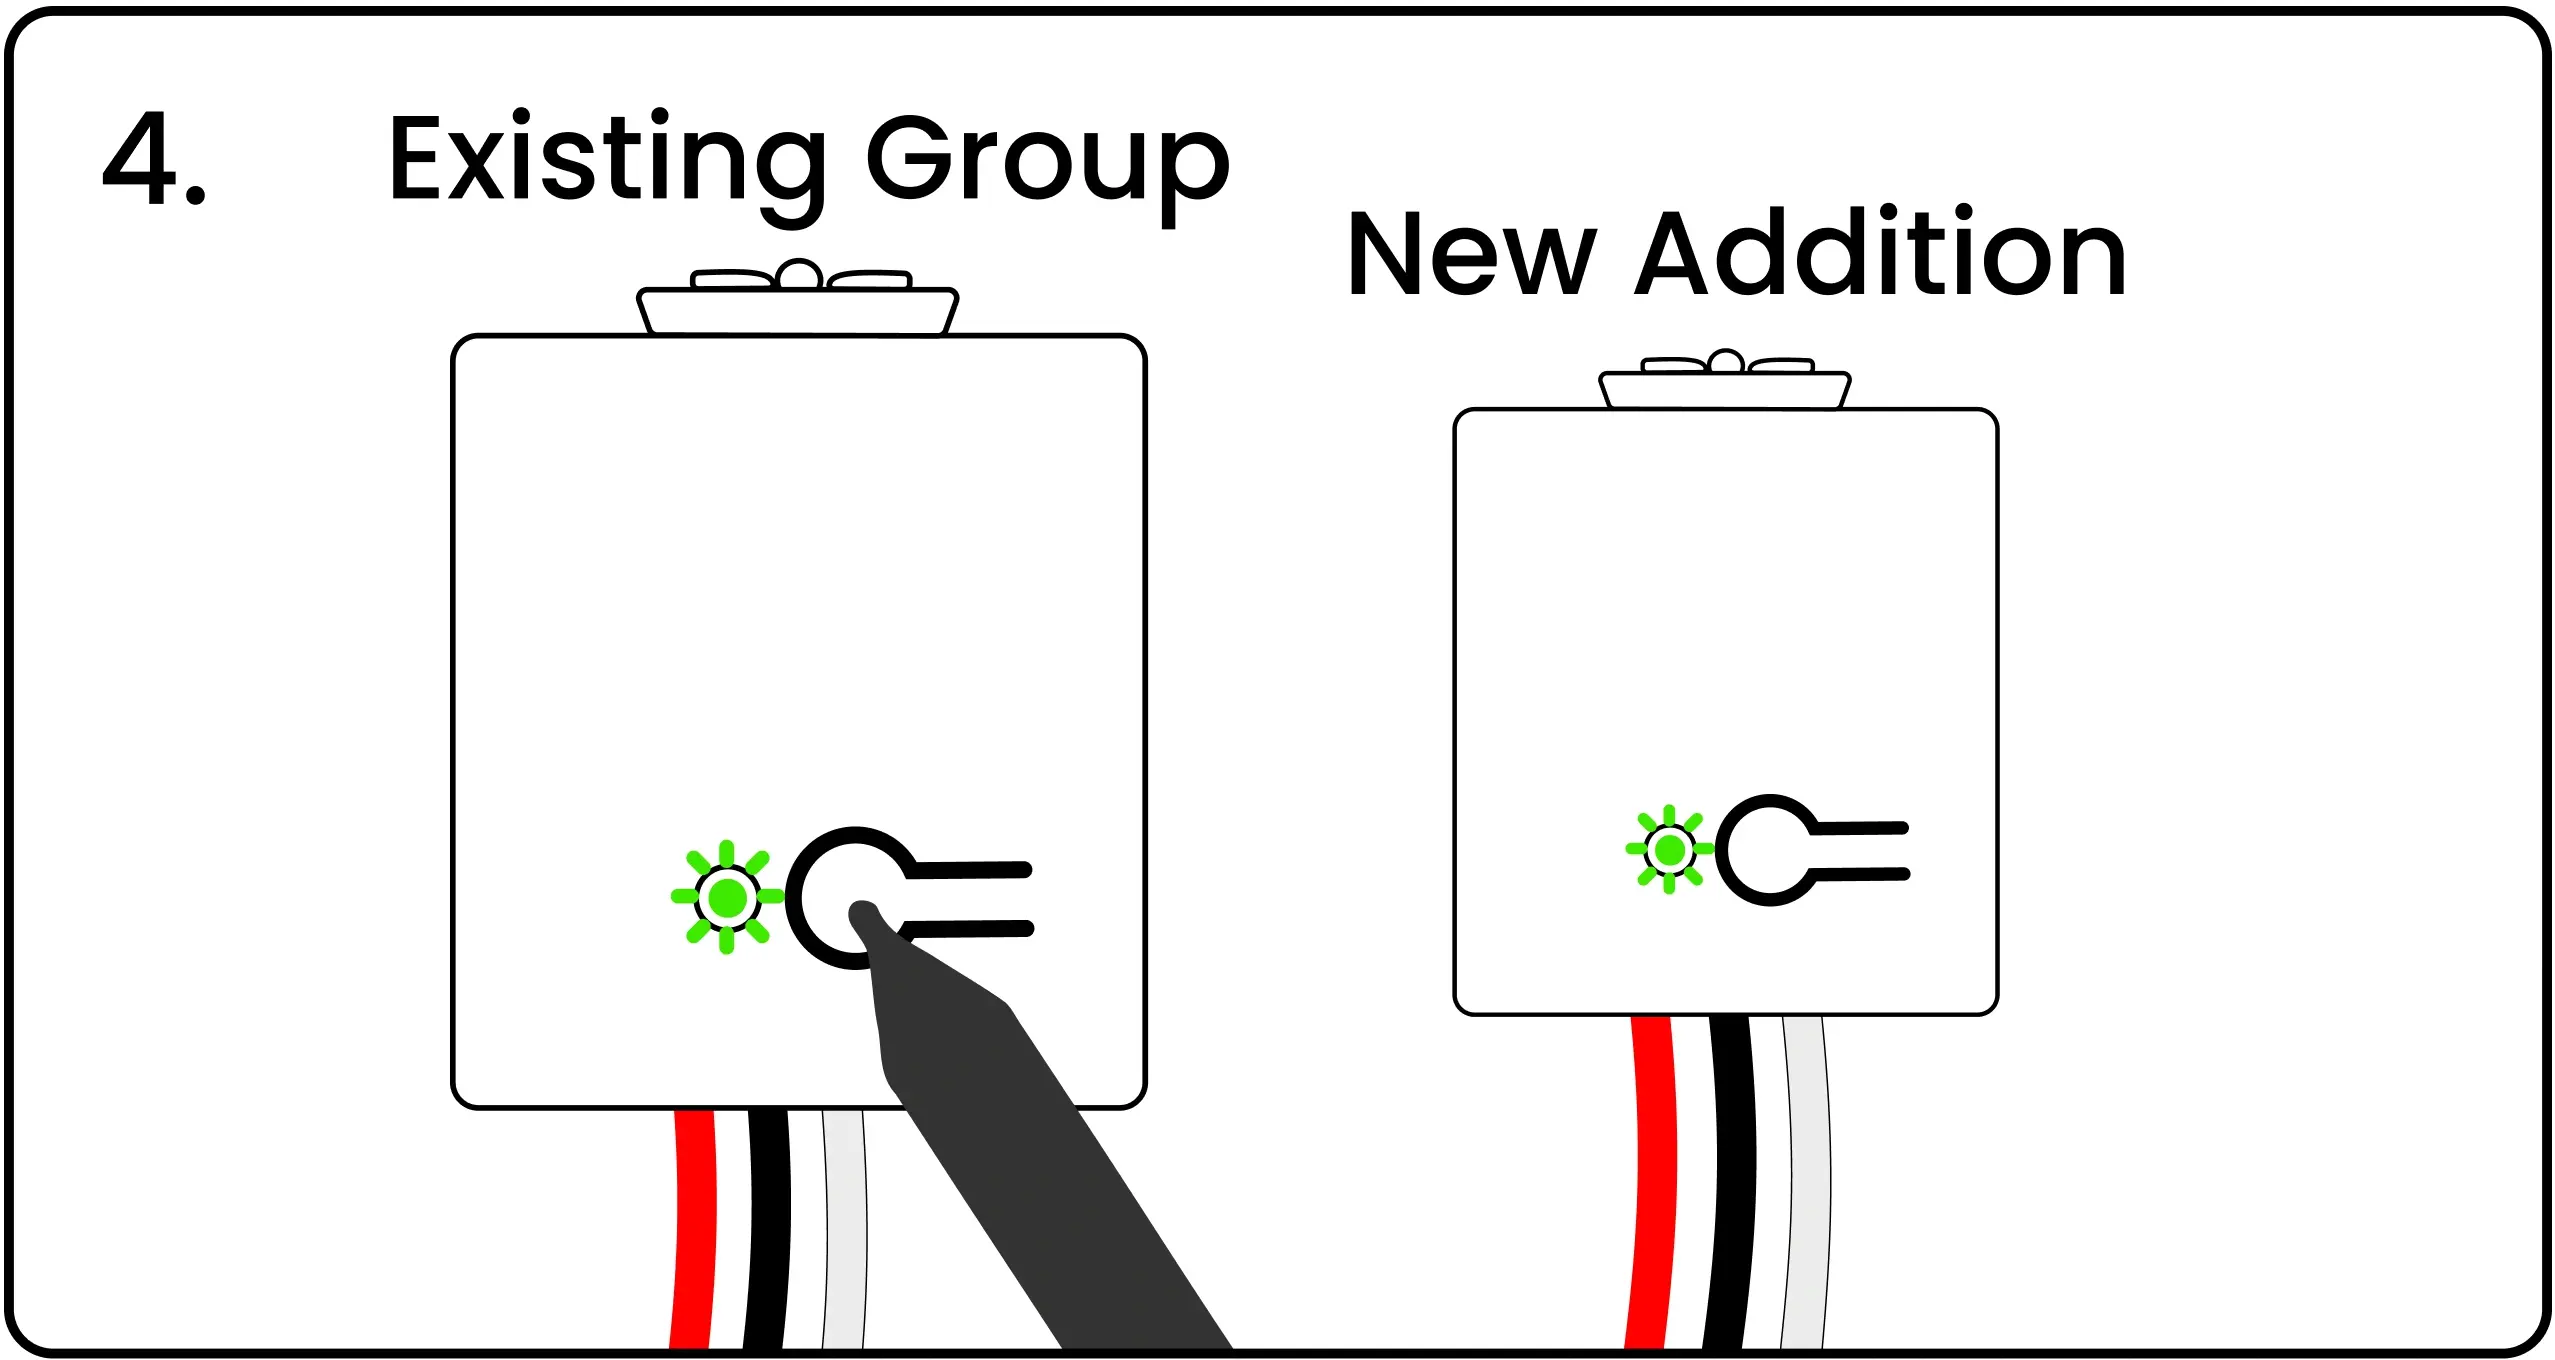
Press and release the pairing button on the first controller one final time to complete the grouping process. The LED on both controllers will flash green to confirm the grouping.
The grouping and pairing processes must be completed within 60 seconds after pressing the first 'pair' button. If controllers are not grouped or paired in 60 seconds, the controller will exit the pairing mode and you will need to restart.
Pairing a Switch to a Controller
When a switch and controller are paired together, the controller will respond to on, off, or dim signals from that switch.
Energize the Controller
Energize the controller by connecting to power or by using the Levven CTKL2 'Plug N Pair' wiring kit.
Press the Controller's Button
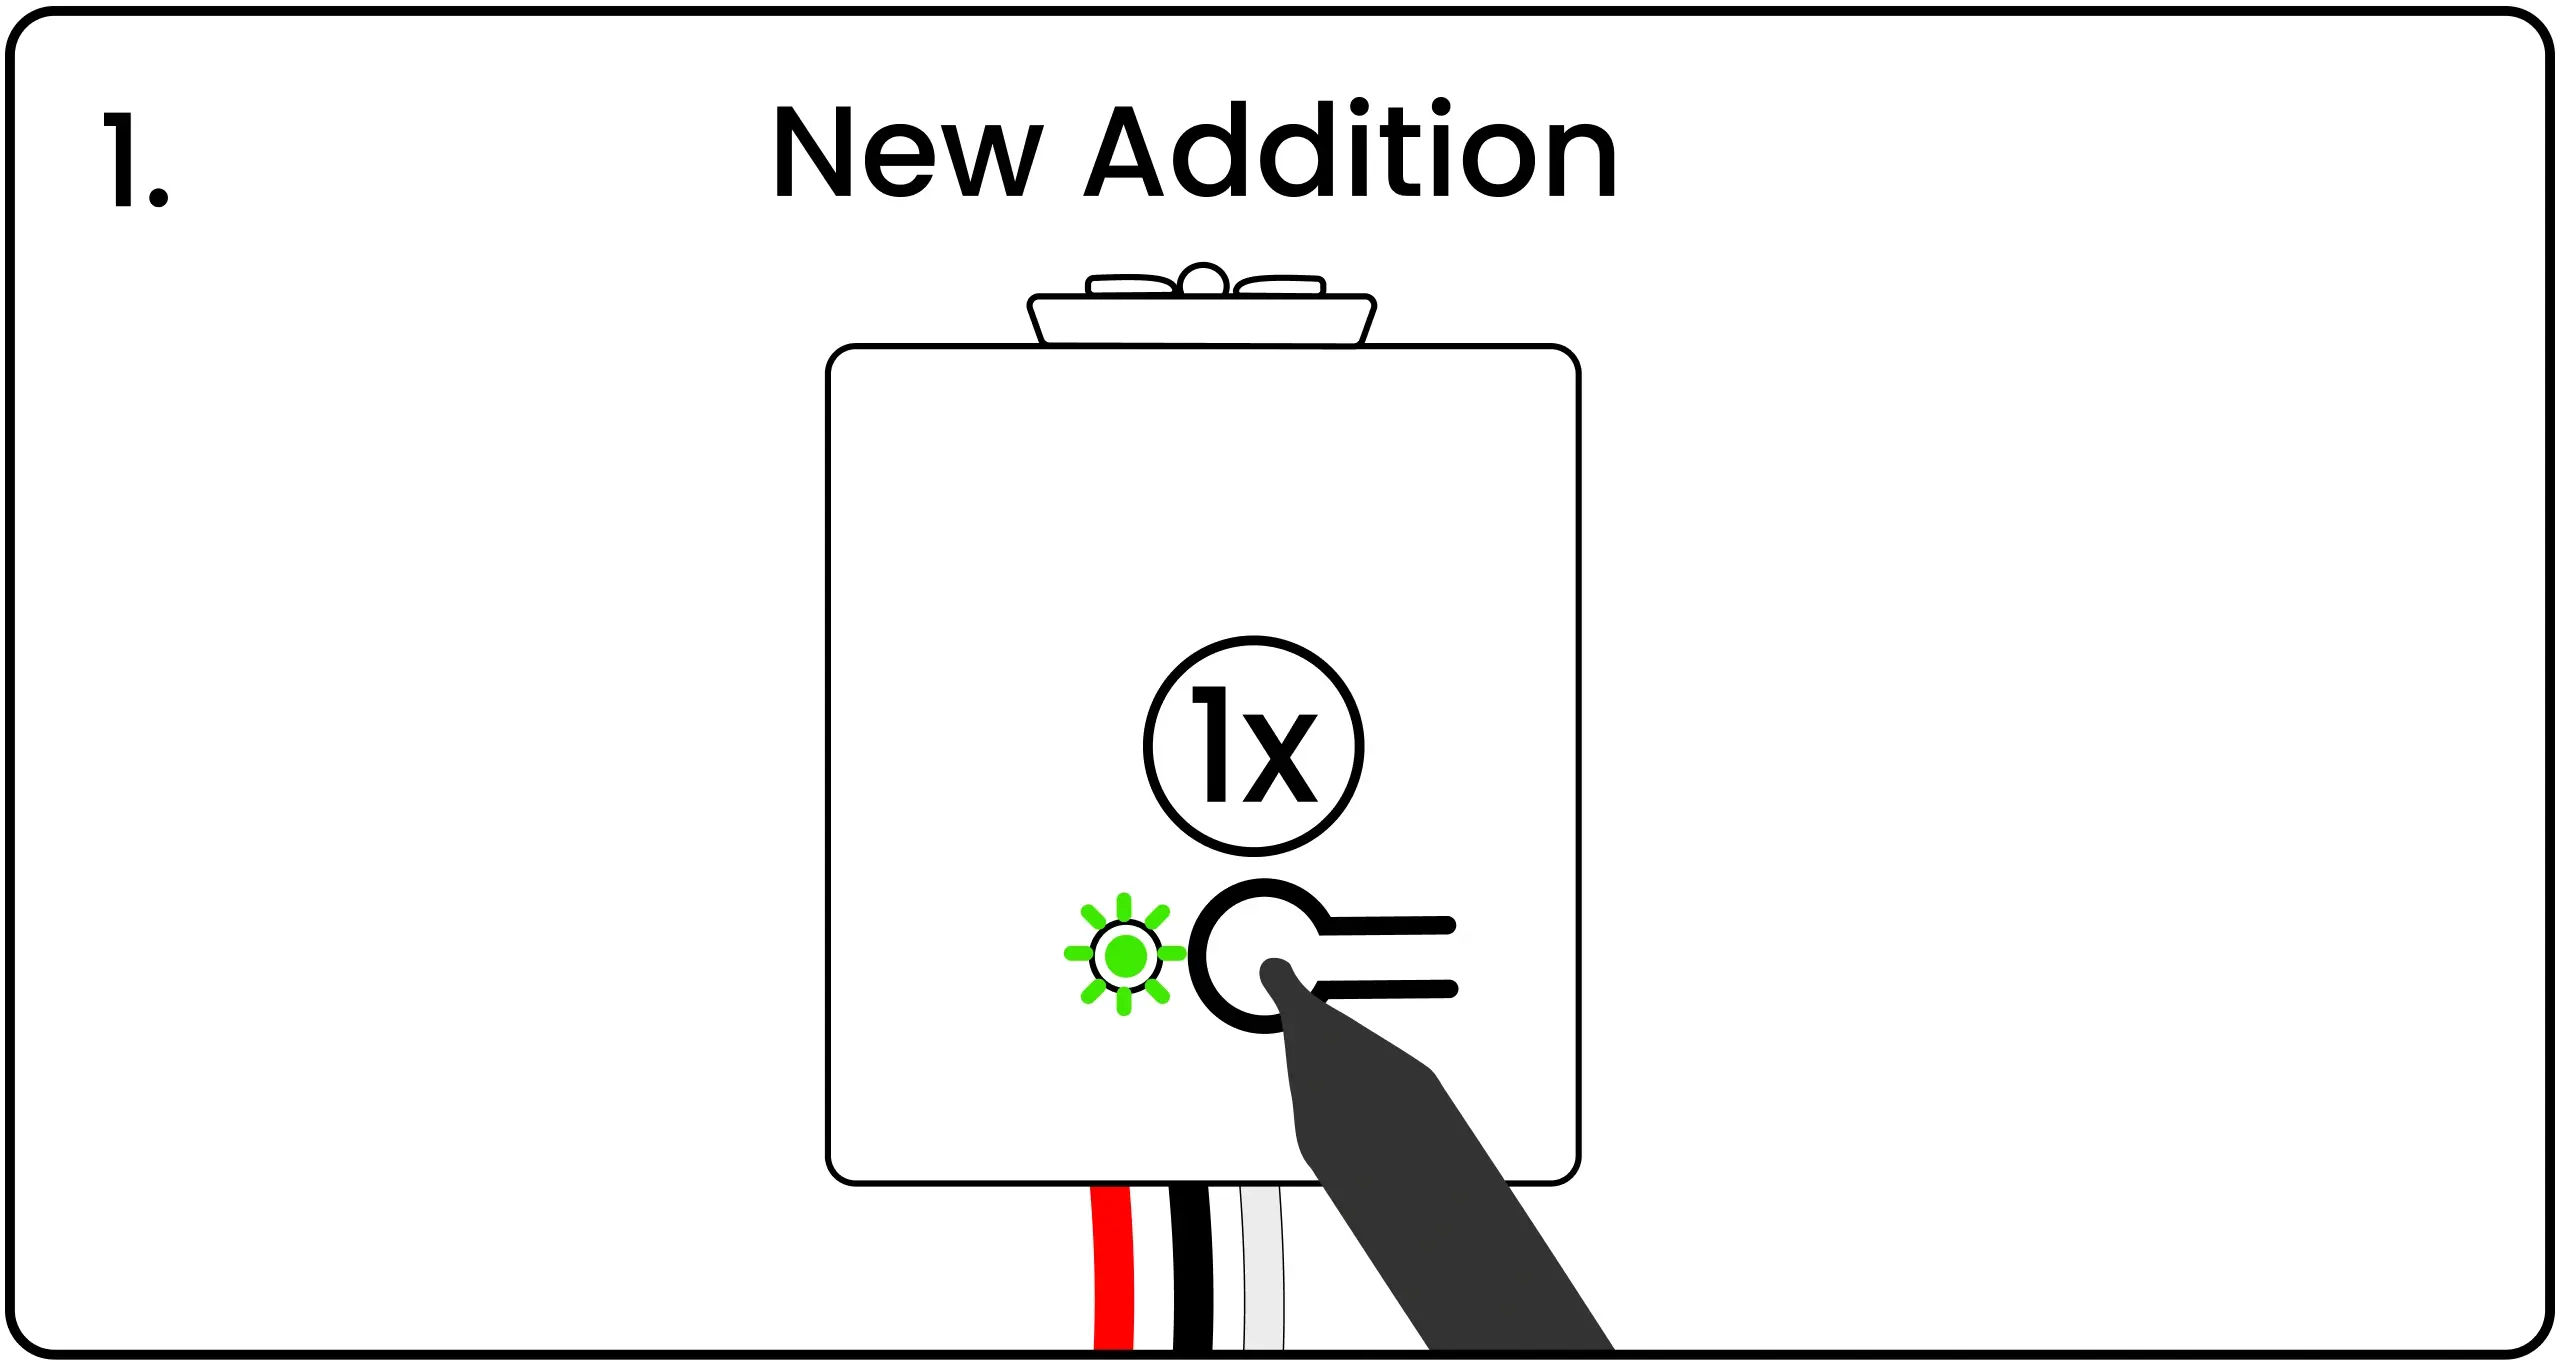
Using a pen, press and release the controller’s pairing button. This controller’s LED will blink green to indicate it is waiting for a pairing signal.
Squeeze Both Ends of the Switch
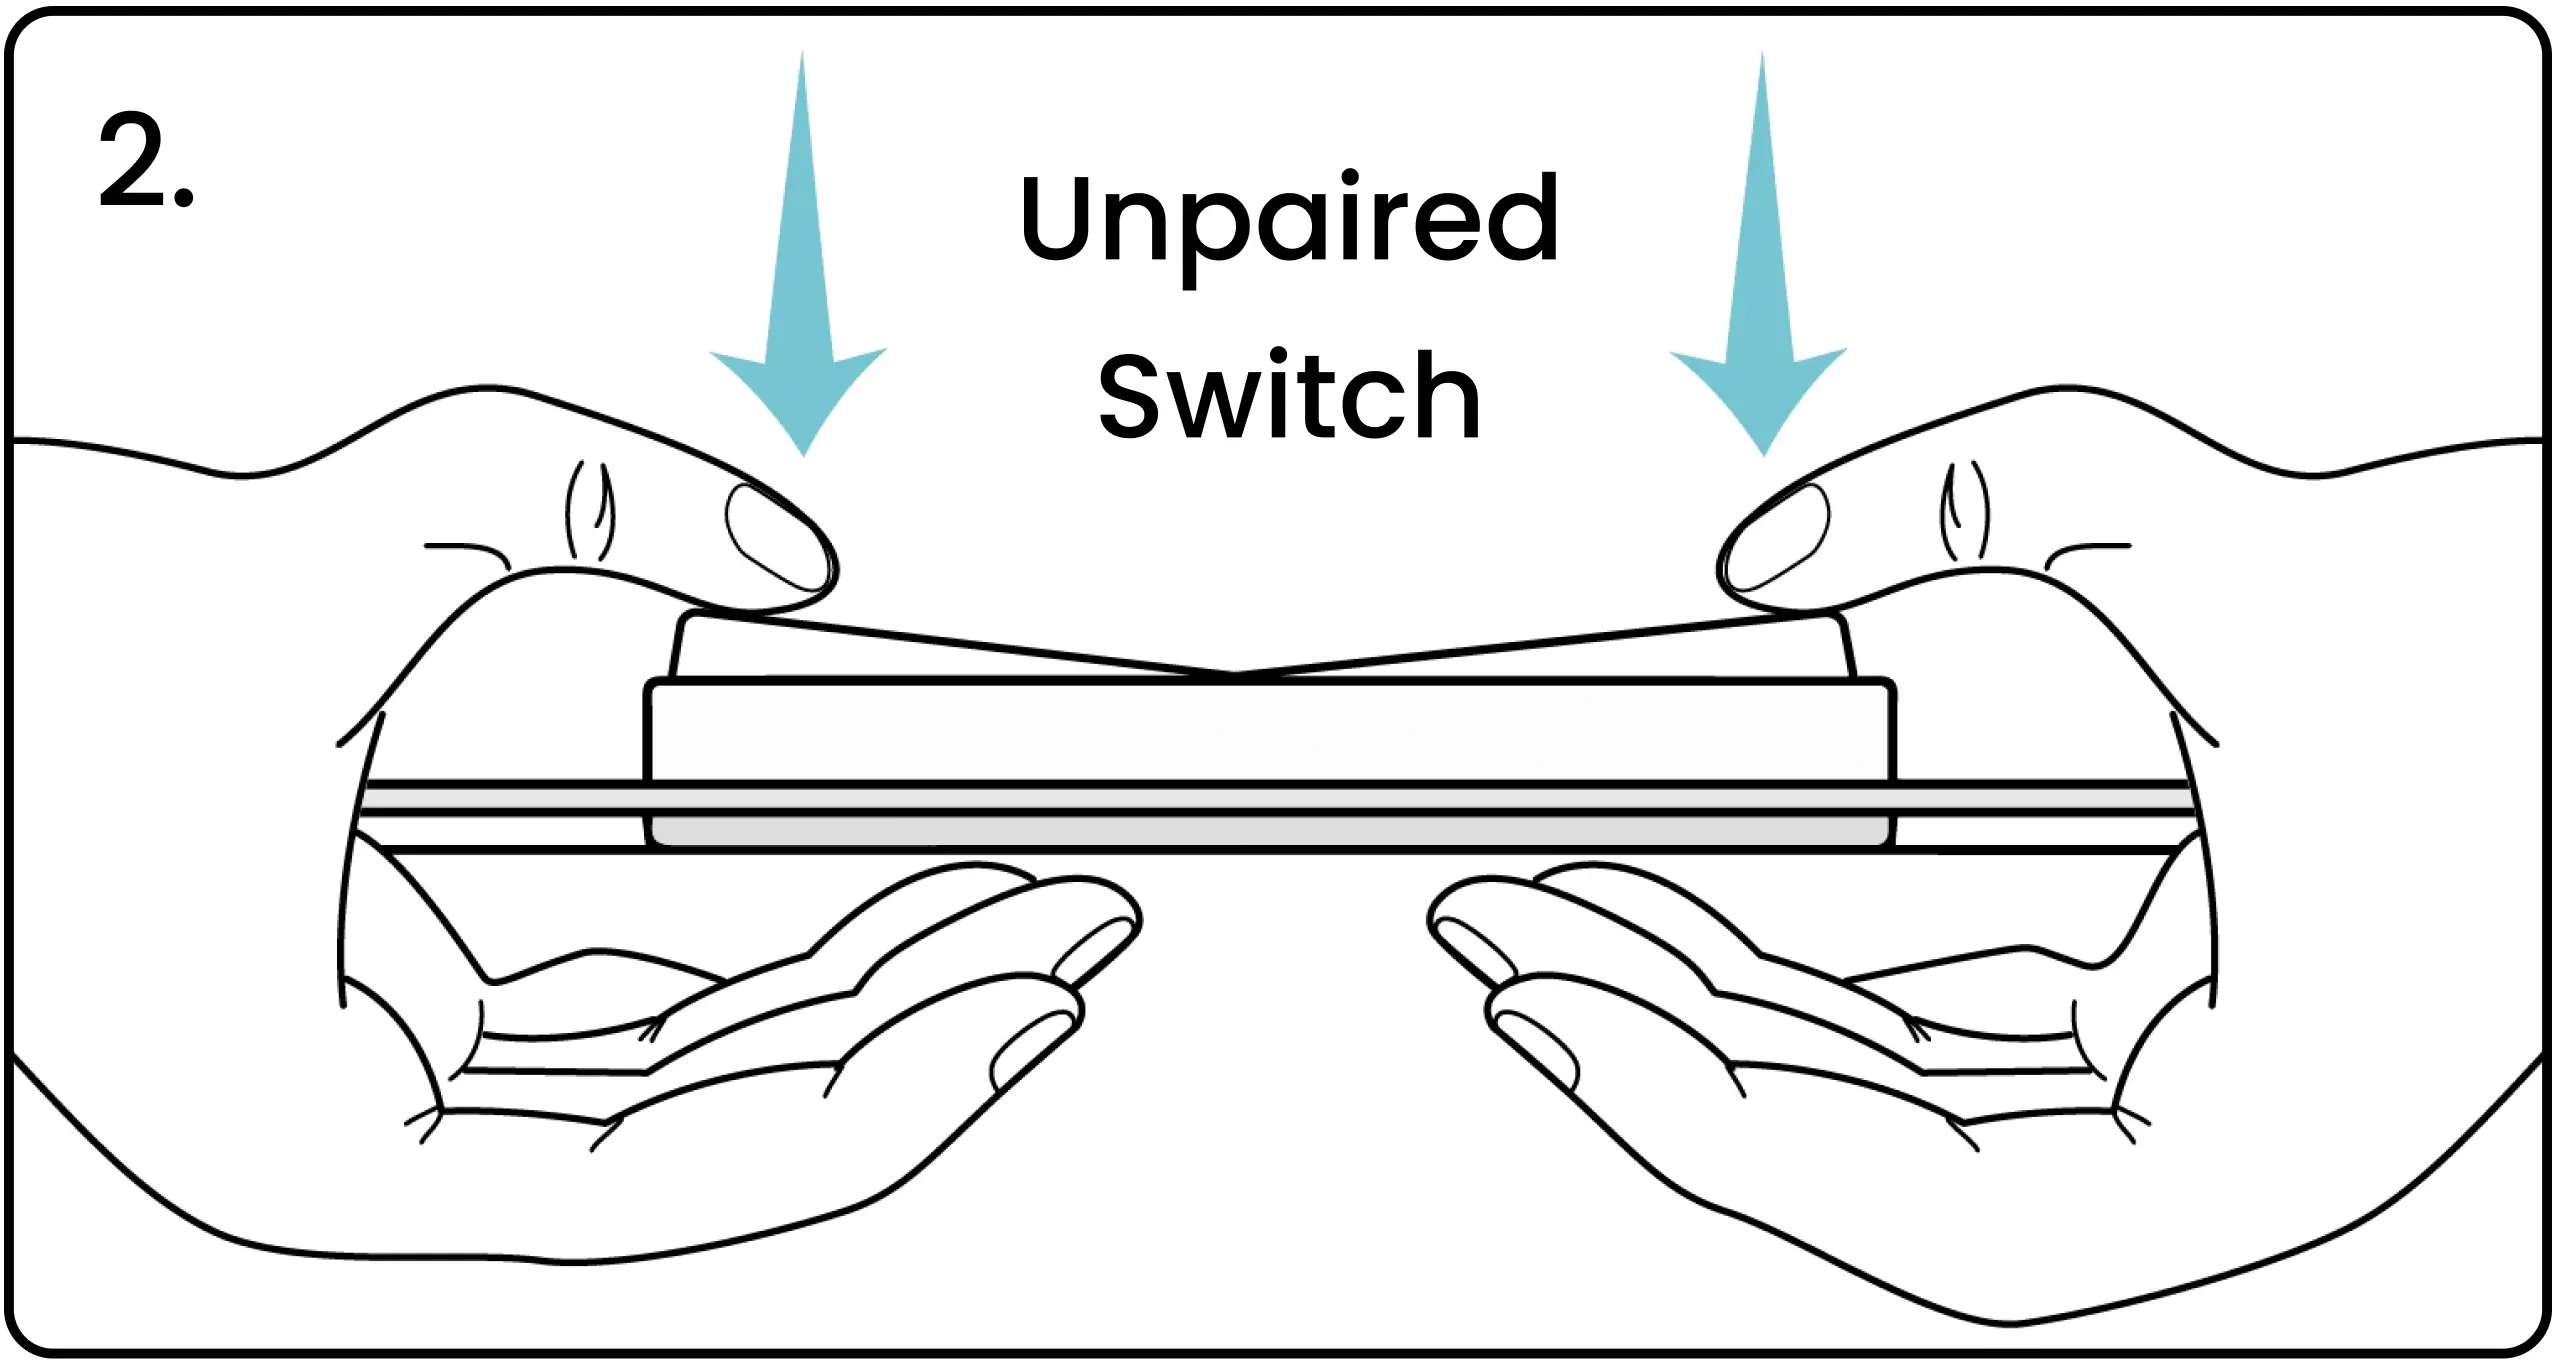
Squeeze and release both ends of the switch simultaneously to transmit a pairing signal. Watch the video above to see a demonstration of this action.
Controller's LED Blinking Red/Green
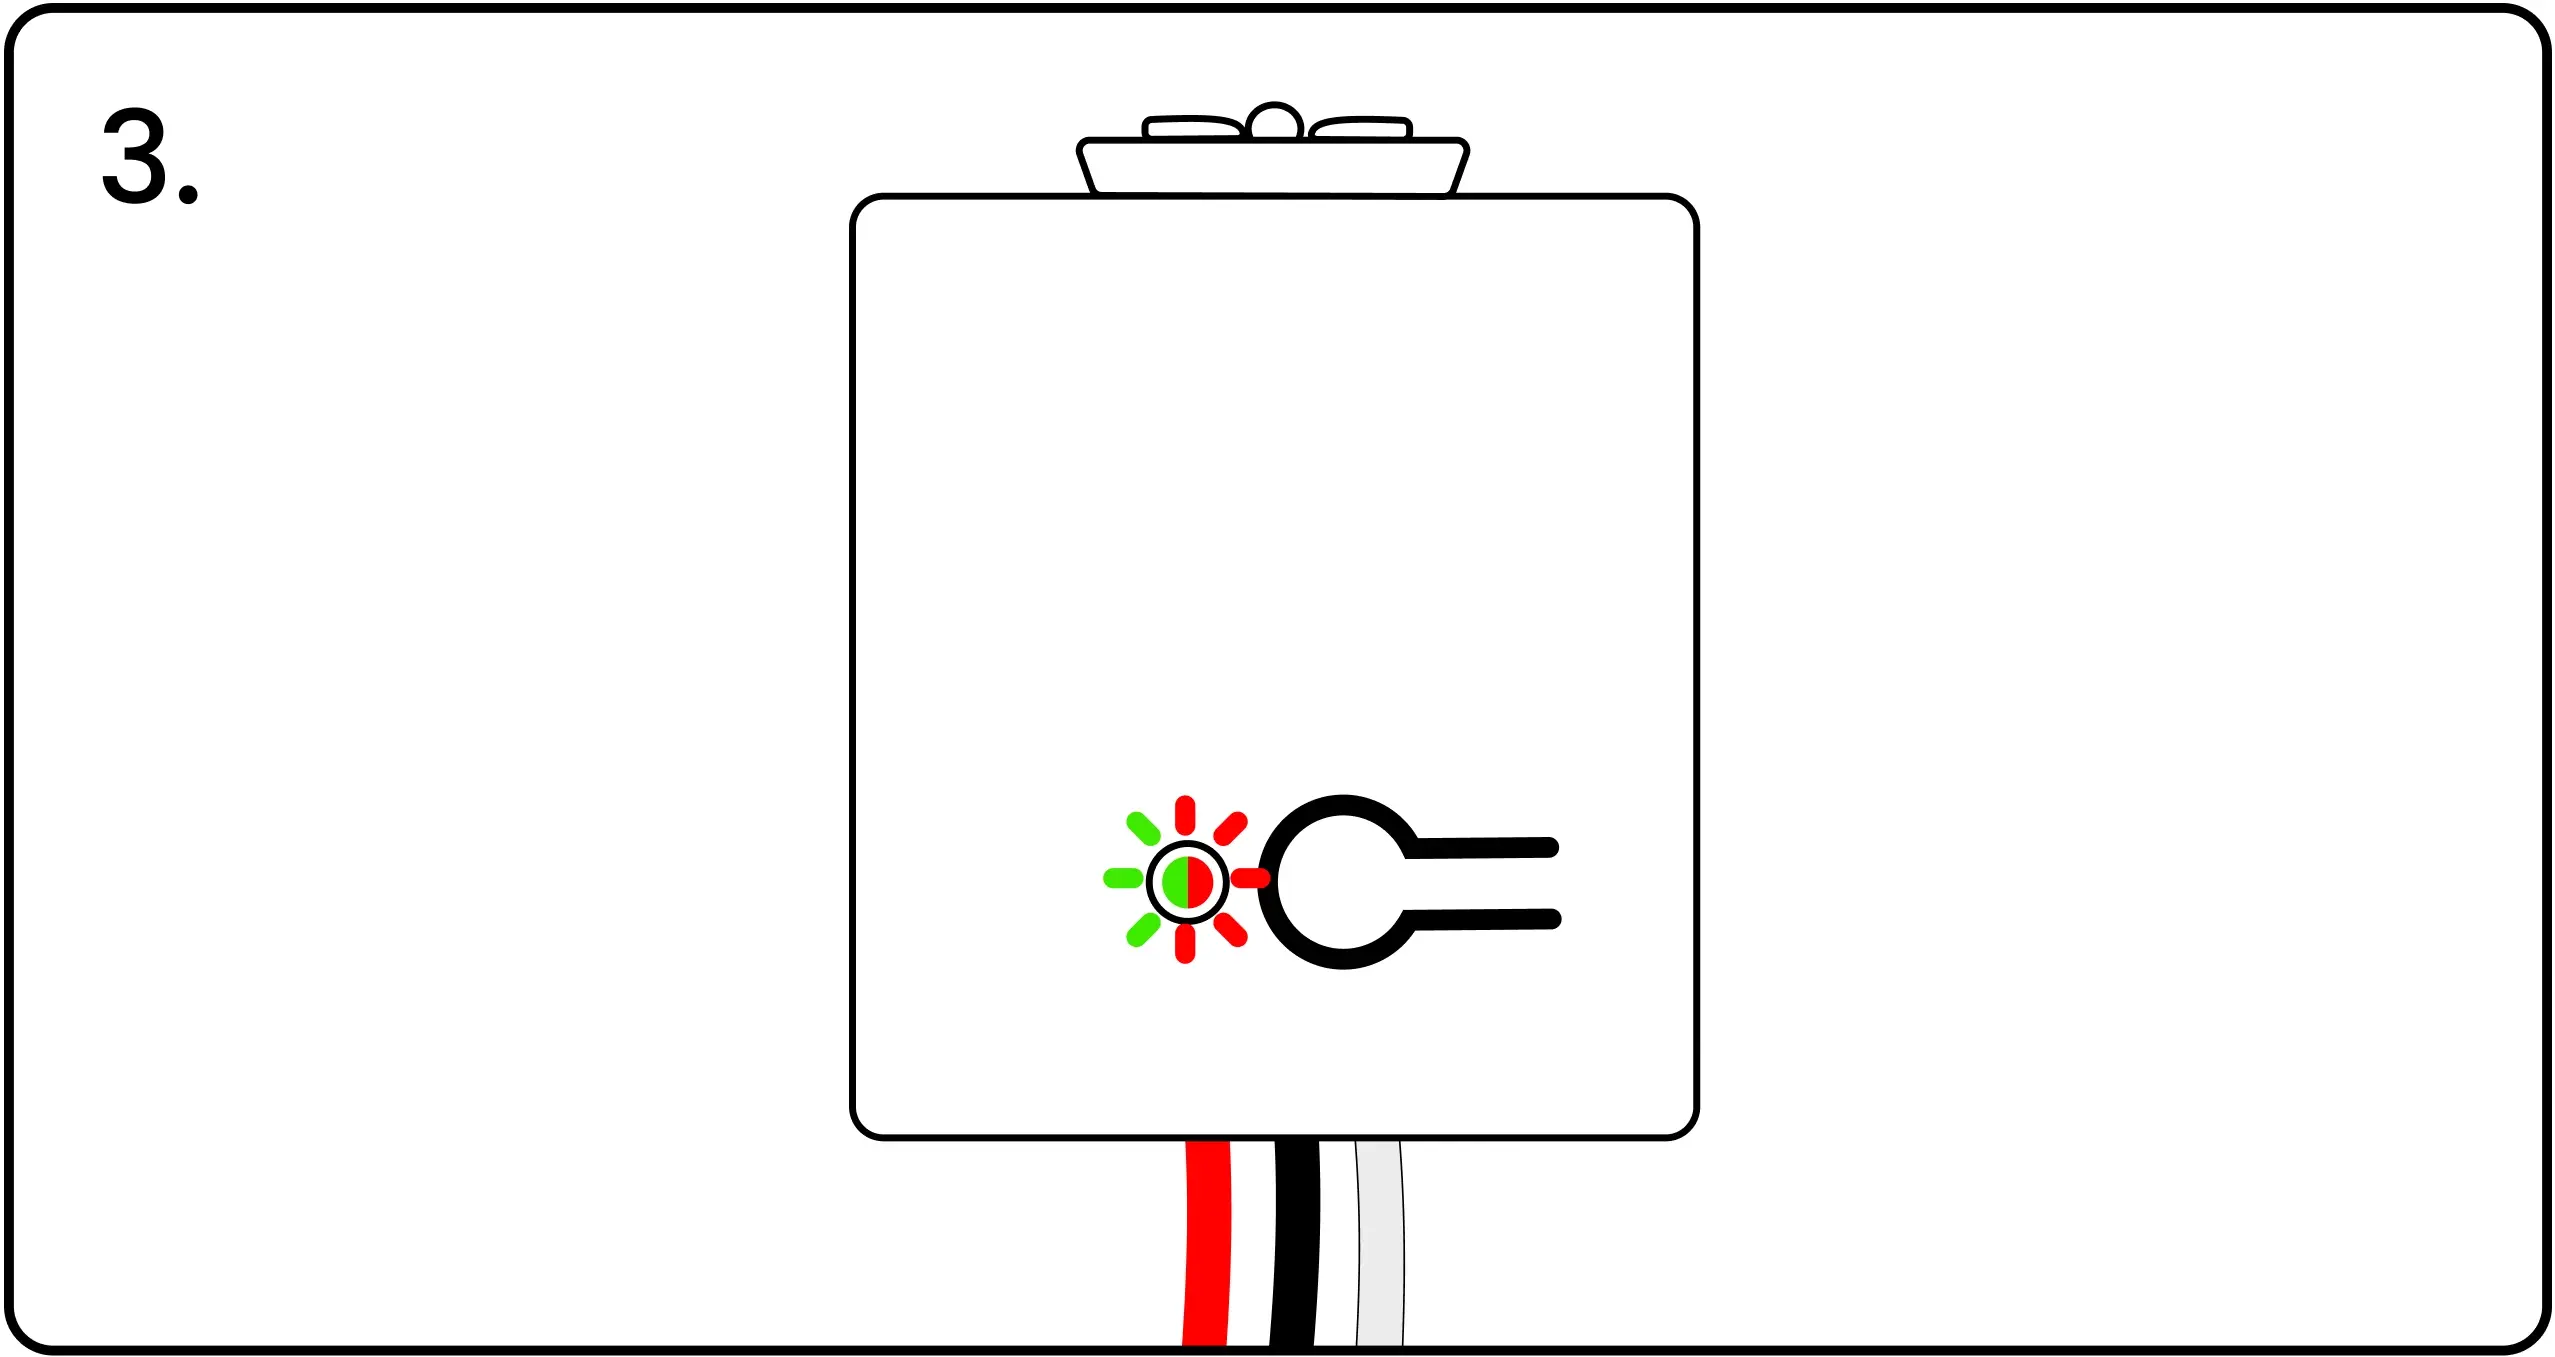
The LED on the controller will blink red and green to confirm the signal was received. If the LED does not blink red and green, squeeze the ends of the switch again to transmit a pairing signal.
Press the Controller's Button to Confirm
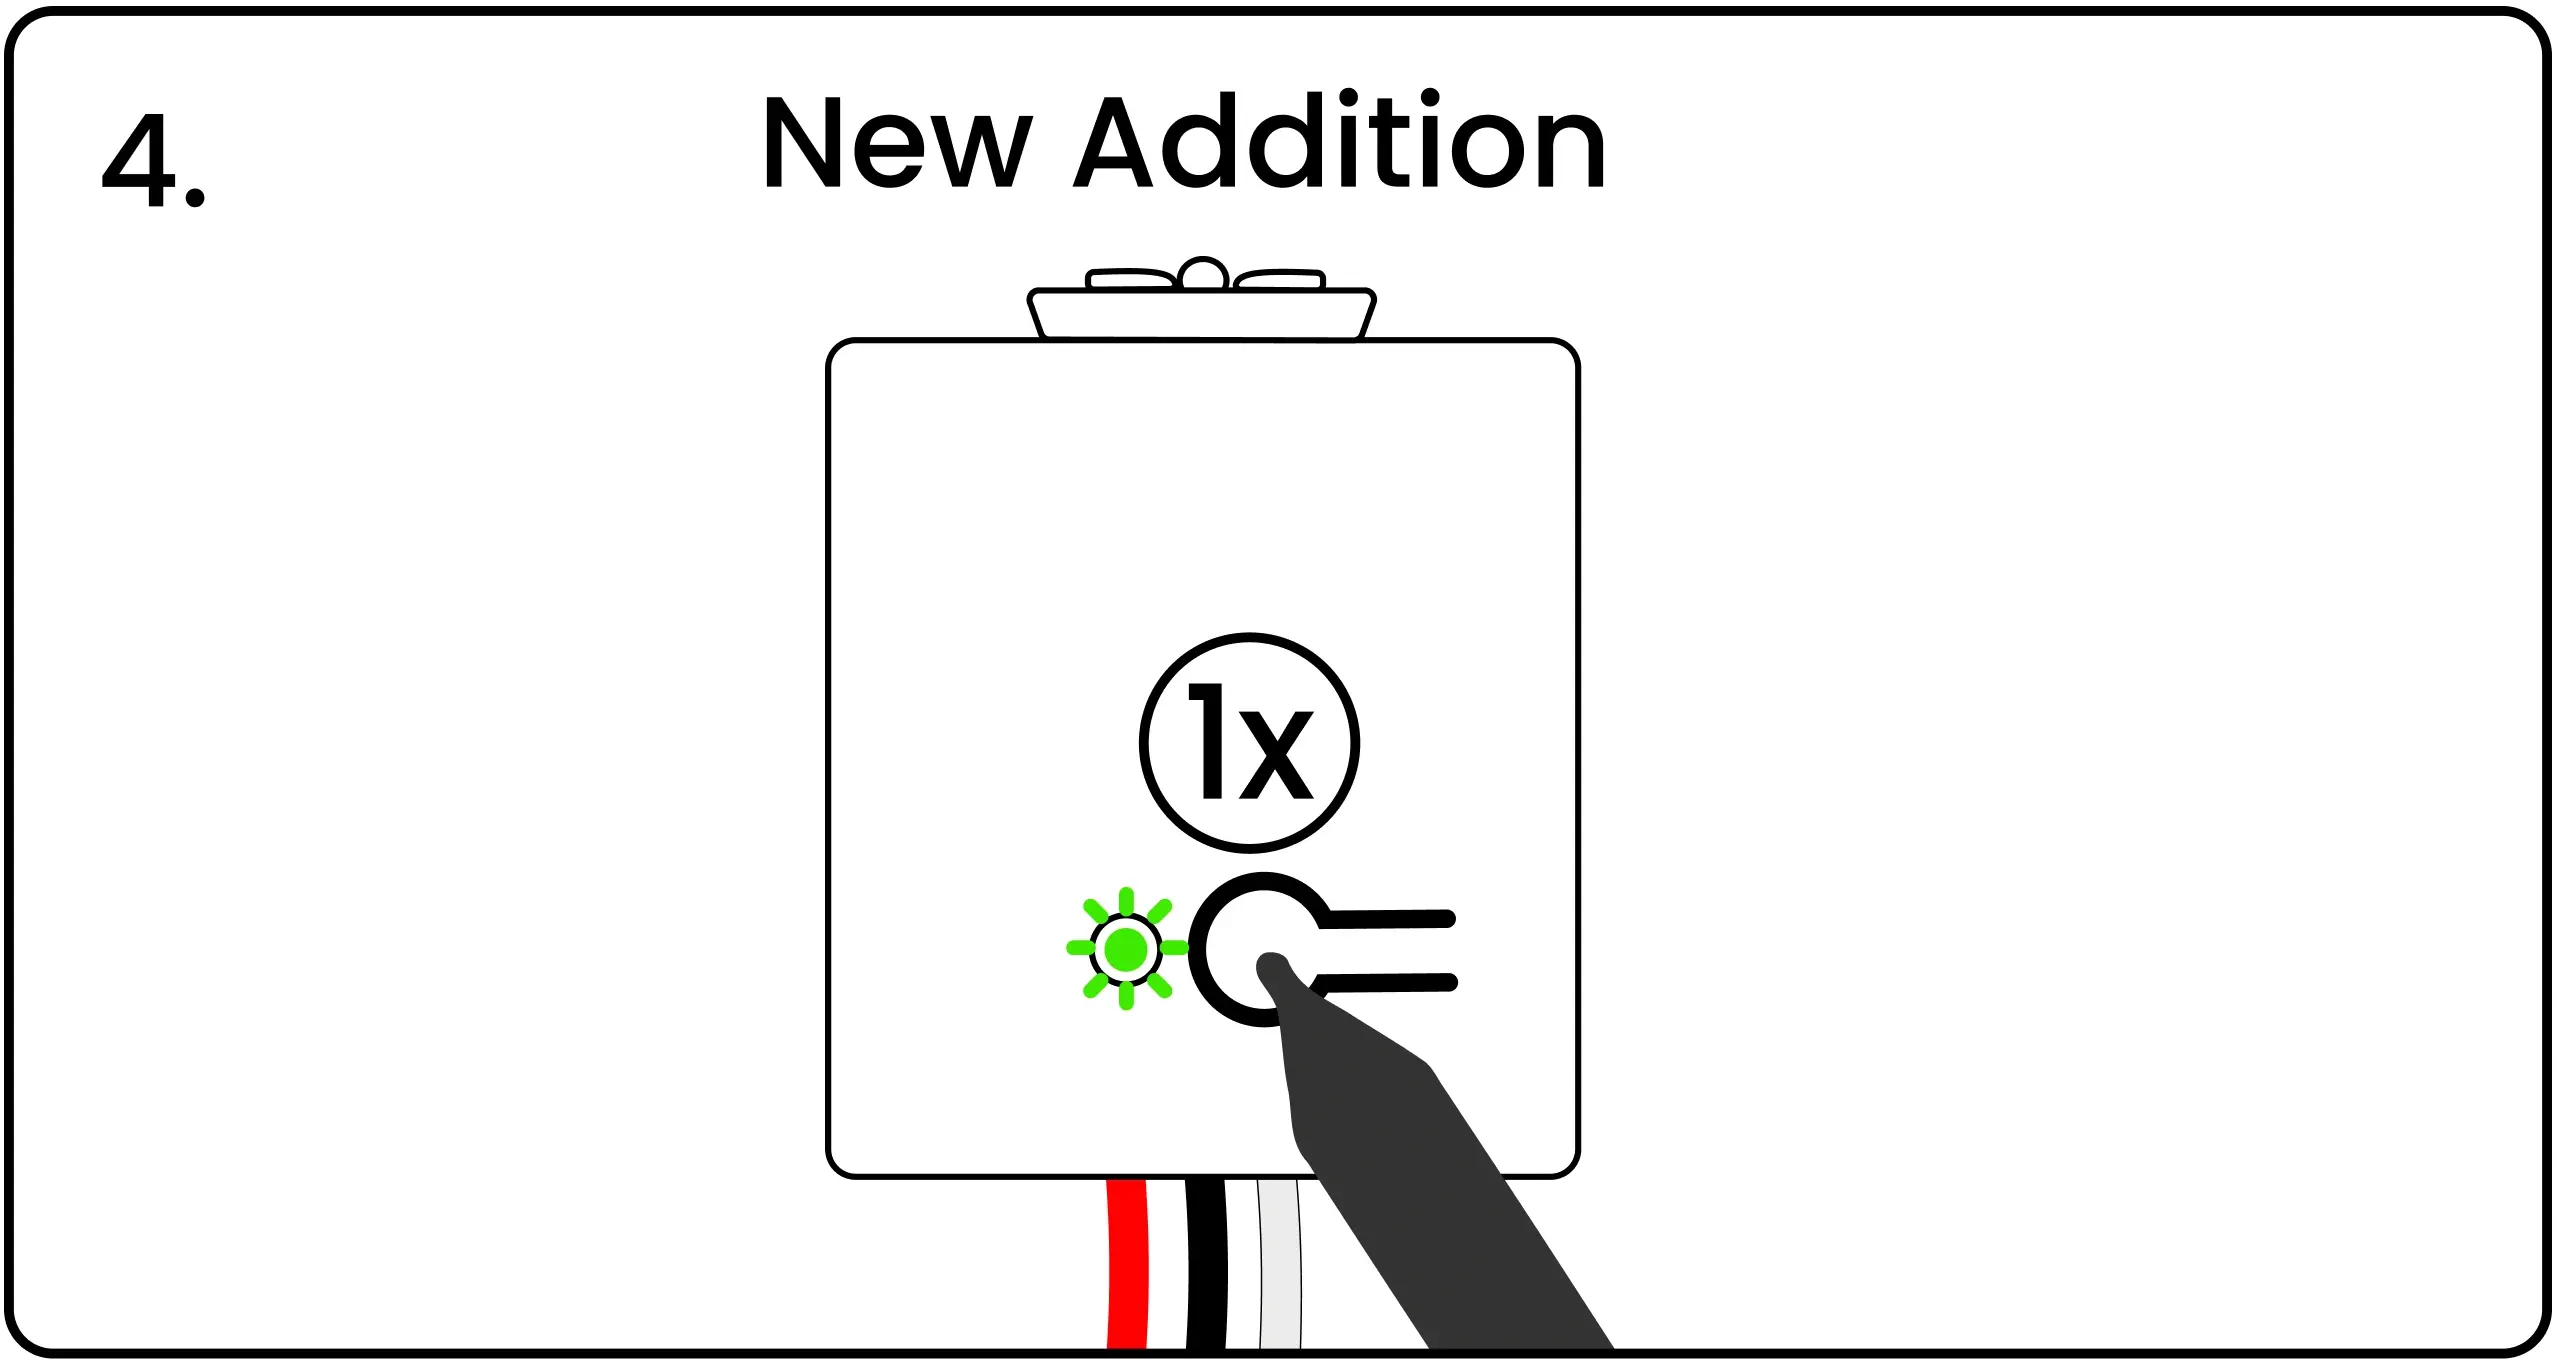
When the LED is blinking red/green, press and release the pairing button on the controller to confirm the pairing. The LED will flash green to show the pairing completed successfully.
Distribute Controllers and Switches Around the House
Controllers and their paired switches can be distributed around the house per the builder's electrical plans.
Reset Unused Controllers
Warning on Resetting Unused Controllers
Factory reset ONLY the extra controllers that were not needed for the installation.
If you have extra controllers, reset them to remove the switch pairing and group data. Controllers that have been reset can be returned to inventory and used in a another installation.
Erase the Saved Pairing / Grouping Data from Controller Memory
Press and Hold Controller Button
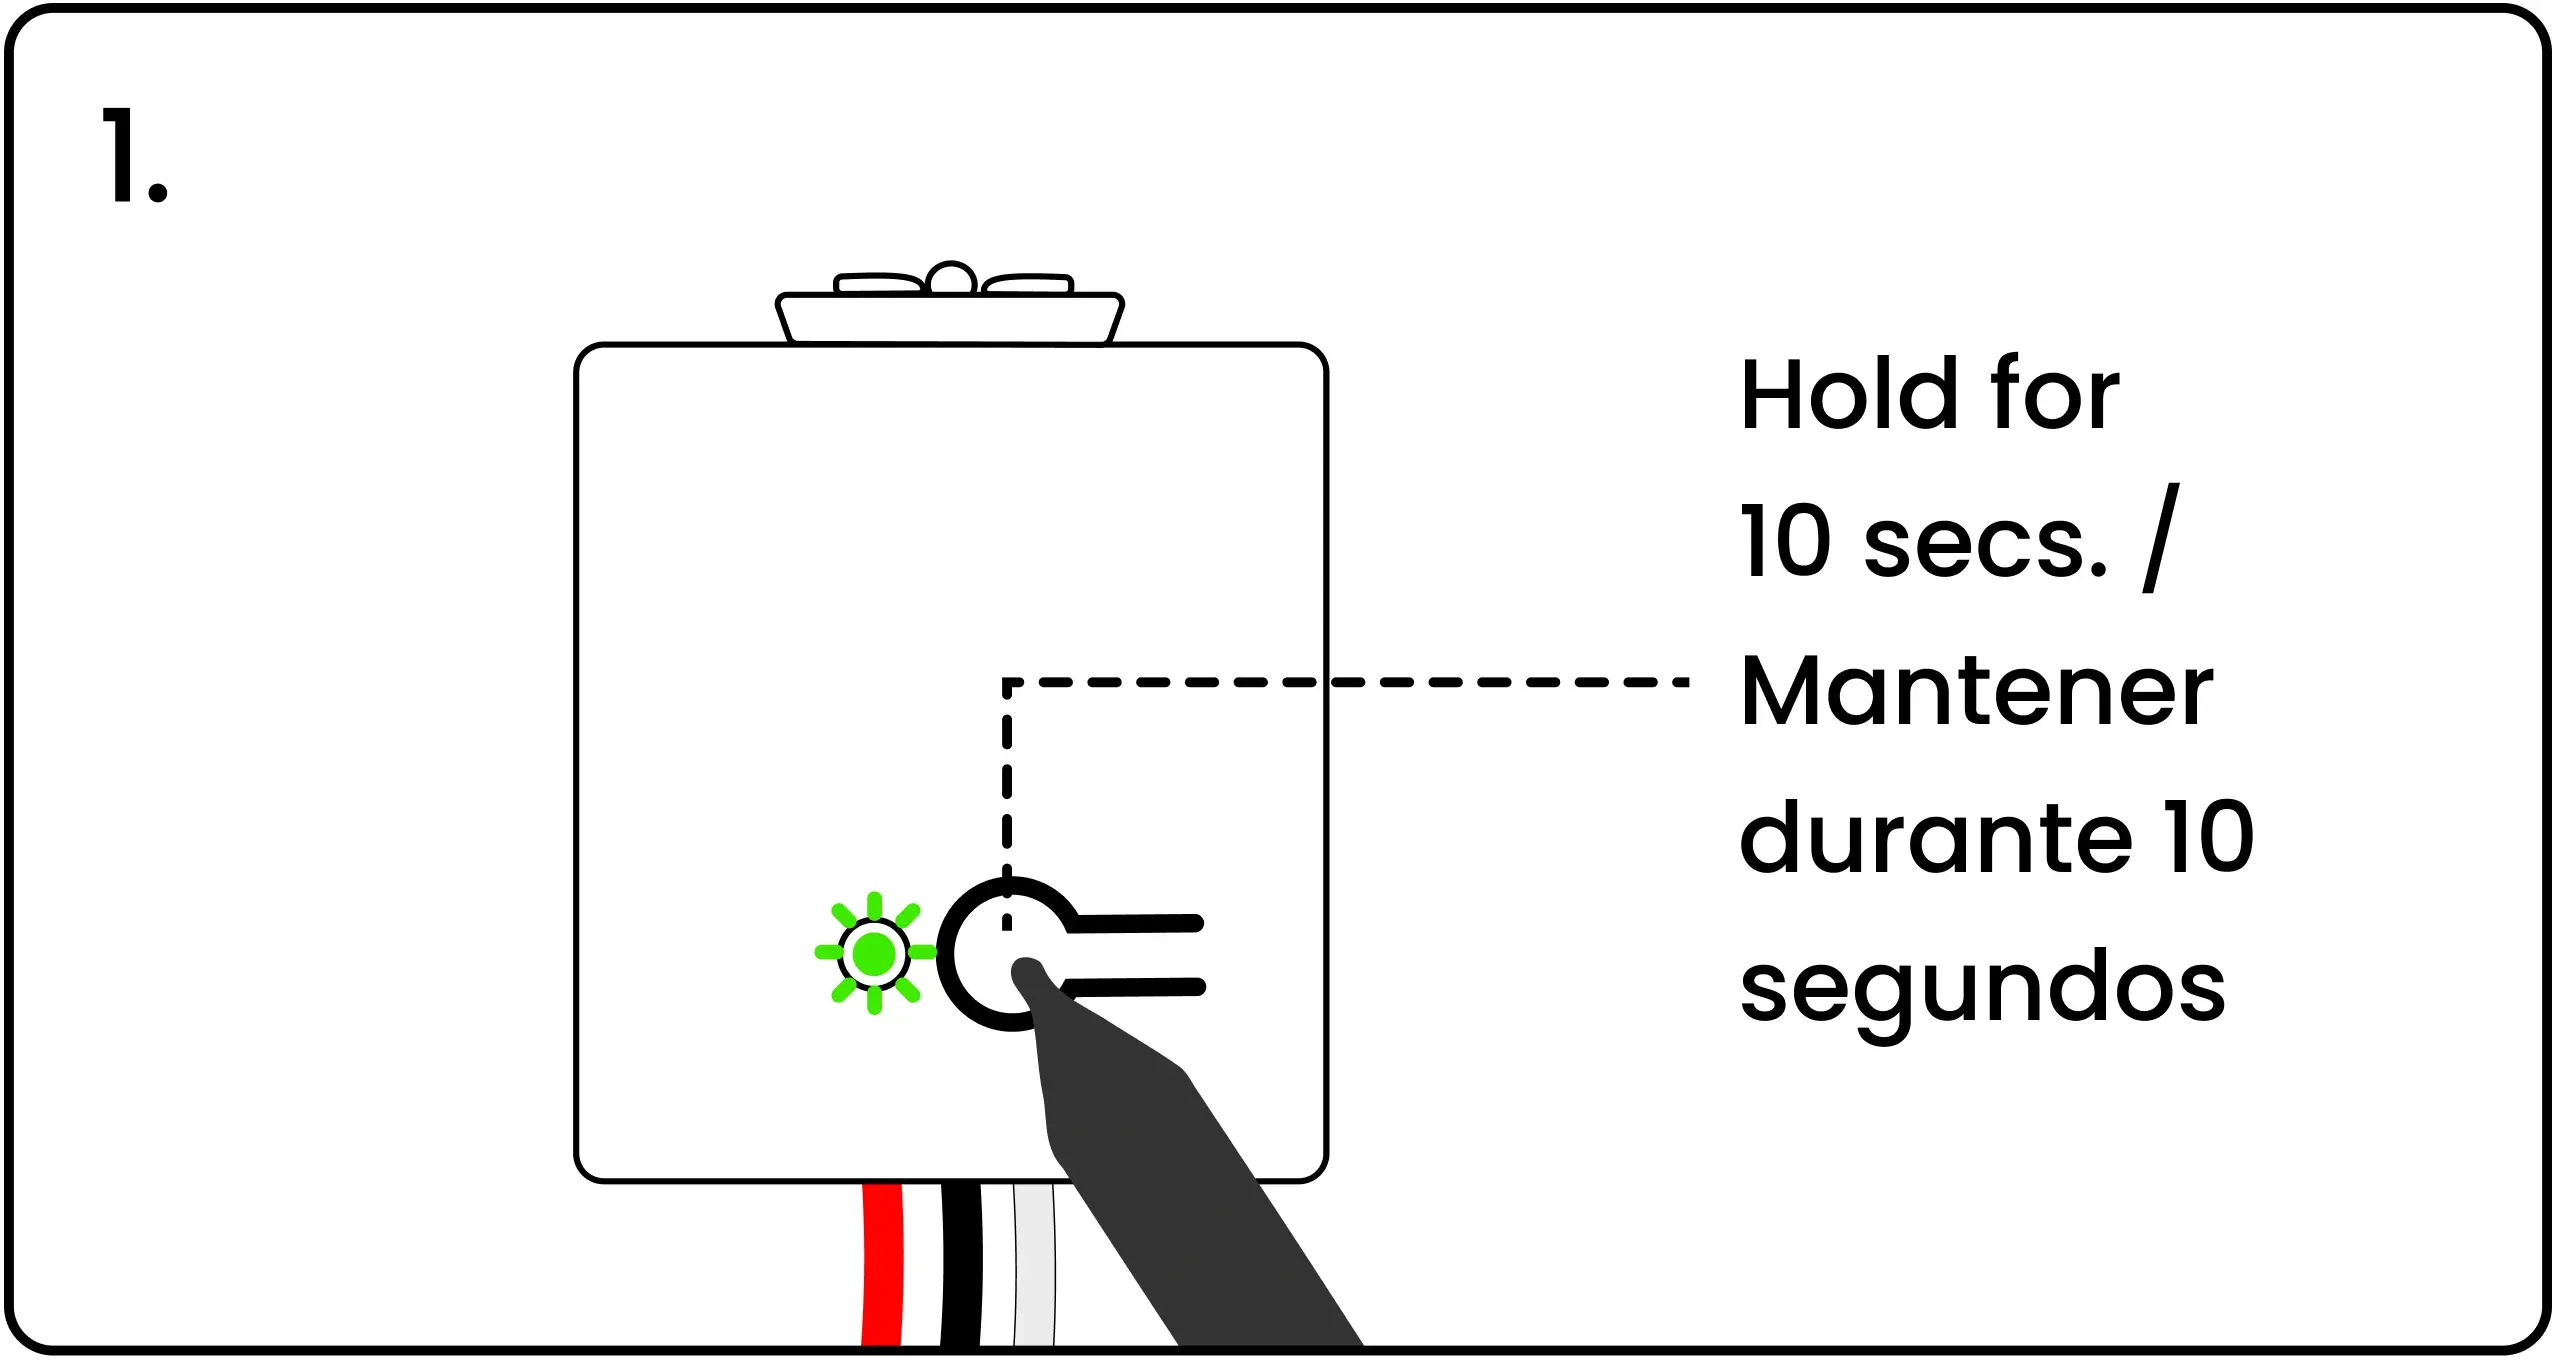
To factory reset a controller, energize the controller, then press and hold the pairing button for 10 seconds.
Controller LED Flashes Red at 5 Seconds and Again at 10 Seconds
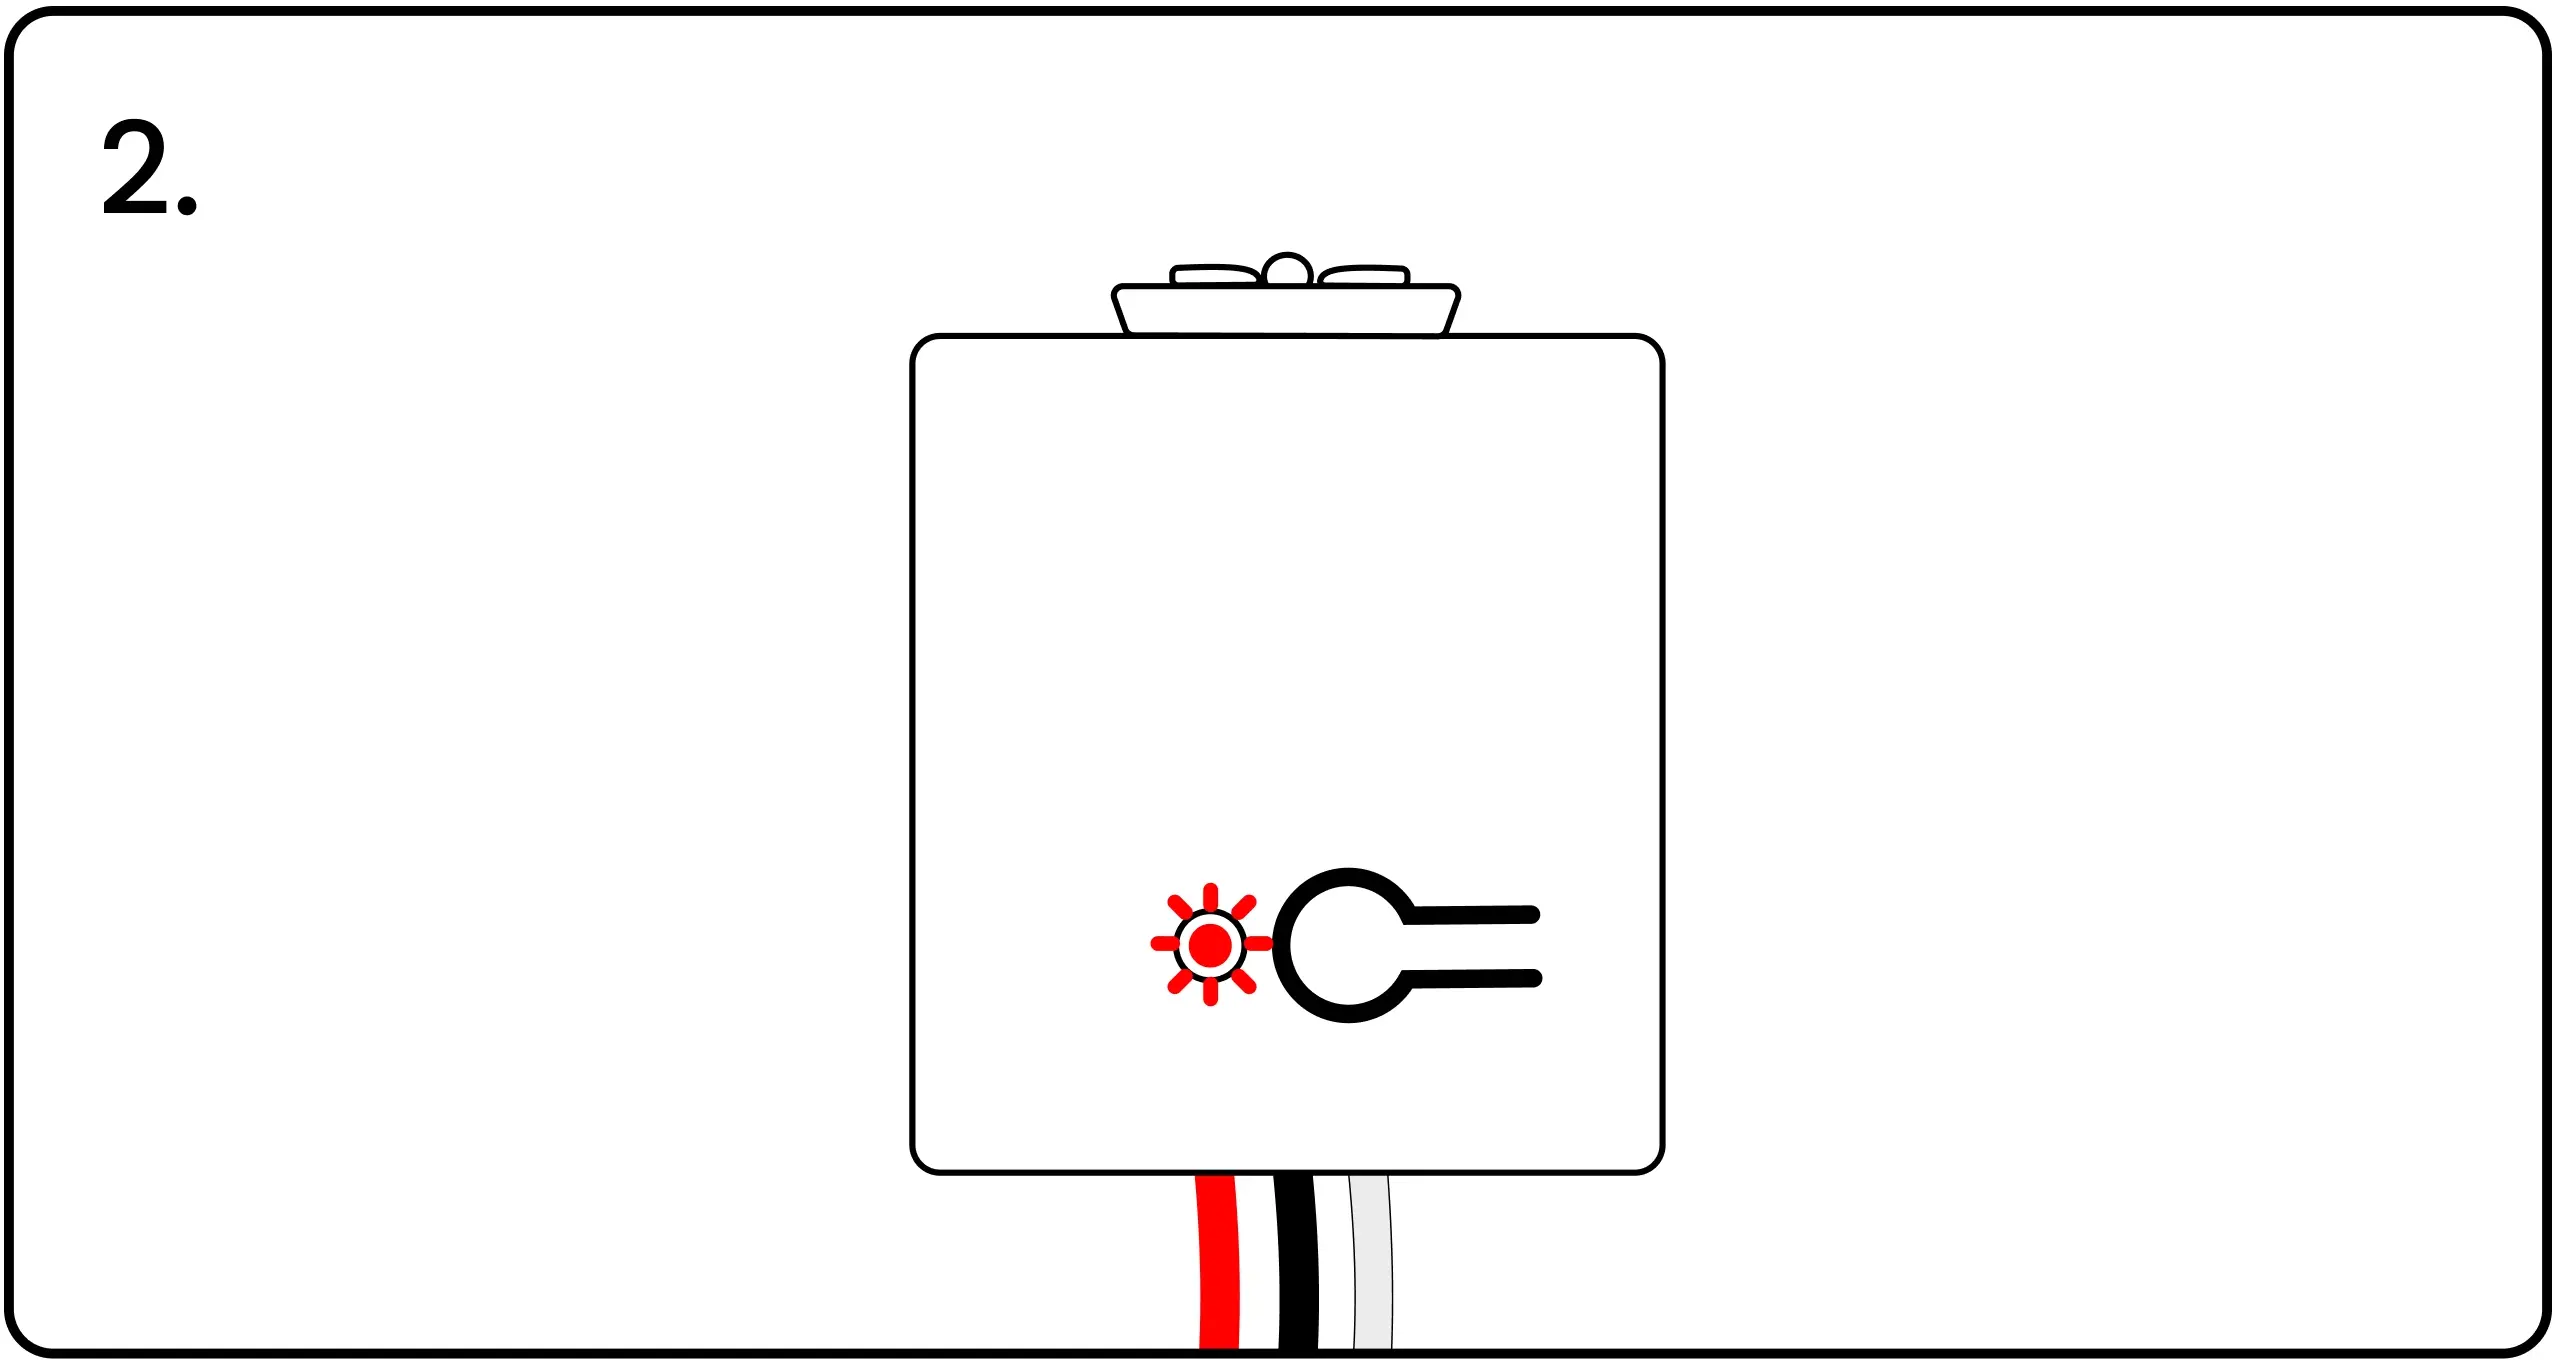
The LED will blink red after 5 seconds. Keep holding until the 10-second mark, when the LED will blink red once again, confirming the controller has been successfully reset to factory settings.
Return Unused Controllers to Inventory
After the controller has been reset, return the unit to your inventory for use in a different installation.
Continue the Installation
Confirm these are done:
Electrical Plans Installing Controllers Installing Switches and Extra Controllers Blue Pairing Plate Levven Q Gateway