Skip to Content

ResourcesElectrical Trim/Final Installation

Installing Switches and Extra Controllers

Interpreting Electrical Plans

See Planning and Preparation for information about reading plans that have Levven markup / redlines.

Mounting Switches Onto the Wall

After the walls are painted, switches can be mounted wherever the homebuyer needs them. Switches can go on any surface: drywall/sheetrock, brick, glass, concrete, etc.

Measure Up From Floor for Correct Switch Height

Levven recommends using the SWI-JIG switch installation jig to speed up your work. 

Multi-Gang Quick Mount Switches

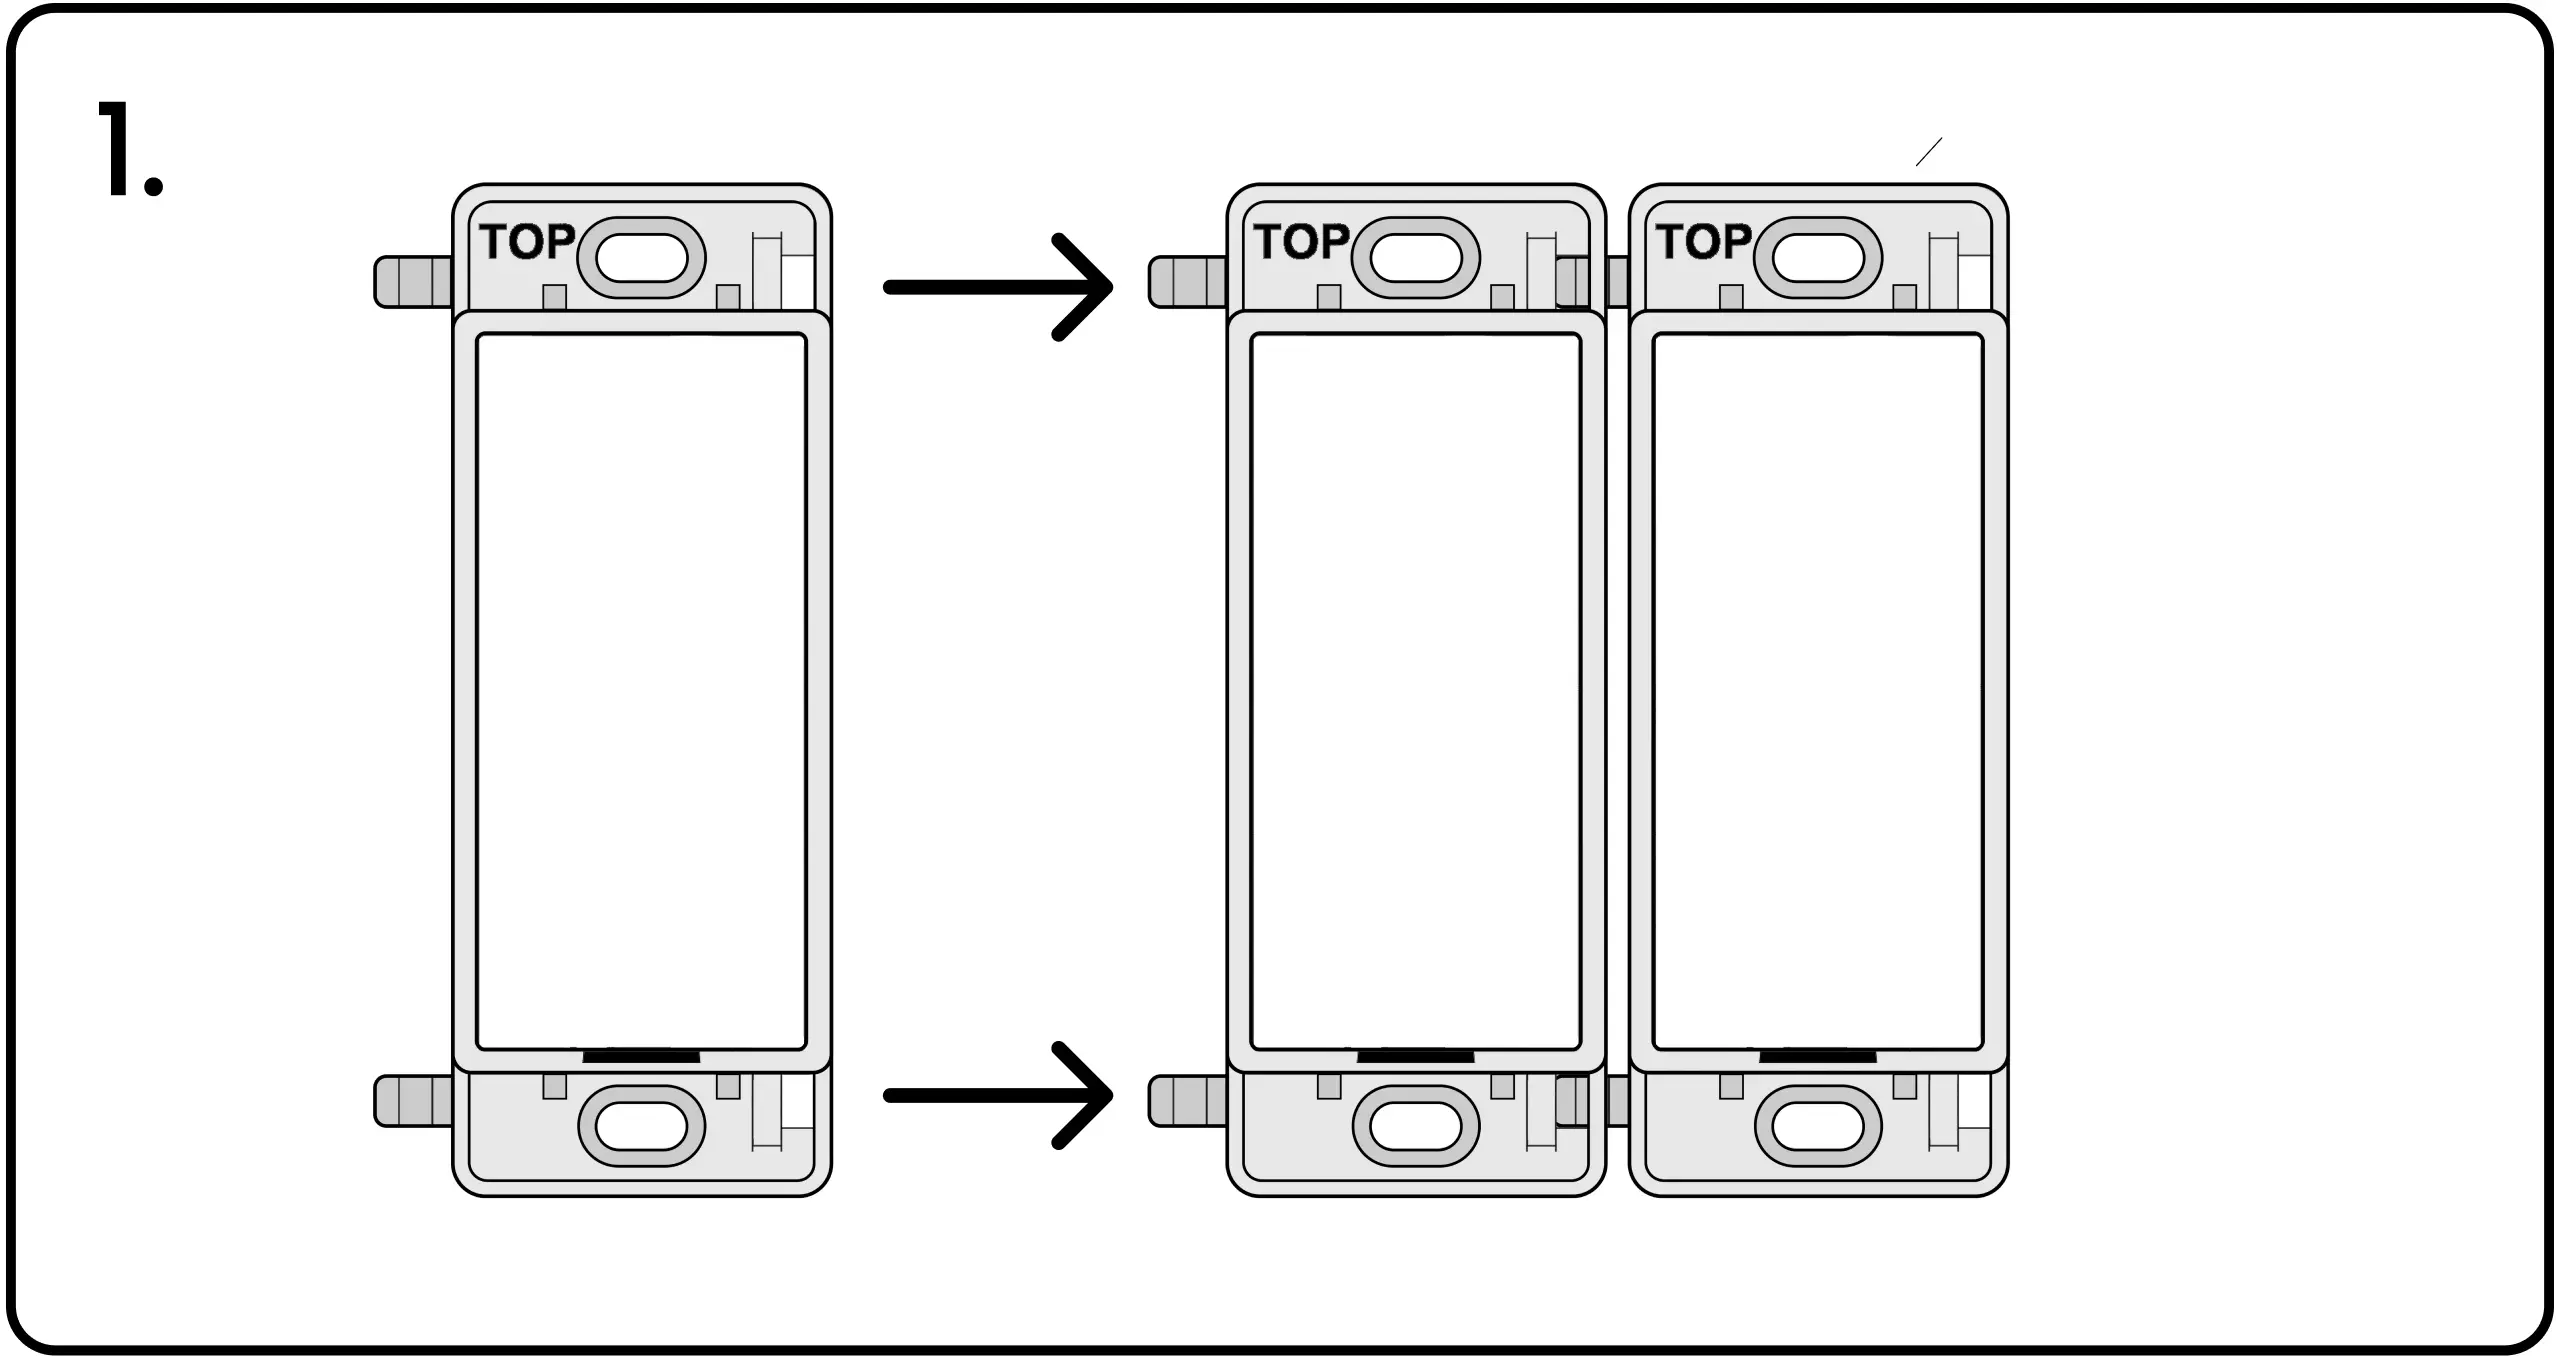
Create multi-gang switches by snapping two or more switches together as shown (2-, 3-, or 4-gang).

Sheetrock Screws

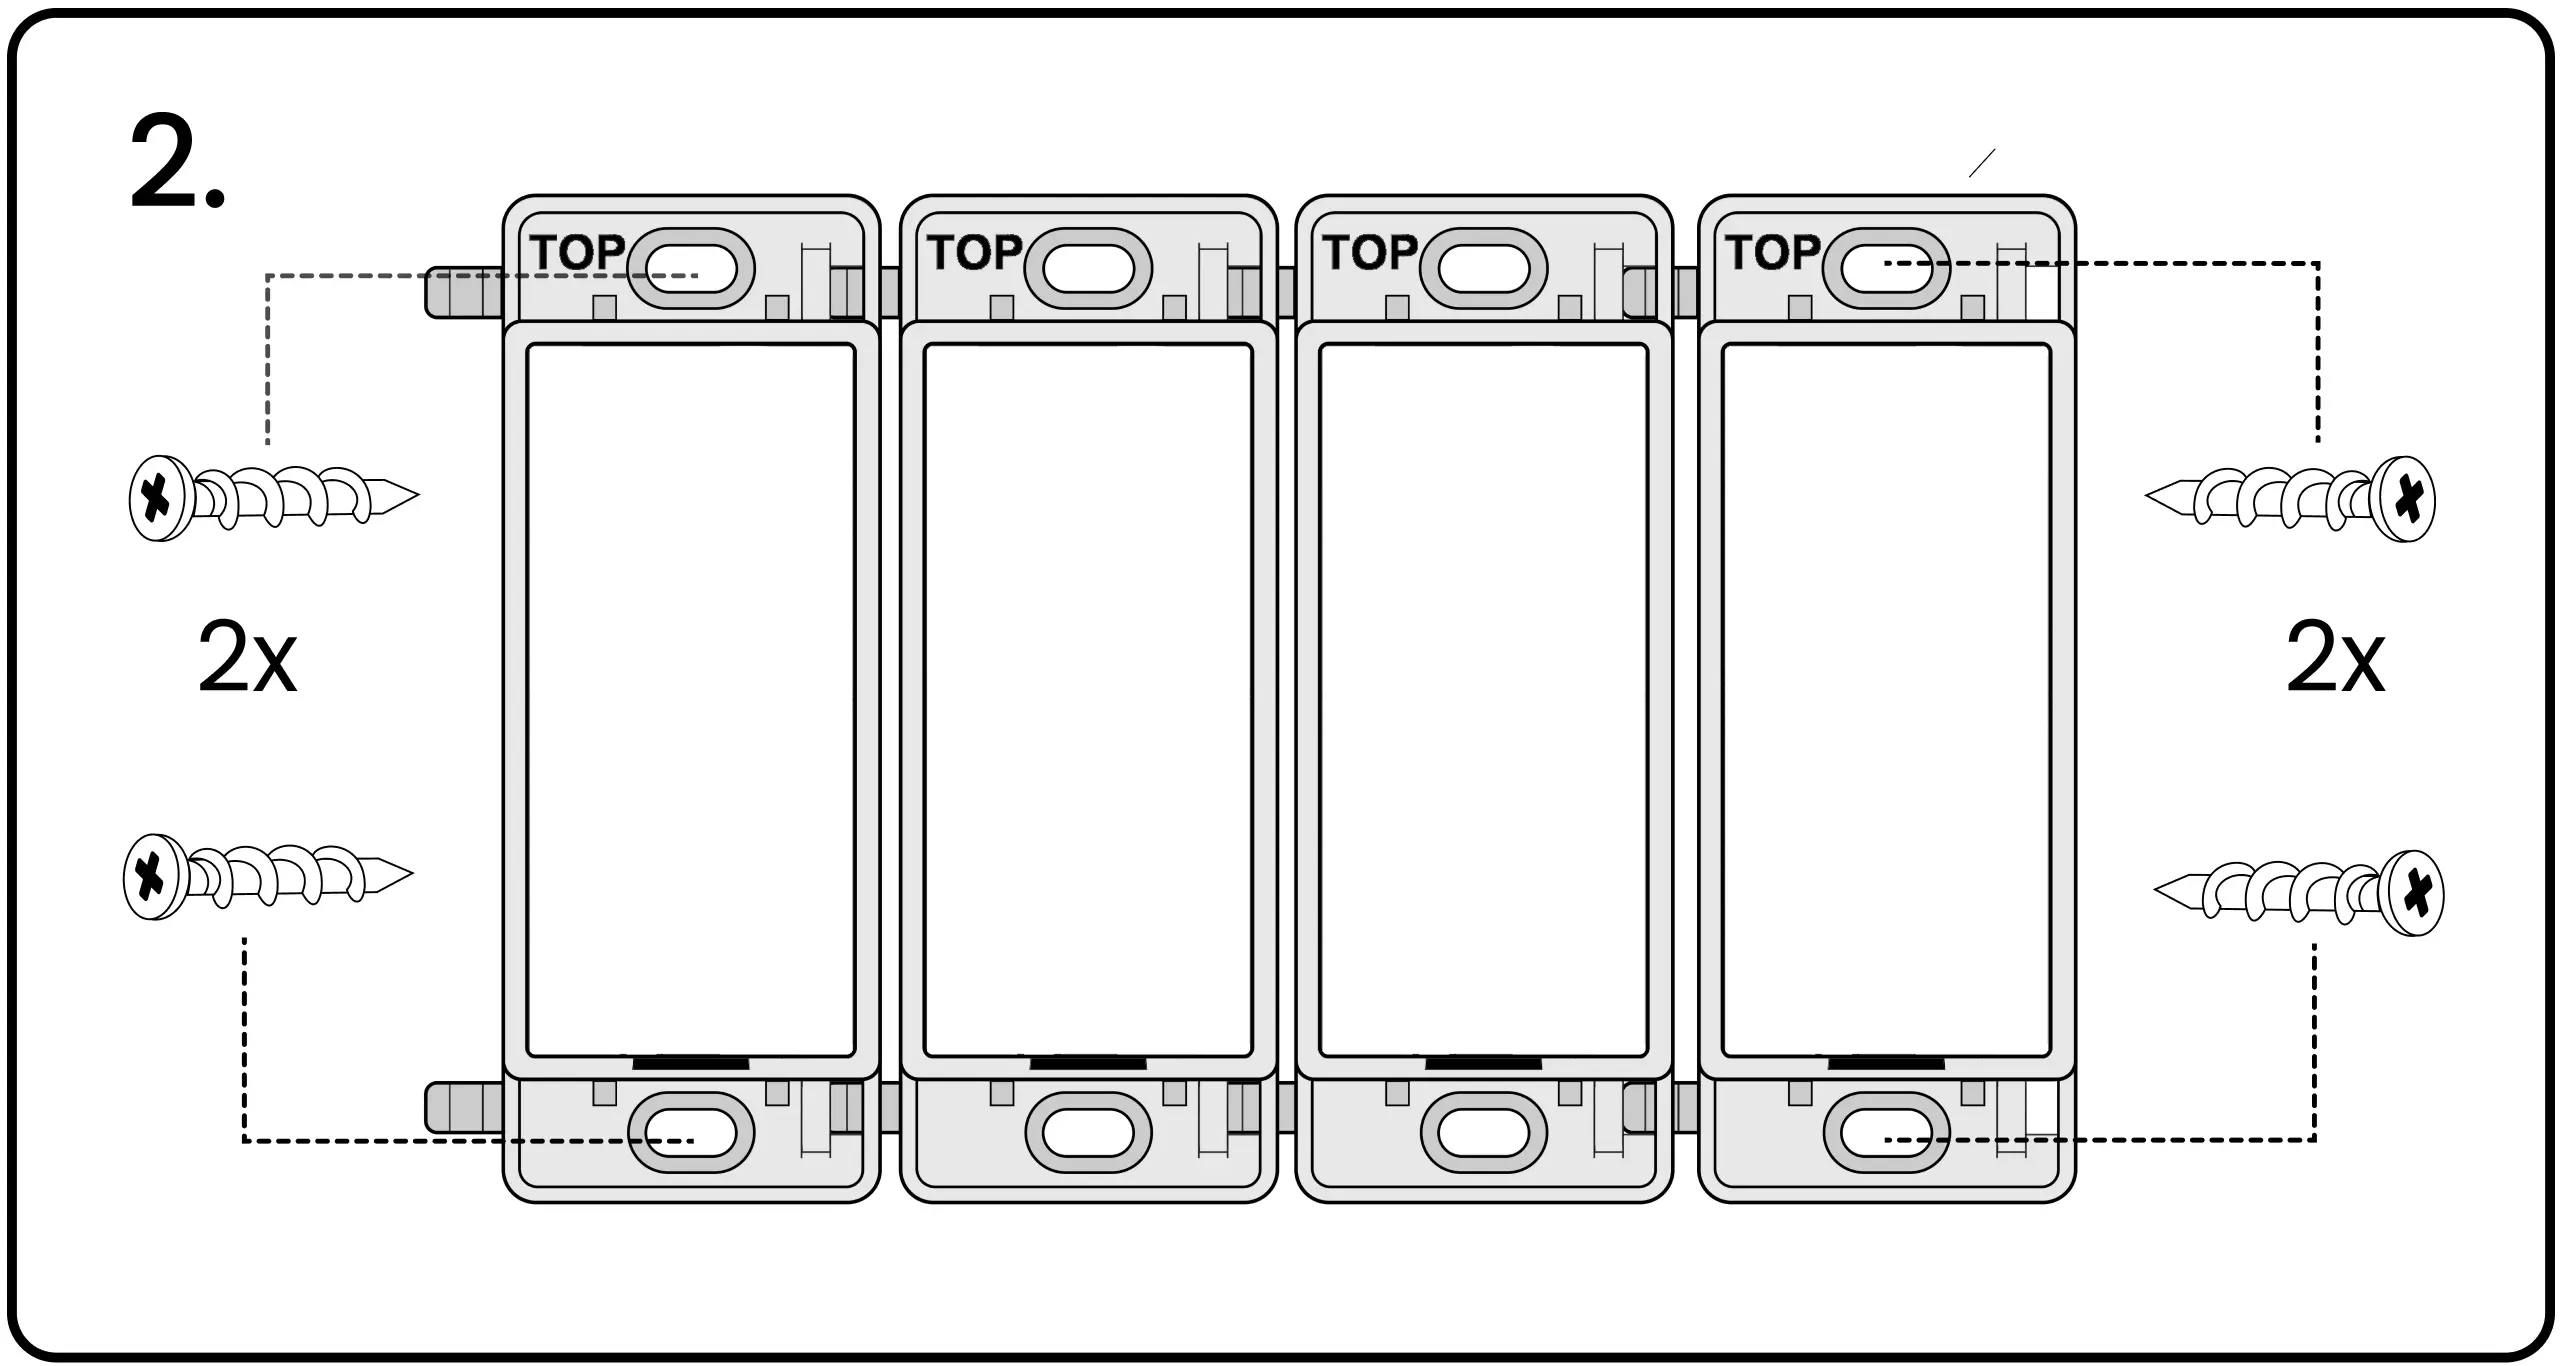
Switches are mounted with drywall/sheetrock anchor screws. Single-gang switches use two screws (one on the top and bottom). Multi-gang switches use four screws (one on each corner).

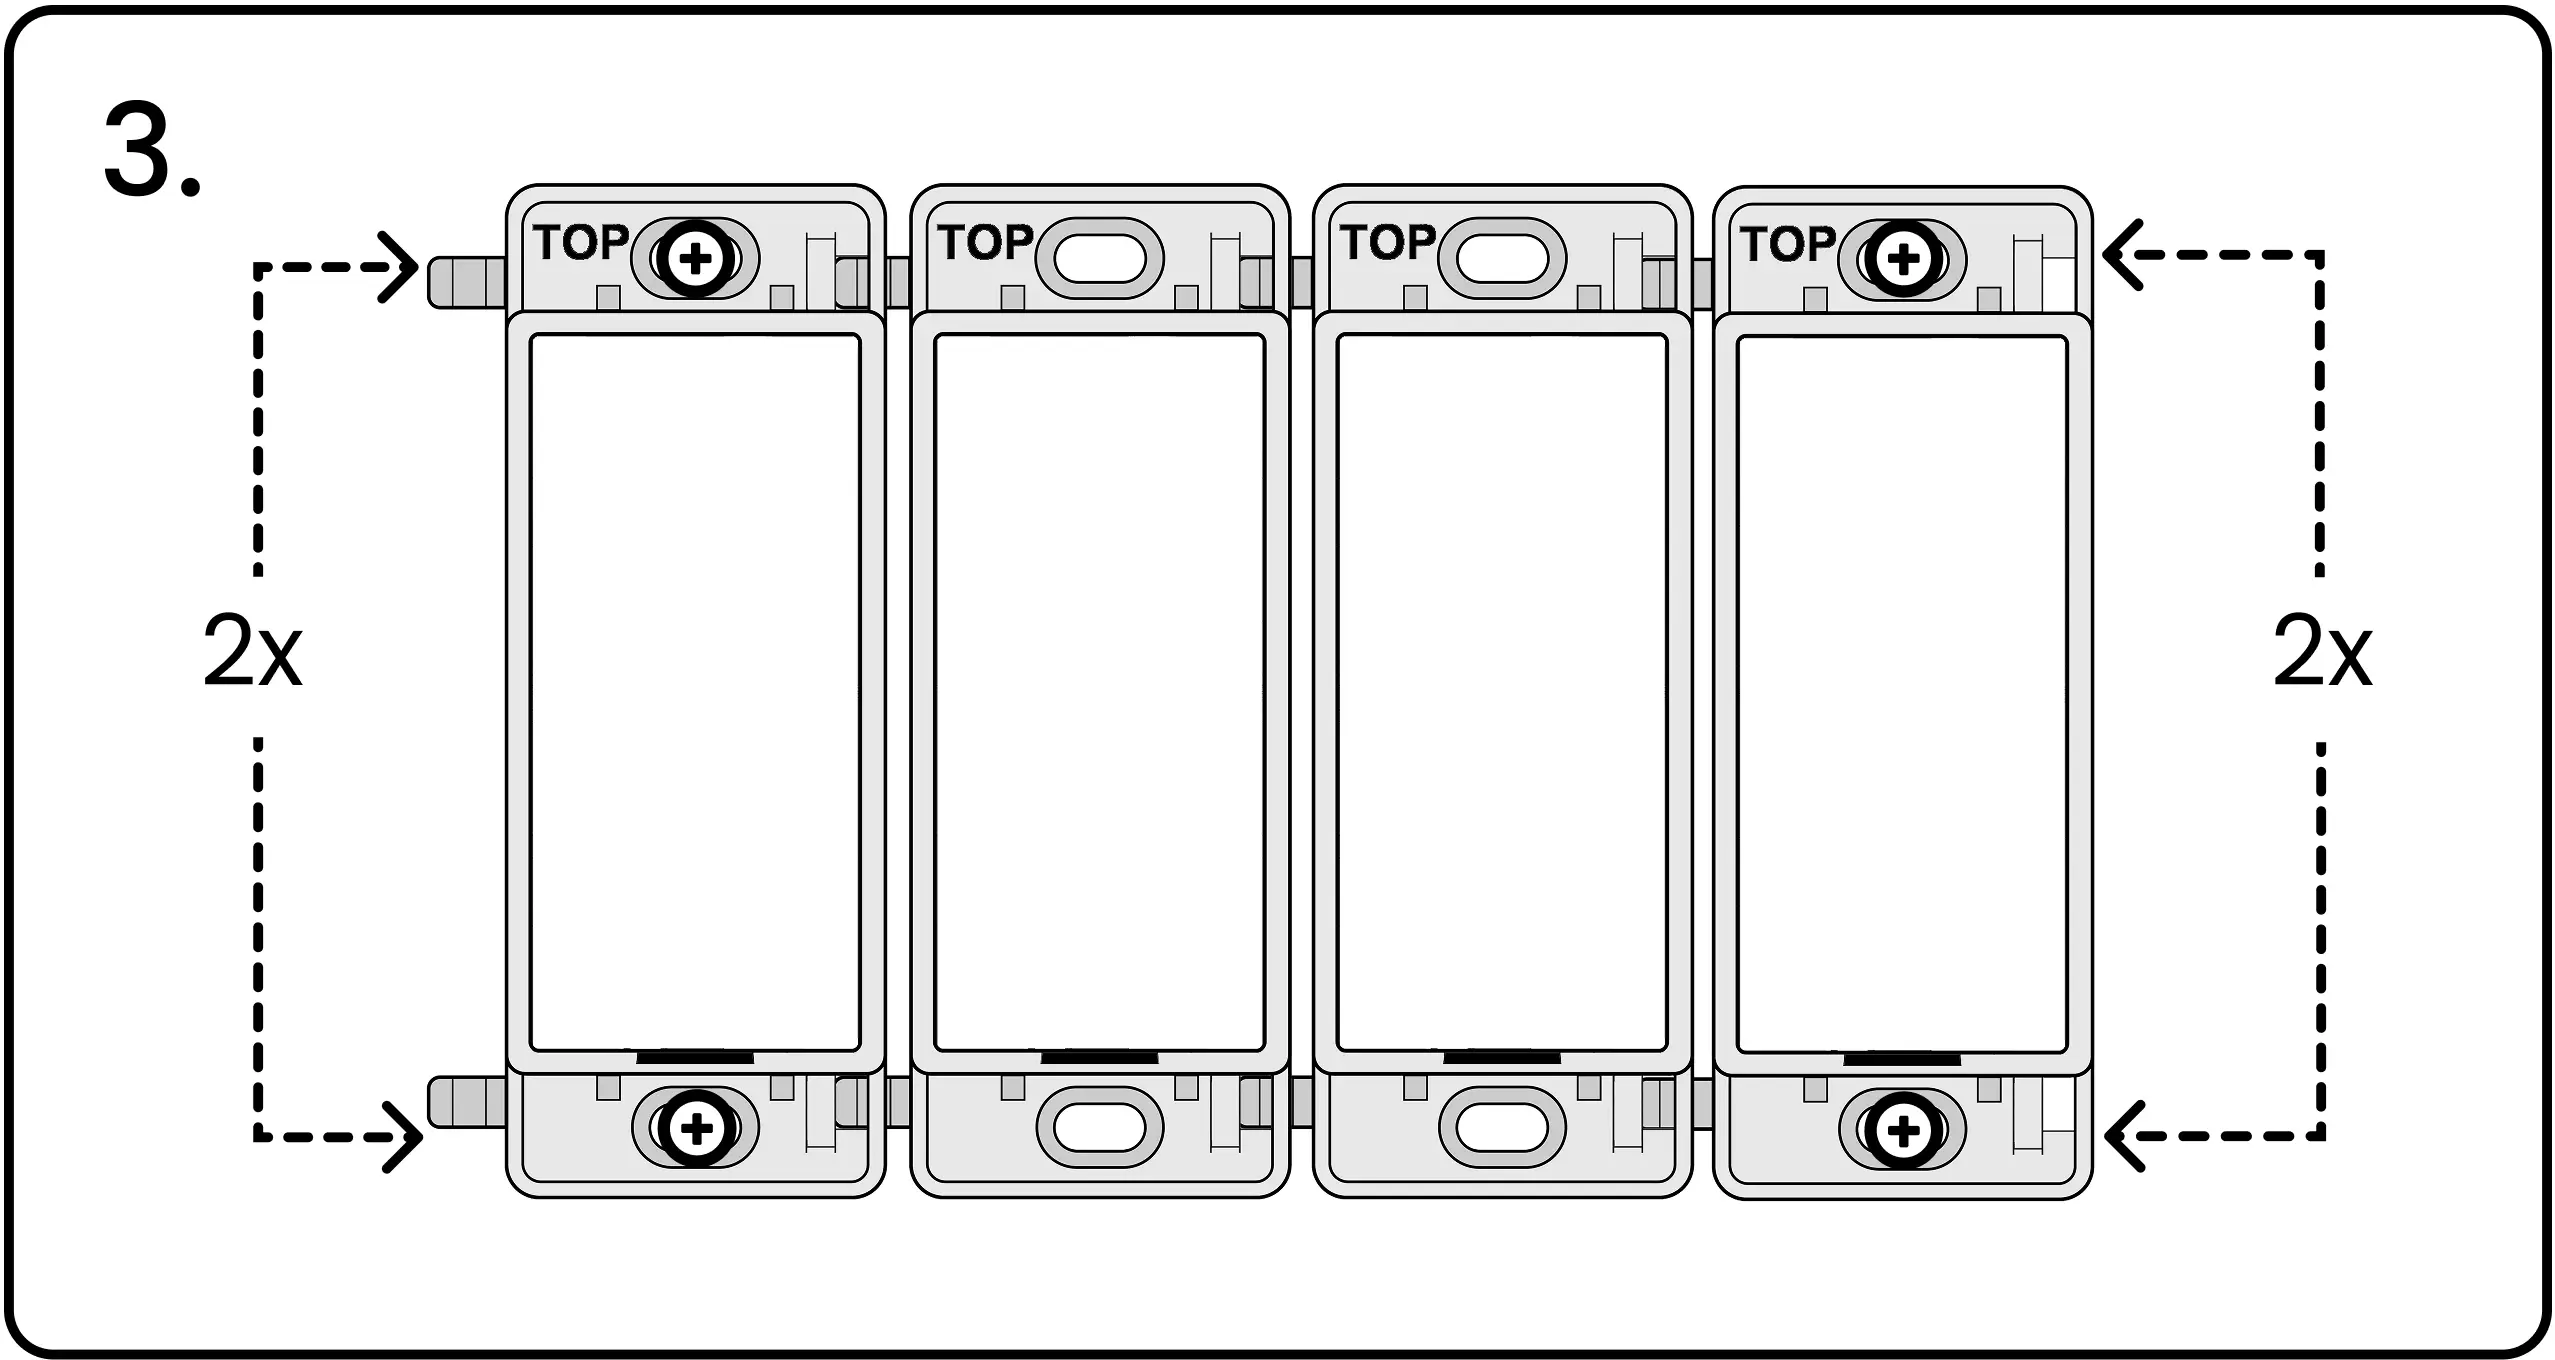
With a screwdriver, gently screw the screws into the sheetrock / drywall. All four corners of the switch should be flat against the wall surface. No gaps or wiggle-room.

Snap On Screwless Plate

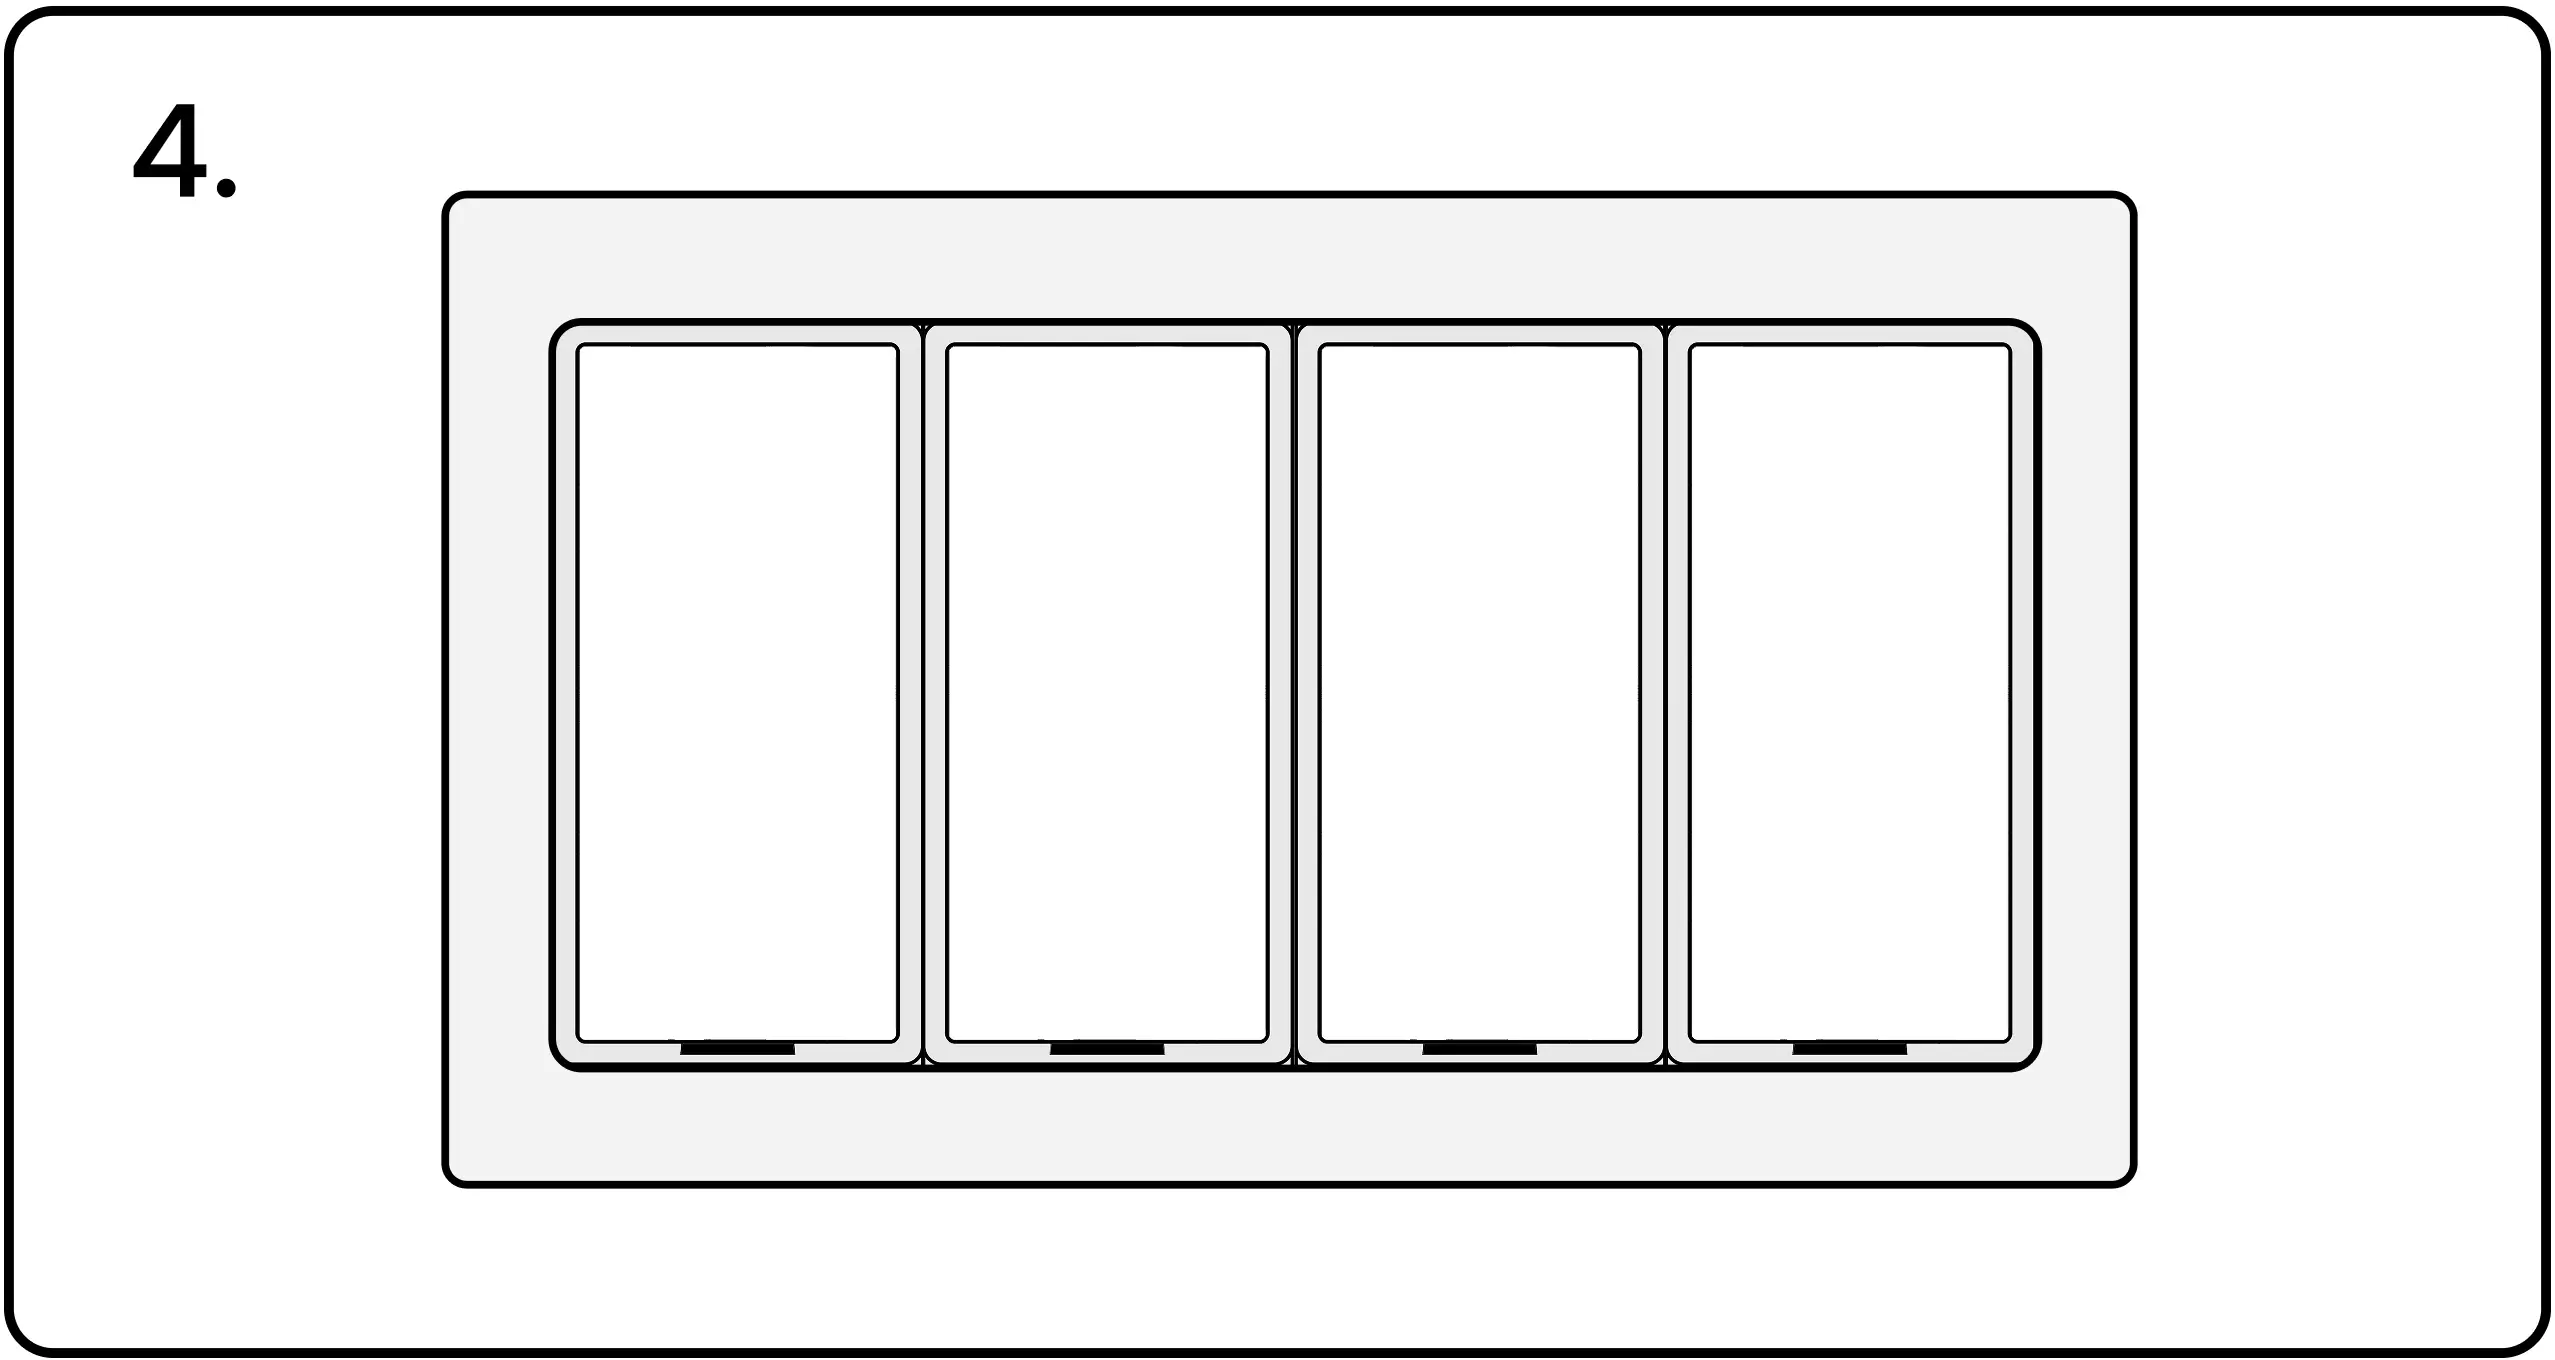
Finish the installation with a screwless snap-on Levven wall plate. 

Builder Change Orders

If a change order requires more controllers to be added to the installation, do not take controllers or switches from another Quick Kit.  Those kits have already been configured for another installation.

Taking controllers out of other Quick Kits causes more work later.

Your purchaser will have ordered additional stock from Levven to address potential changes. Ensure your truck is stocked with several spare units to handle unexpected change orders.

Reset Unused Controllers

It's possible that your spare controllers are joined to another controller group. Connect each of the spares to power and reset their memory before using them in your current installation.

Warning on Resetting Unused Controllers

Factory reset ONLY the extra controllers that were not needed for the installation. If you have extra controllers, reset them to remove the switch pairing and group data. 

Controllers that have been reset can be returned to inventory and used in a another installation.

Erase the Saved Pairing / Grouping Data from Controller Memory


Press and Hold Controller Button

To factory reset a controller, energize the controller, then press and hold the pairing button for 10 seconds.

Controller LED Flashes Red at 5 Seconds and Against at 10 Seconds

The LED will blink red after 5 seconds. Keep holding until the 10-second mark, when the LED will blink red once again, confirming the controller has been successfully reset to factory settings.

Using Extra Controllers to Complete an Installation

Once the extra controllers have been reset, they can be added to the Home Group manually.

Adding Extra Controllers to Home Group

Energize Both Controllers

Adding an extra controller to the group requires a controller from the Quick Kit. The controllers in the kit are already grouped together. Energize one of these controllers by connecting to power or by using the Levven CTKL2 'Plug N Pair' wiring kit.

Press Button on Controller from Group

Using your finger or a pen, press and release the "Existing Group" controller's pairing button once. This initiates the grouping process. The controller’s LED will blink green.

Press Button on New Controller

Press and release the pairing button on the "New Addition" controller being added to the group. This controller’s LED will blink green.

Both LEDs Blinking Red/Green

The LED on both controllers will start blinking red and green to confirm their group/pairing signals have been successfully exchanged.

Press First Controller Button to Confirm

Press and release the pairing button on the first controller one final time to complete the grouping process. The LED on both controllers will flash green to confirm the grouping.

The grouping and pairing processes must be completed within 60 seconds after pressing the first 'pair' button. If controllers are not grouped or paired in 60 seconds, the controller will exit the pairing mode and you will need to restart.

Pair Switches to the New Controller

Once the controller has been added to the controller group, pair one or more switches to it. A controller can be paired with up to 10 different switches.

Energize the Controller

Energize the controller by connecting to power or by using the Levven CTKL2 'Plug N Pair' wiring kit.

Press the Controller's Button

Using your finger or a pen, press and release the controller’s pairing button. This controller’s LED will blink green to indicate it is waiting for a pairing signal.

Squeeze Both Ends of the Switch

Squeeze and release both ends of the switch simultaneously to transmit a pairing signal. Watch the video above to see a demonstration of this action.

Controller's LED Blinking Red/Green

The LED on the controller will blink red and green to confirm the signal was received. If the LED does not blink red and green, squeeze the ends of the switch again to transmit a pairing signal. 

Press the Controller's Button to Confirm

When the LED is blinking red/green, press and release the pairing button on the controller to confirm the pairing. The LED will flash green to show the pairing completed successfully. 

Reset Any Unused Controllers

You may end up with more power controllers than the installation requires. Extra controllers must be reset before being returned to inventory. Doing a factory reset on a controller erases its group/pairing data. The reset controllers can be used in a different installation.

Erase the Saved Pairing / Grouping Data from Controller Memory

Press and Hold Controller Button

To factory reset a controller, energize the controller, then press and hold the pairing button for 10 seconds.

Controller LED Flashes Red at 5 Seconds and Again at 10 Seconds

The LED will blink red after 5 seconds. Keep holding until the 10-second mark, when the LED will blink red once again, confirming the controller has been successfully reset to factory settings. 

Return Unused Controllers to Inventory

After the controller has been reset, return the unit to your inventory for use in a different installation.

Continue the Installation

Confirm these are done:

Electrical Plans Levven Quick Kit Installing Controllers Blue Wall Plate Levven Q Gateway

Additional Support?

Try these pages:

Installation Resources Technical Support

Rate This Page

Was this information useful?